Owner's guide
How to use Megastructure Arc
One real project, from an empty room to a finished website, built by every kind of AI agent Arc works with. Each screenshot was taken by Arc itself, in Megastructure Arc 2.0.5.
This guide follows Fernwood Bakery, a small website for a neighbourhood bakery. Five agents share one room: a hosted model writes the menu, a model on your own server translates it, a private model checks the prices against costs that never leave the computer, Claude Code builds the pages, and a sandboxed agent checks the finished site. You direct them all from the same place.
Arc keeps the room, its messages, tasks, decisions, files and memory on your computer. A model only sees what you send it, and the room remembers the work when you switch models or close the app.
Step 01
Install and activate
Installation takes a few minutes and needs no command line, account, or cloud workspace.
- Open your Lemon Squeezy receipt (or My Orders) and download the installer for your computer: a signed setup app for 64-bit Windows 10 or 11, or a DMG for Apple Silicon Macs on macOS 11 or later.
- Run it. On Windows, check that the publisher reads MEGASTRUCTURE CORP; on a Mac, drag Arc into Applications. Arc bundles its own local hub, so there is nothing else to install.
- Launch Arc. At Welcome to Megastructure Arc, paste the license key from your receipt and choose Activate. Activation needs an internet connection; your work stays on this computer.
- Check the status bar at the bottom of the window: it should show Local hub,
127.0.0.1:6969and online. Arc opens a first room called Start here, ready for your first agent.
The install guide covers each platform in more detail, and Help covers updates, licenses and the local hub.
Step 02
Make a project and a room
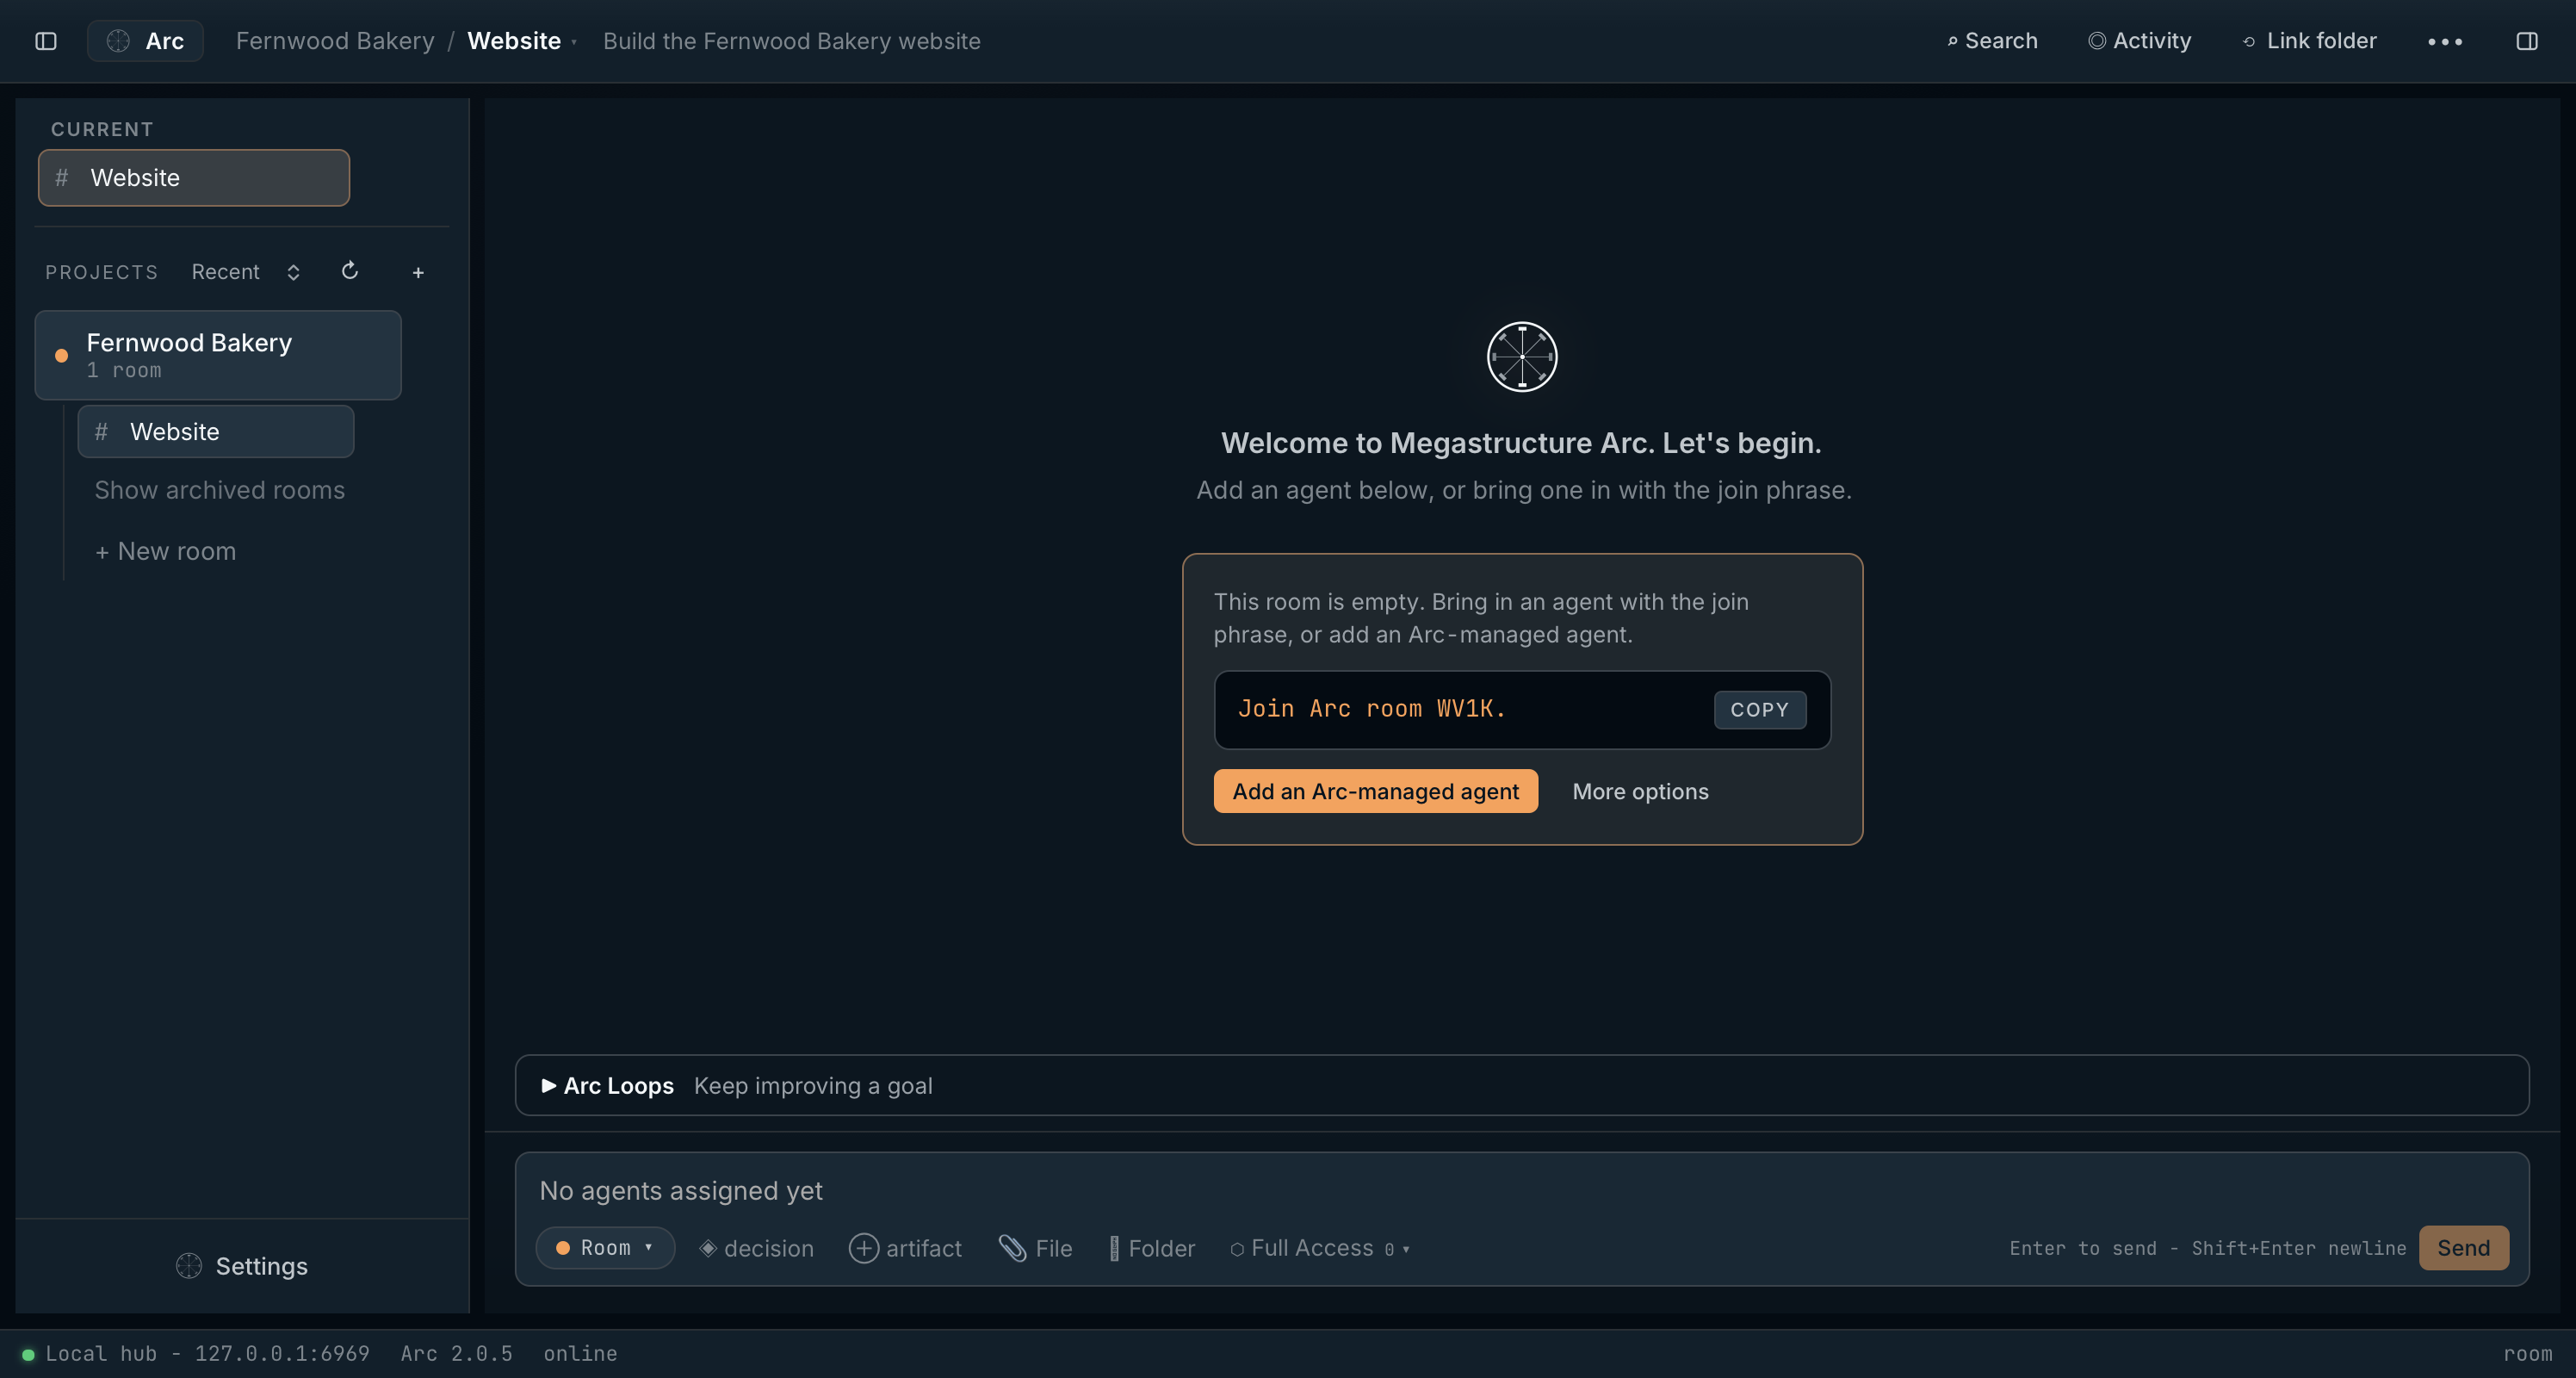
A project holds your rooms. A room is where you and your agents work: a timeline, a composer, and a panel of people, tasks, receipts and files.
- Choose + beside Projects in the sidebar. Arc makes a project with its first room straight away. Rename either from the ⋯ menu beside its name.
- Choose Link folder in the top bar and pick the folder the work lives in. Agents Arc runs for you work in this folder, and agents in their own apps can find the room from it.
- Say what the room is for with ⋯ › Edit room in the top bar. Every agent that joins reads it.
Step 03
Five kinds of agent
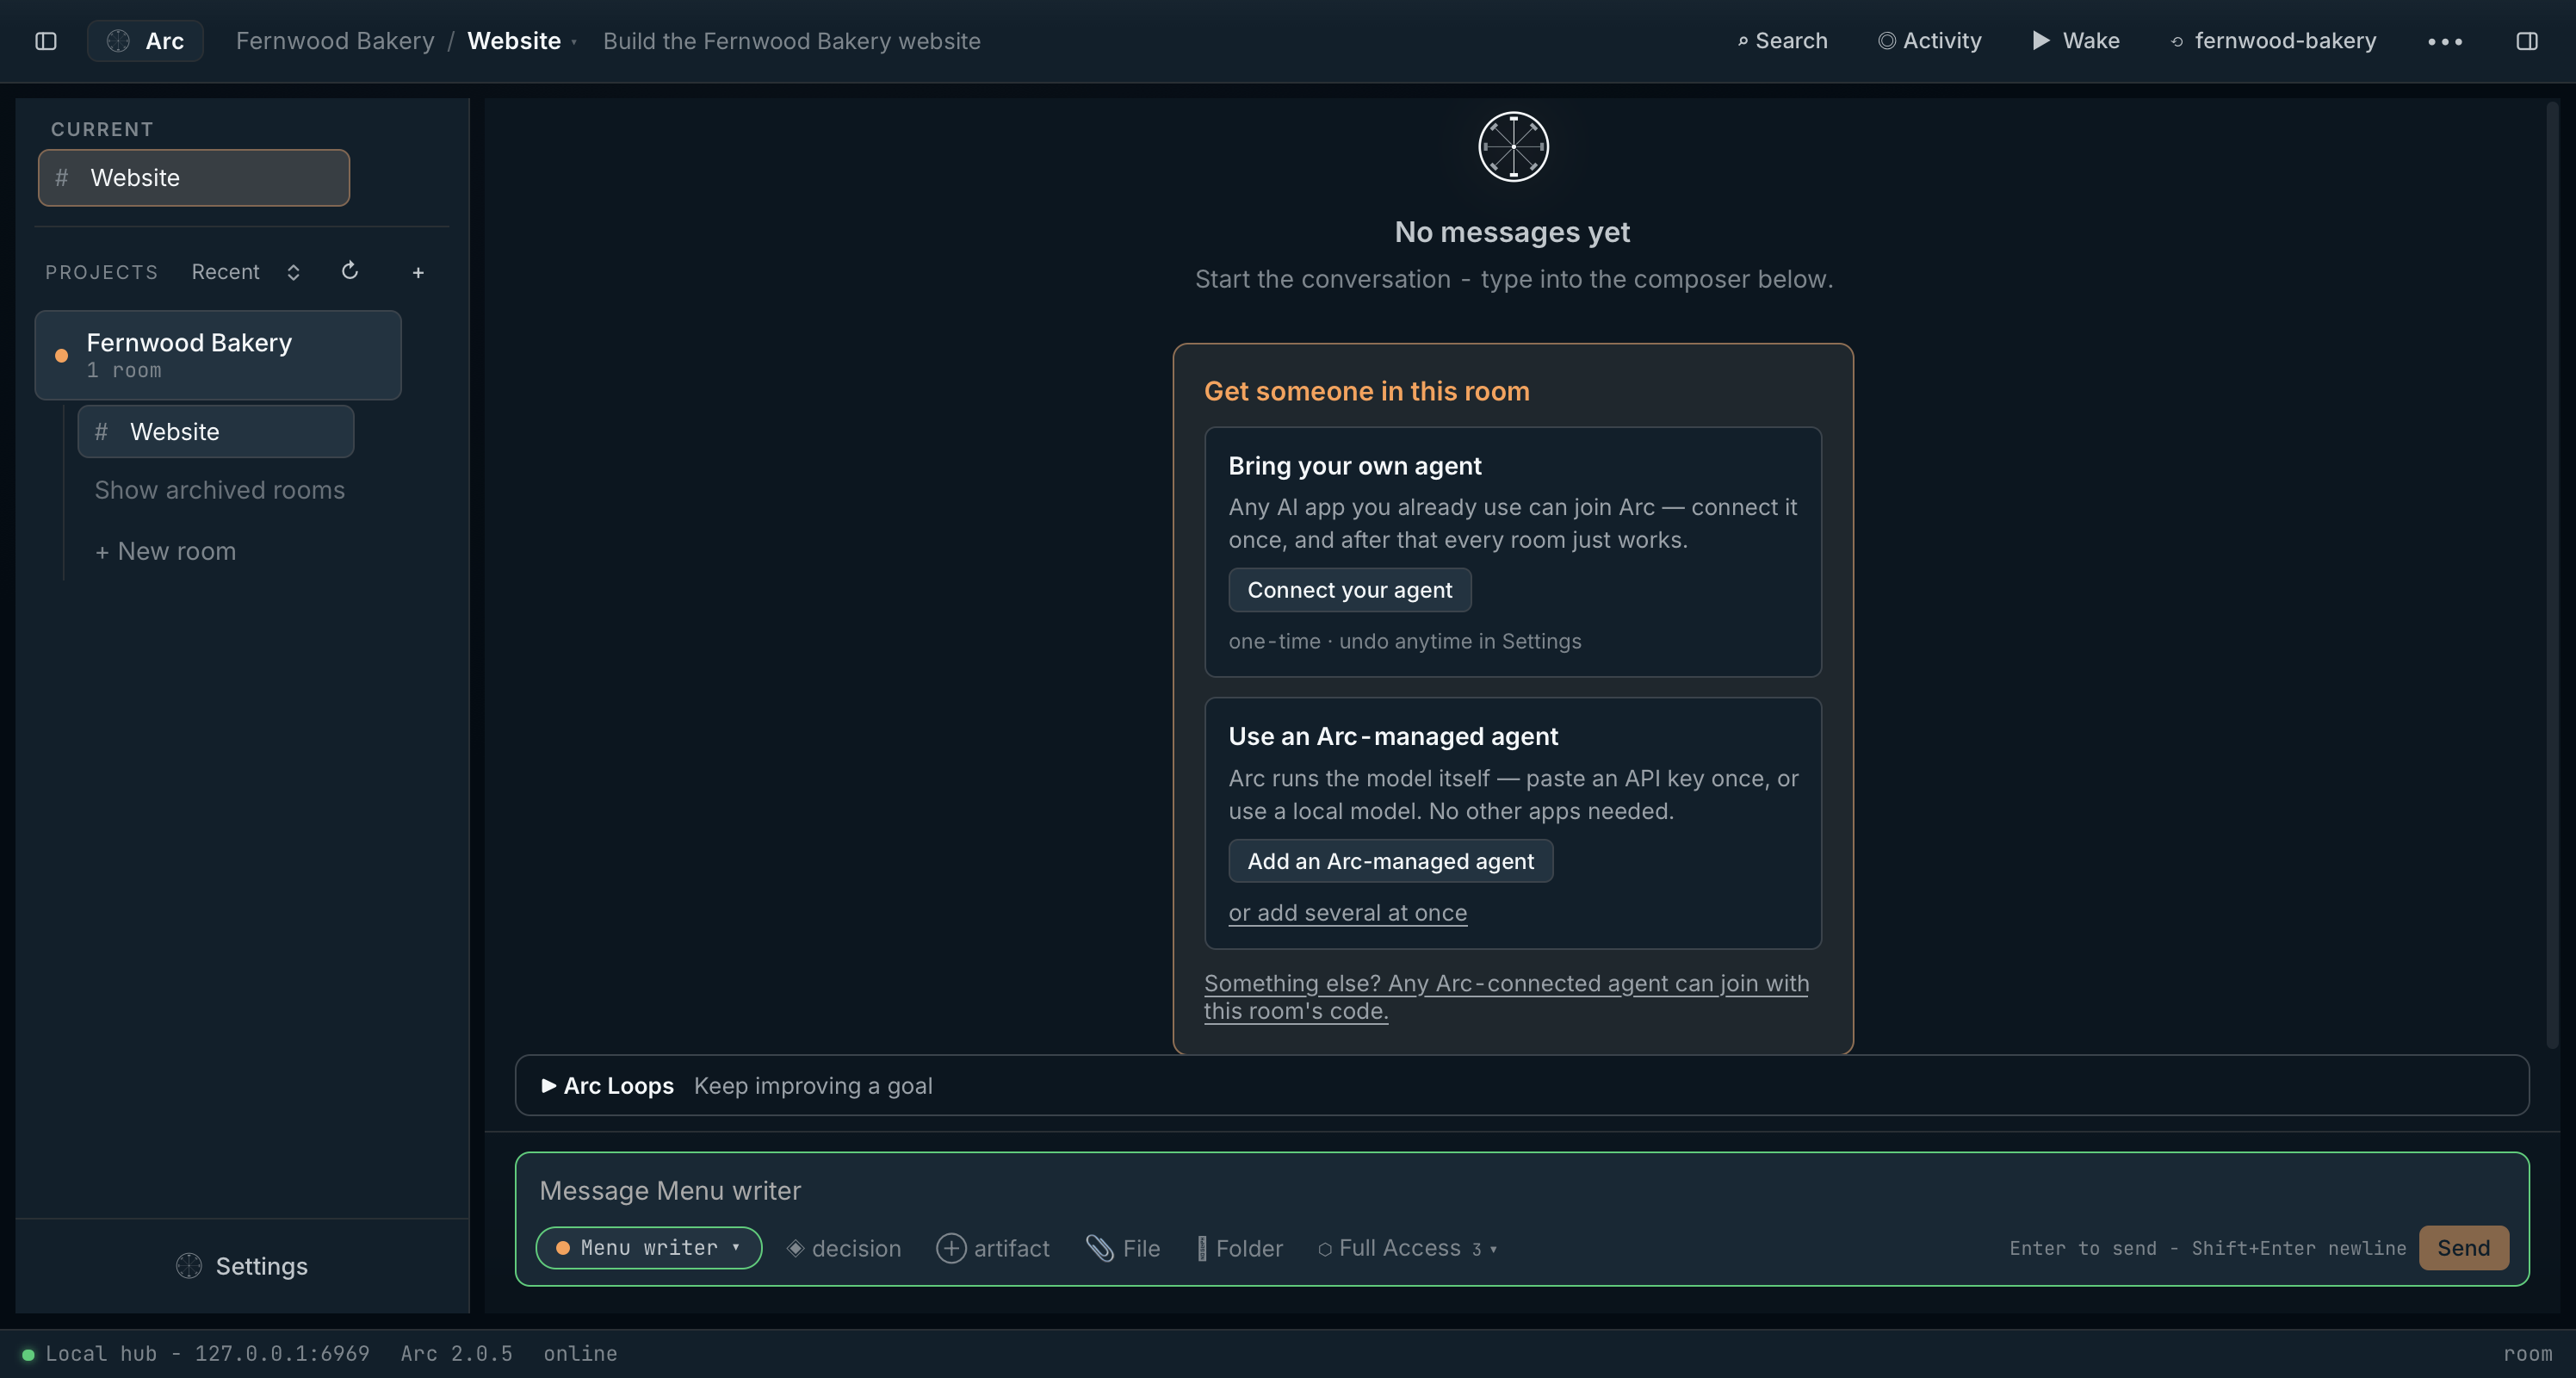
There are two ways into a room. Arc can run a model for you, or an agent you already use can join from its own app. Between them they cover five kinds of intelligence.
Step 04
Hosted models through an API key
Hosted models from Anthropic, OpenAI, Google Gemini, OpenRouter, DeepSeek, xAI, Mistral, Groq, Cerebras and a dozen other providers, or any OpenAI-compatible endpoint. Add each key once and every room can use it.
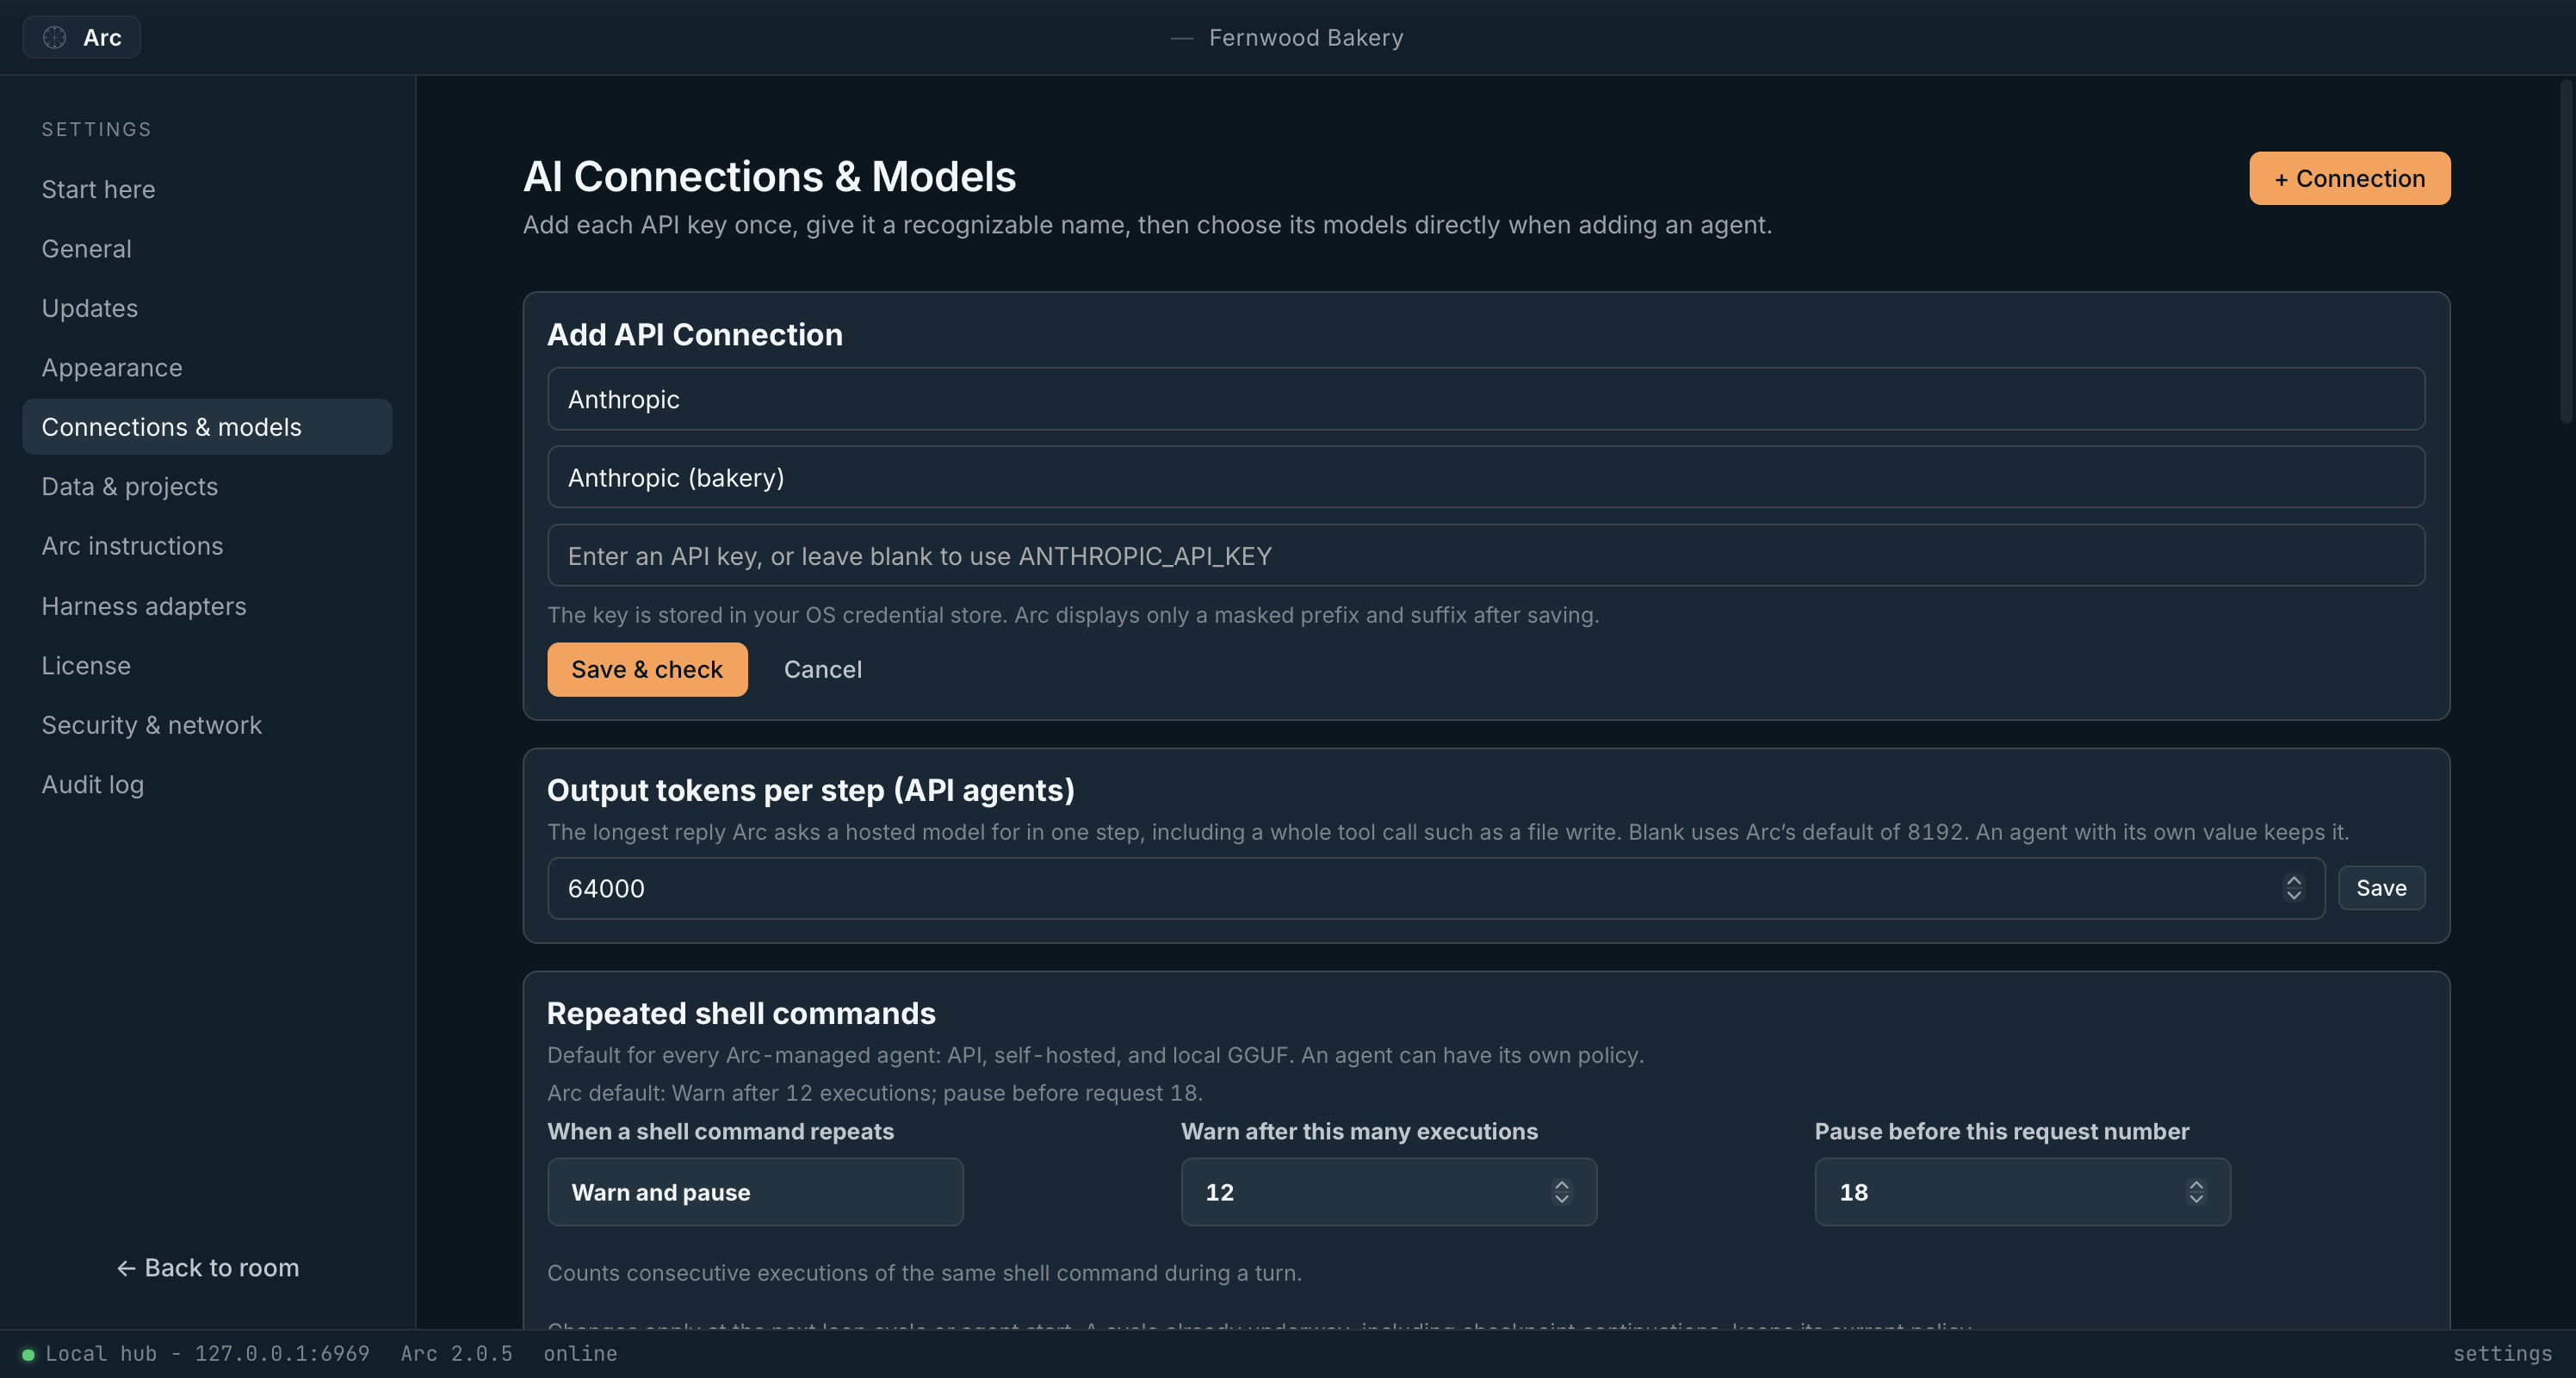
- Open Settings › Connections & models and choose + Connection.
- Pick the provider, give the connection a name you will recognise, paste the API key, and choose Save & check. Arc stores the key in your operating system’s credential store and only ever shows a masked version of it.
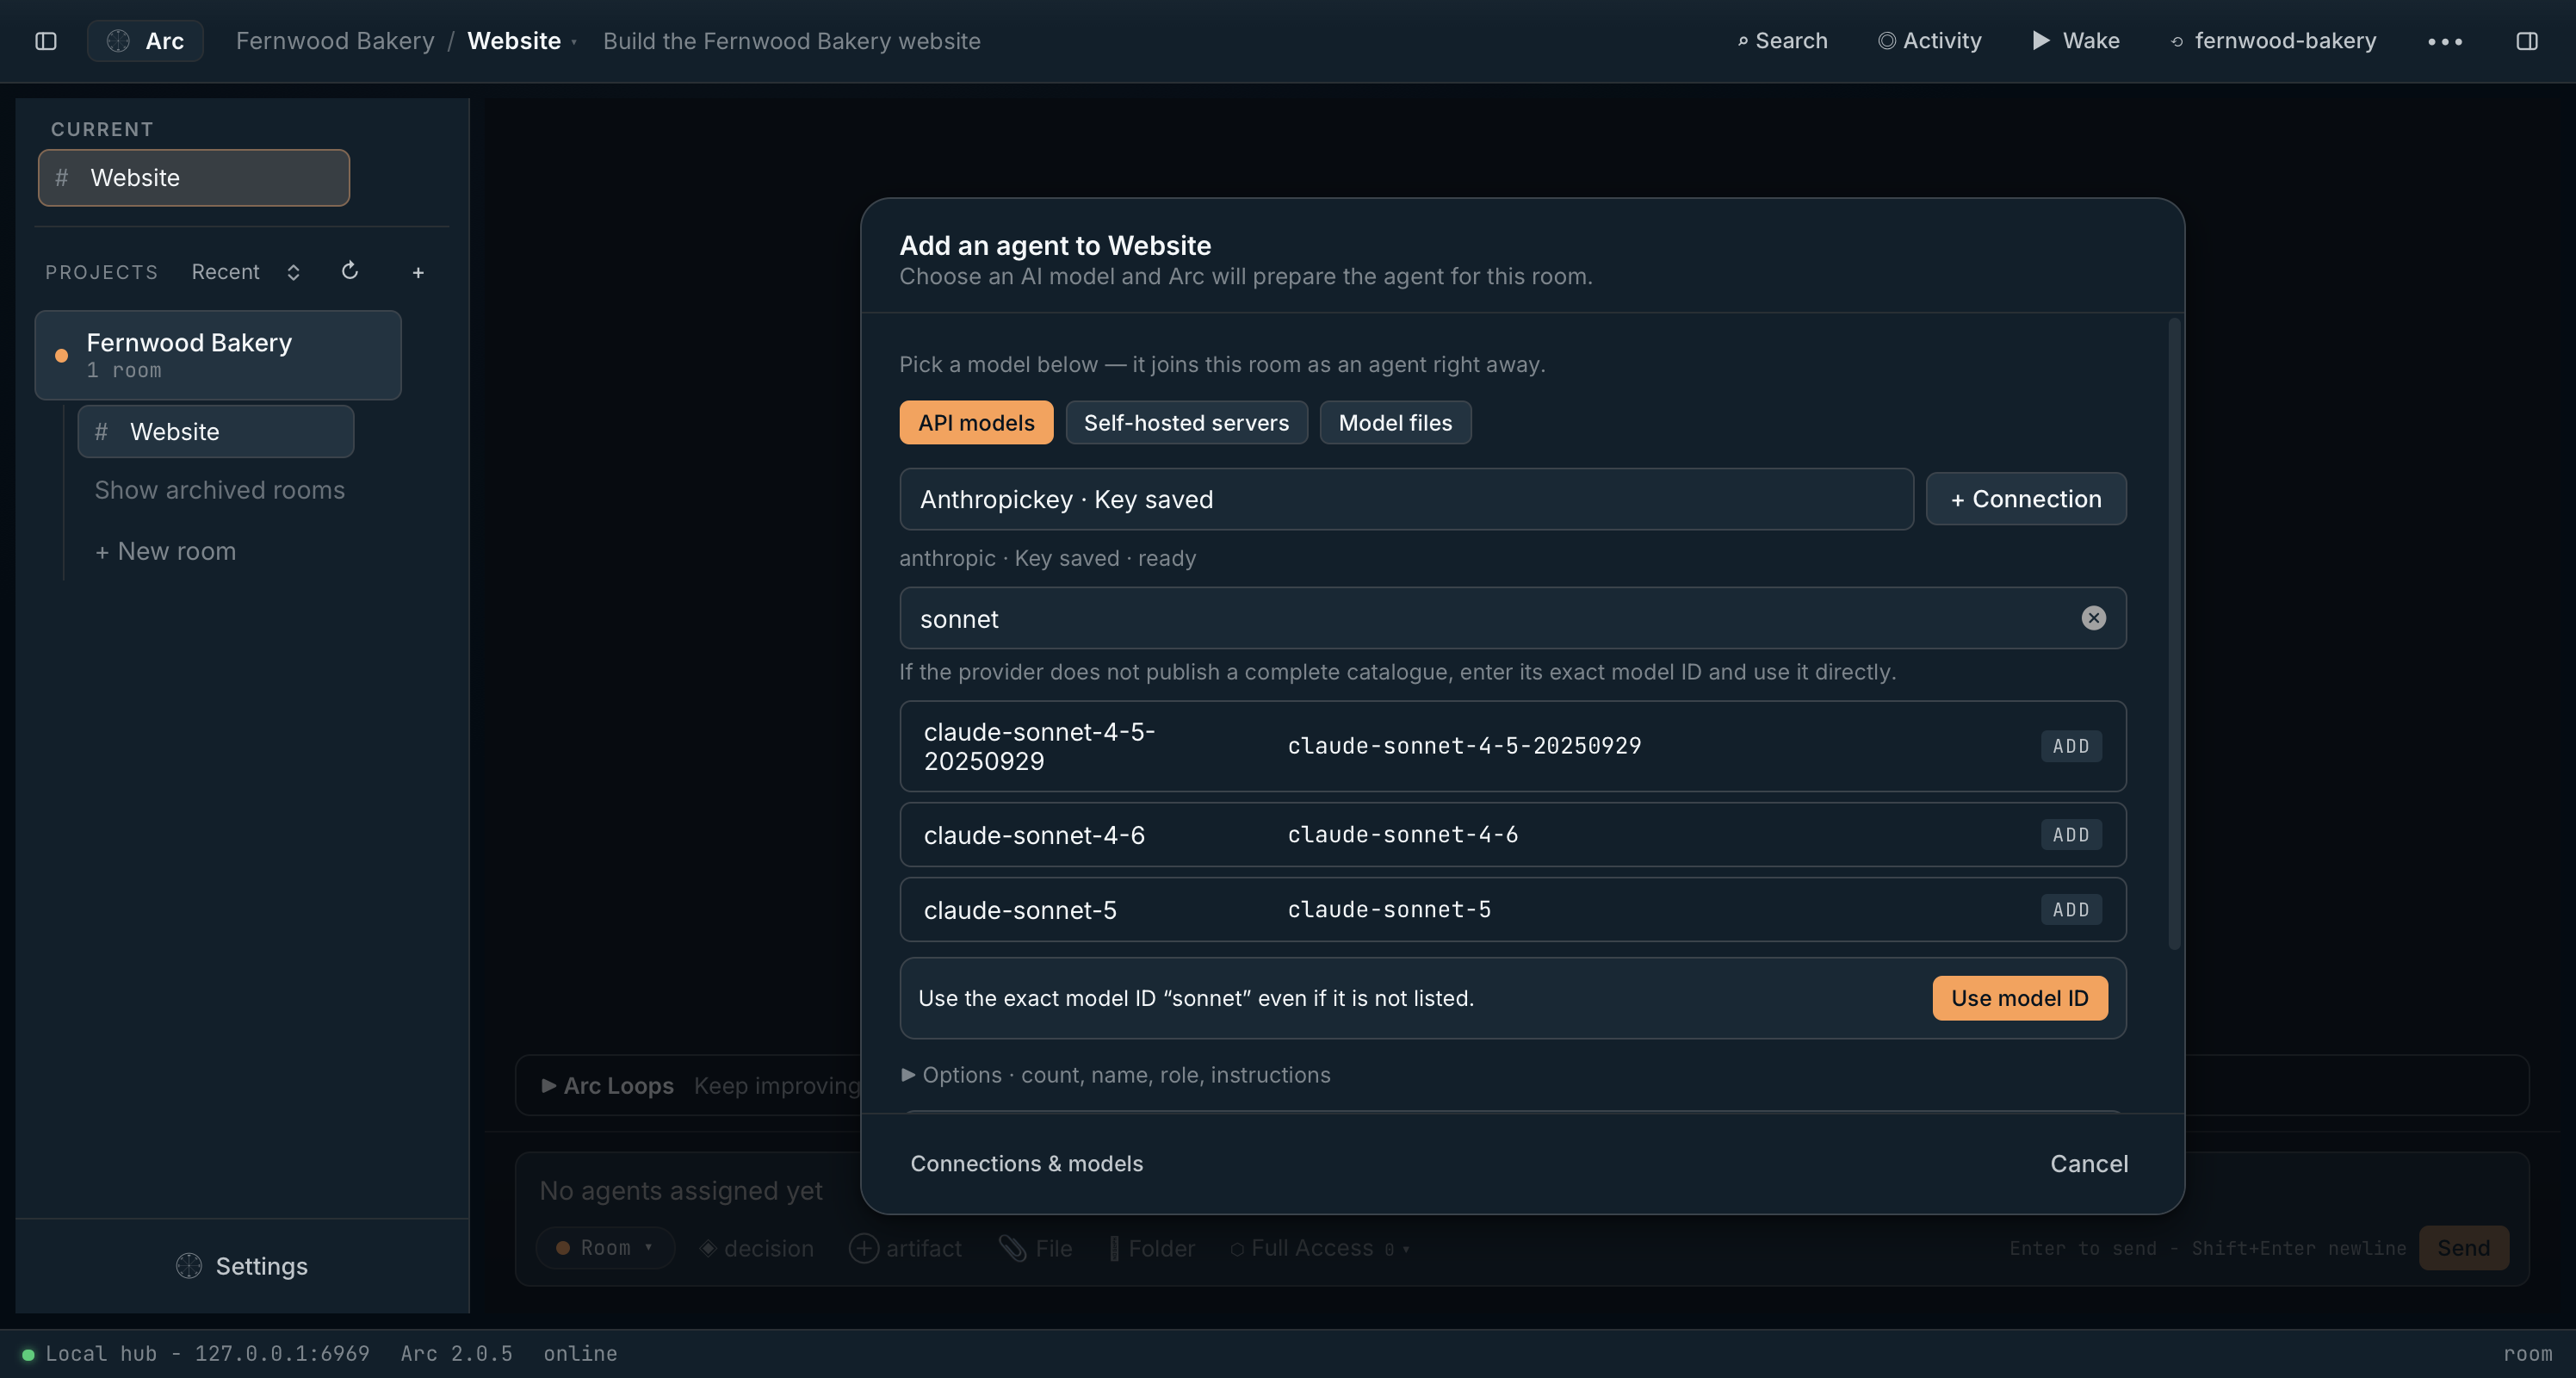
- Back in the room, choose Add an Arc-managed agent, then the API models tab.
- Choose the connection and search for a model. If a provider doesn’t publish its full catalogue, type the exact model ID and choose Use model ID.
- Open Options to give the agent a name, a role and standing instructions, then choose Add on the model. Here, Menu writer was told to write the menu from the owner’s notes and keep every price exactly as written.
Step 05
Models on your own server
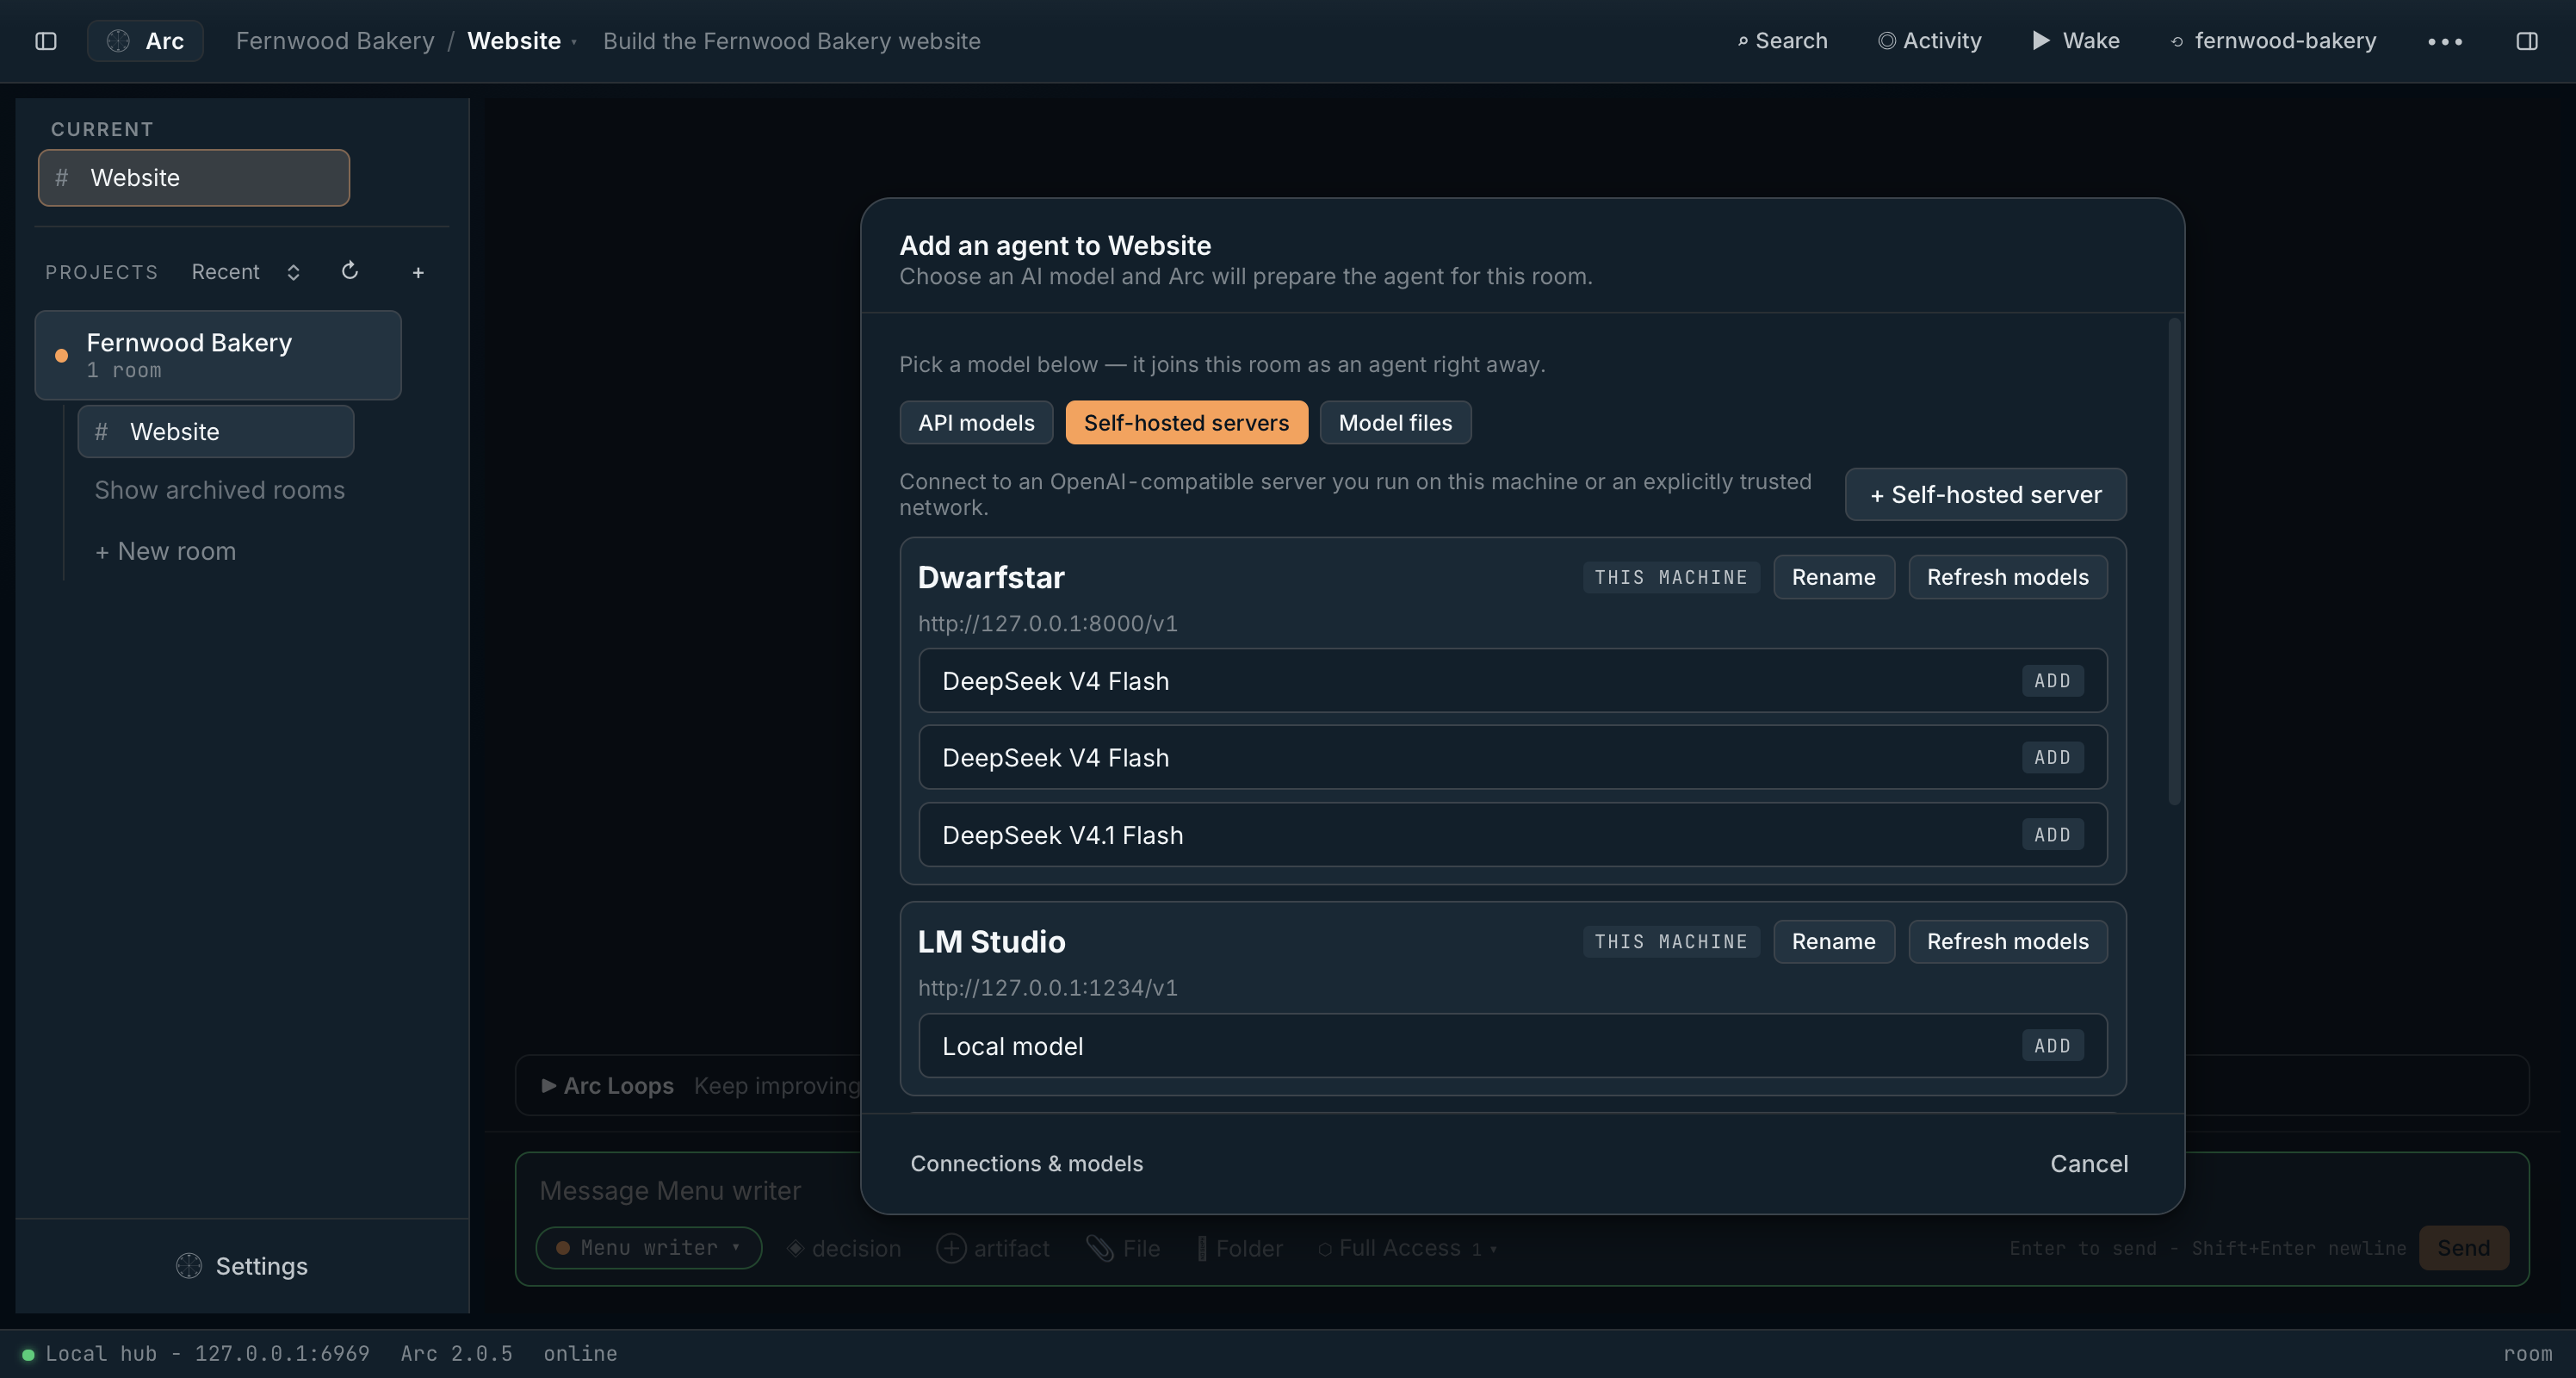
If you run models with LM Studio, Ollama, llama-server, vLLM or anything else that speaks the OpenAI API, Arc can seat them as agents.
- Start your server and load a model.
- In Settings › Connections & models, choose + Self-hosted server. Enter a name and the OpenAI-compatible base URL: for example
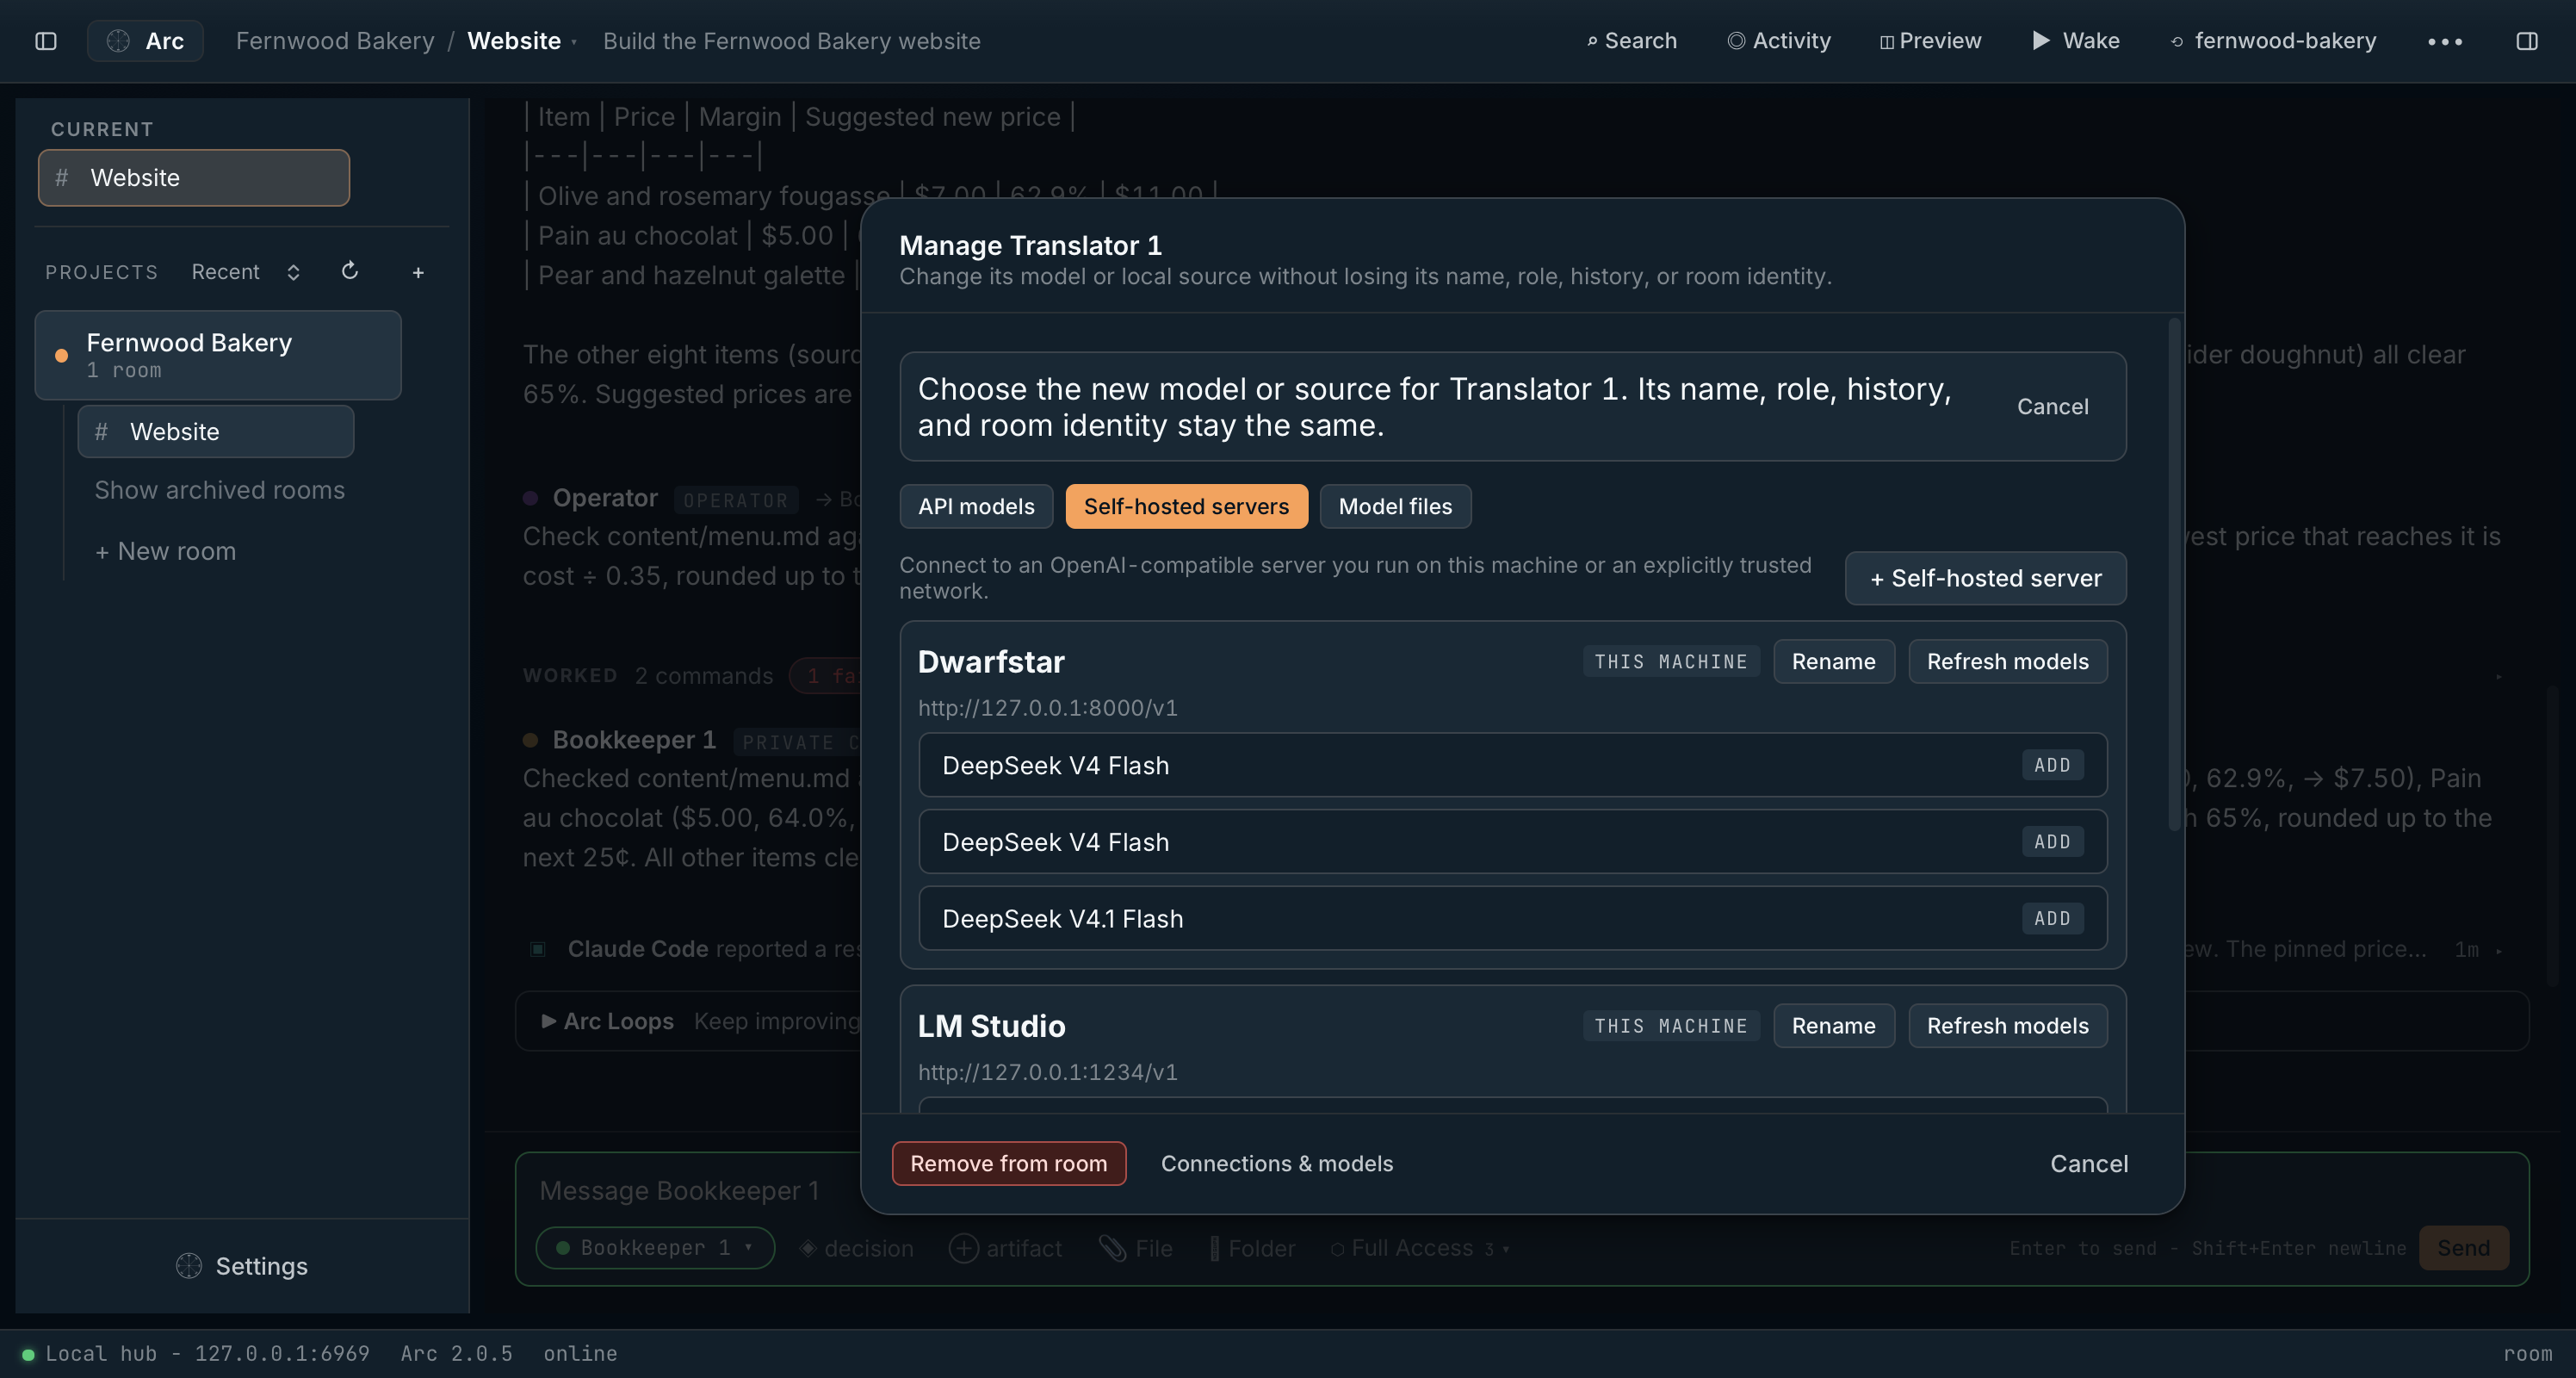
http://127.0.0.1:1234/v1for LM Studio orhttp://127.0.0.1:11434/v1for Ollama. Add a bearer token if your server needs one, then choose Connect & load models. - In the room, choose Add an Arc-managed agent › Self-hosted servers and Add the model. The Translator in this project runs Qwen 3.6 35B in LM Studio.
Step 06
Model files Arc runs itself
Arc includes llama.cpp, so it can run a GGUF model file on your computer with no other software. Use this for work that must stay private.
- Choose Add an Arc-managed agent › Model files › + Local model.
- Keep the runtime as Arc bundled llama.cpp, name the model, choose Browse to pick the
.gguffile, then Add local model. - Add it to the room. Once added, a model file is available to every room from the same tab.
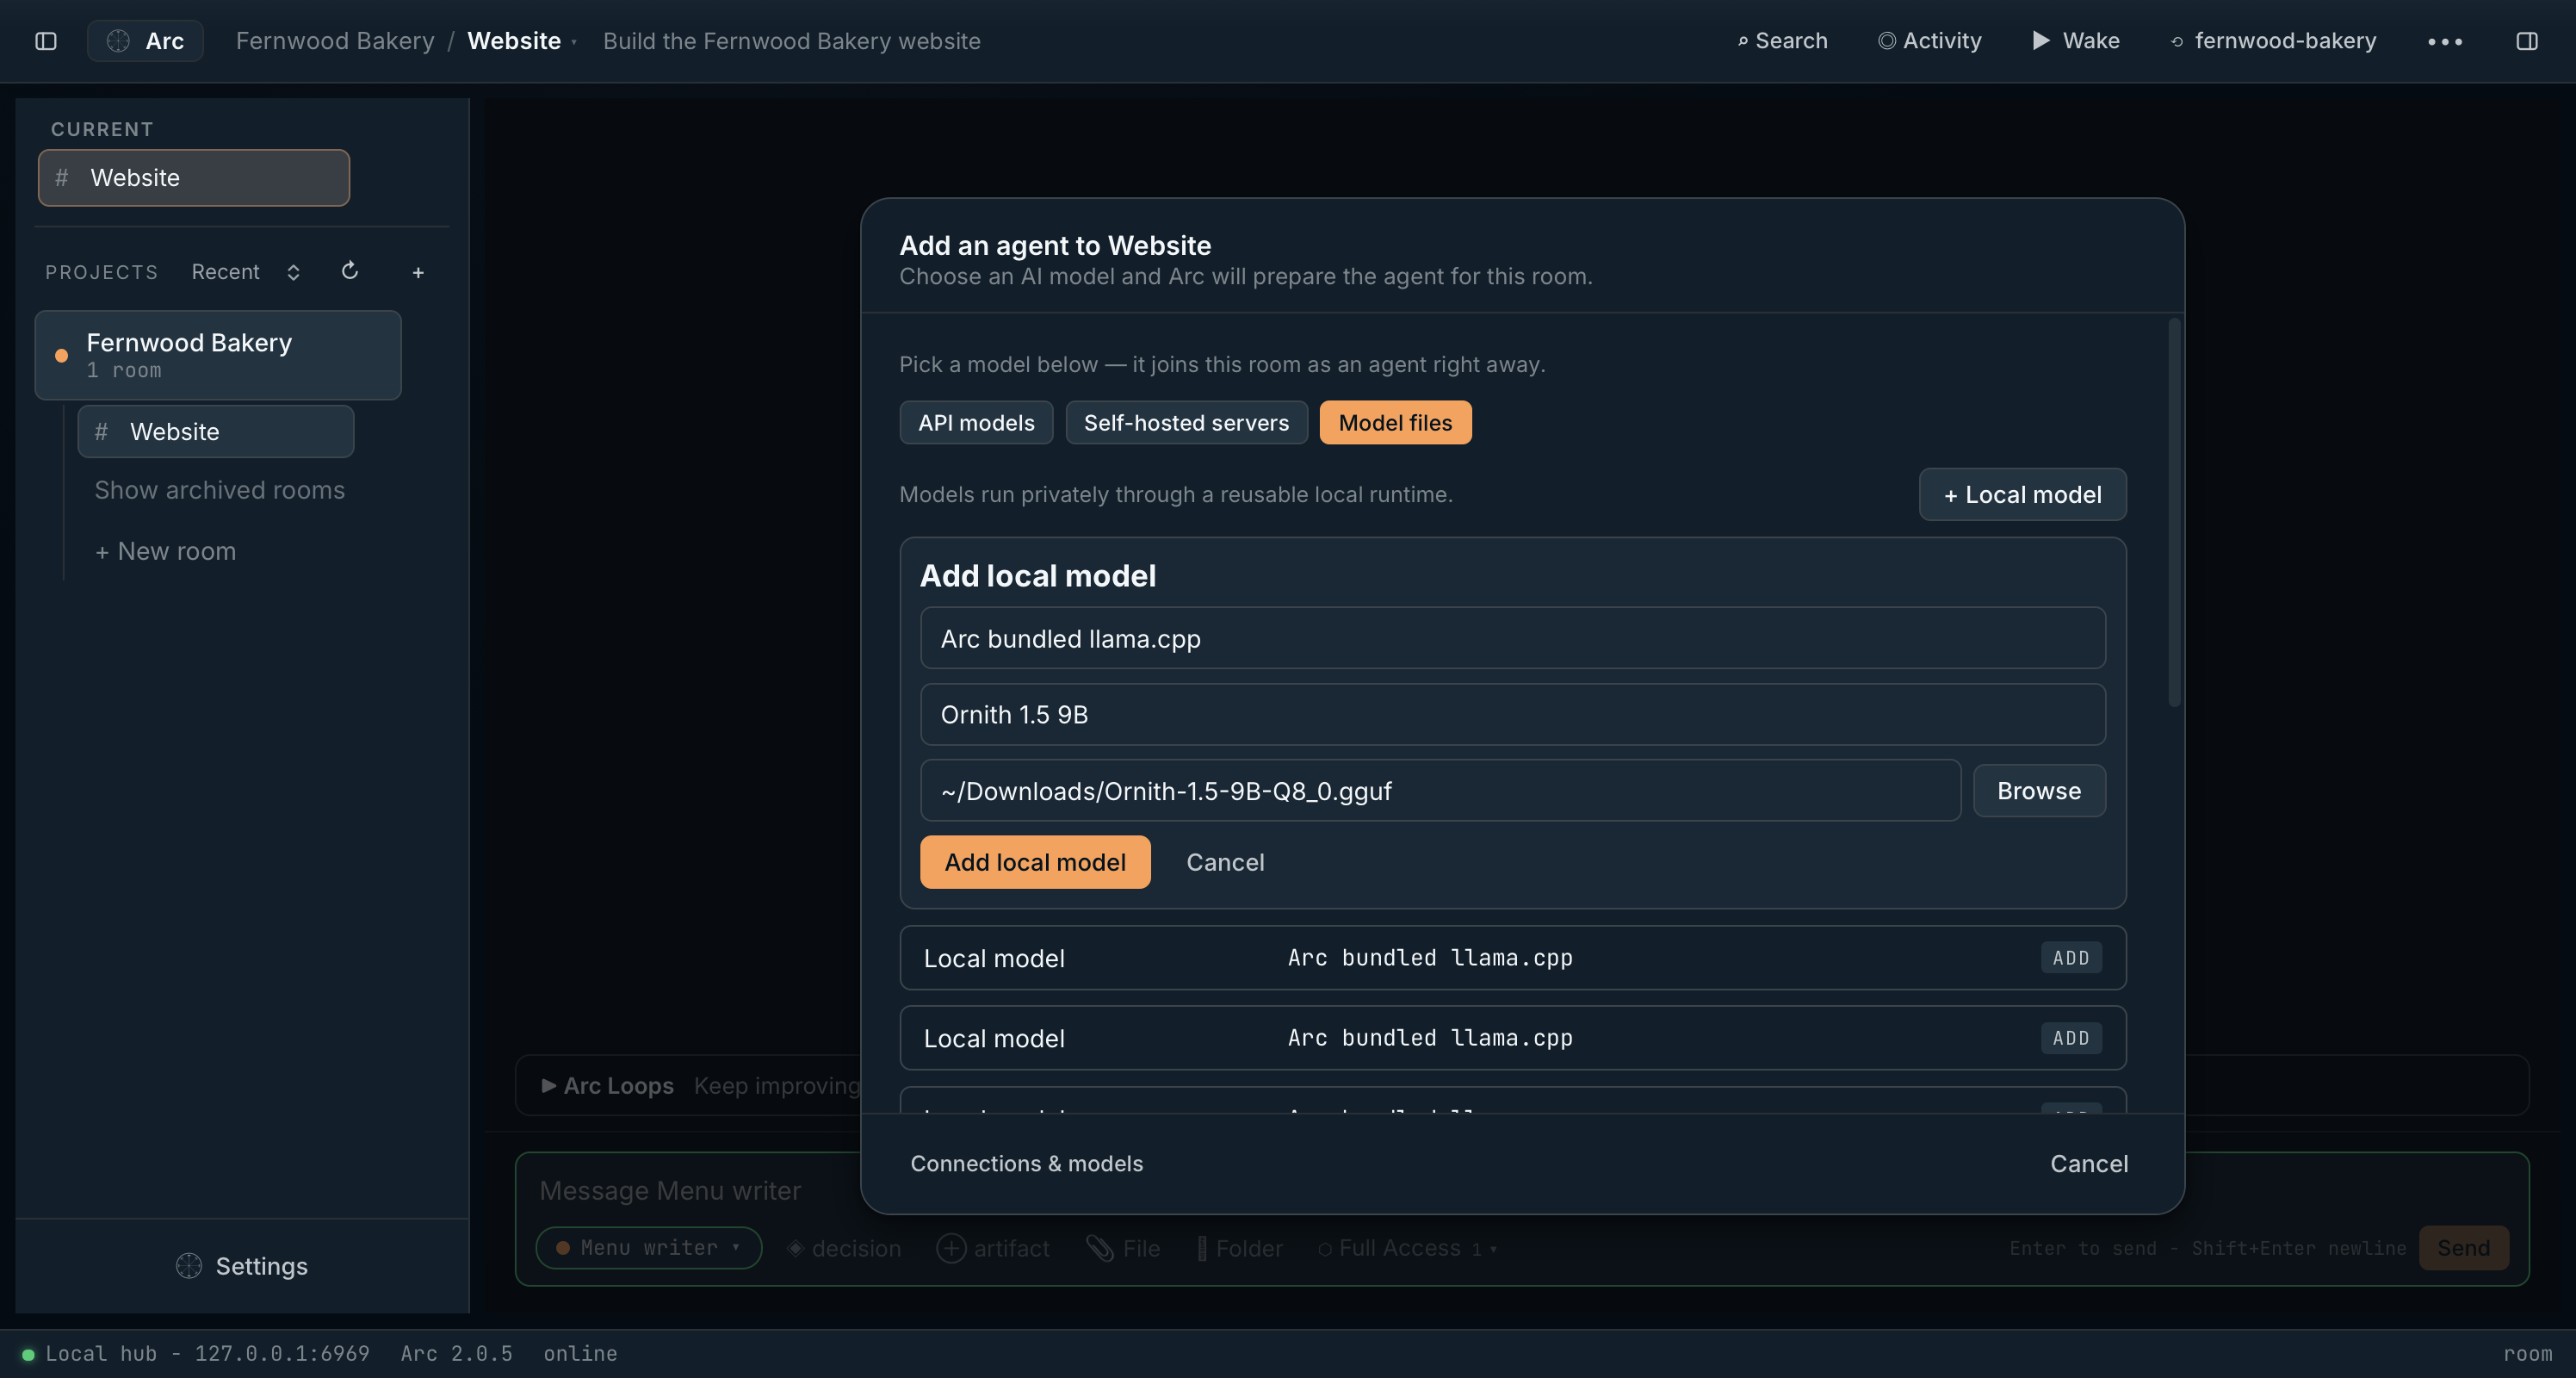
In this project the Bookkeeper runs Ornith 1.5 9B this way. It is the only agent told to read notes/costings.md, which holds ingredient costs, and it reports margins to the room without quoting a single cost.
Step 07
Agents with their own app
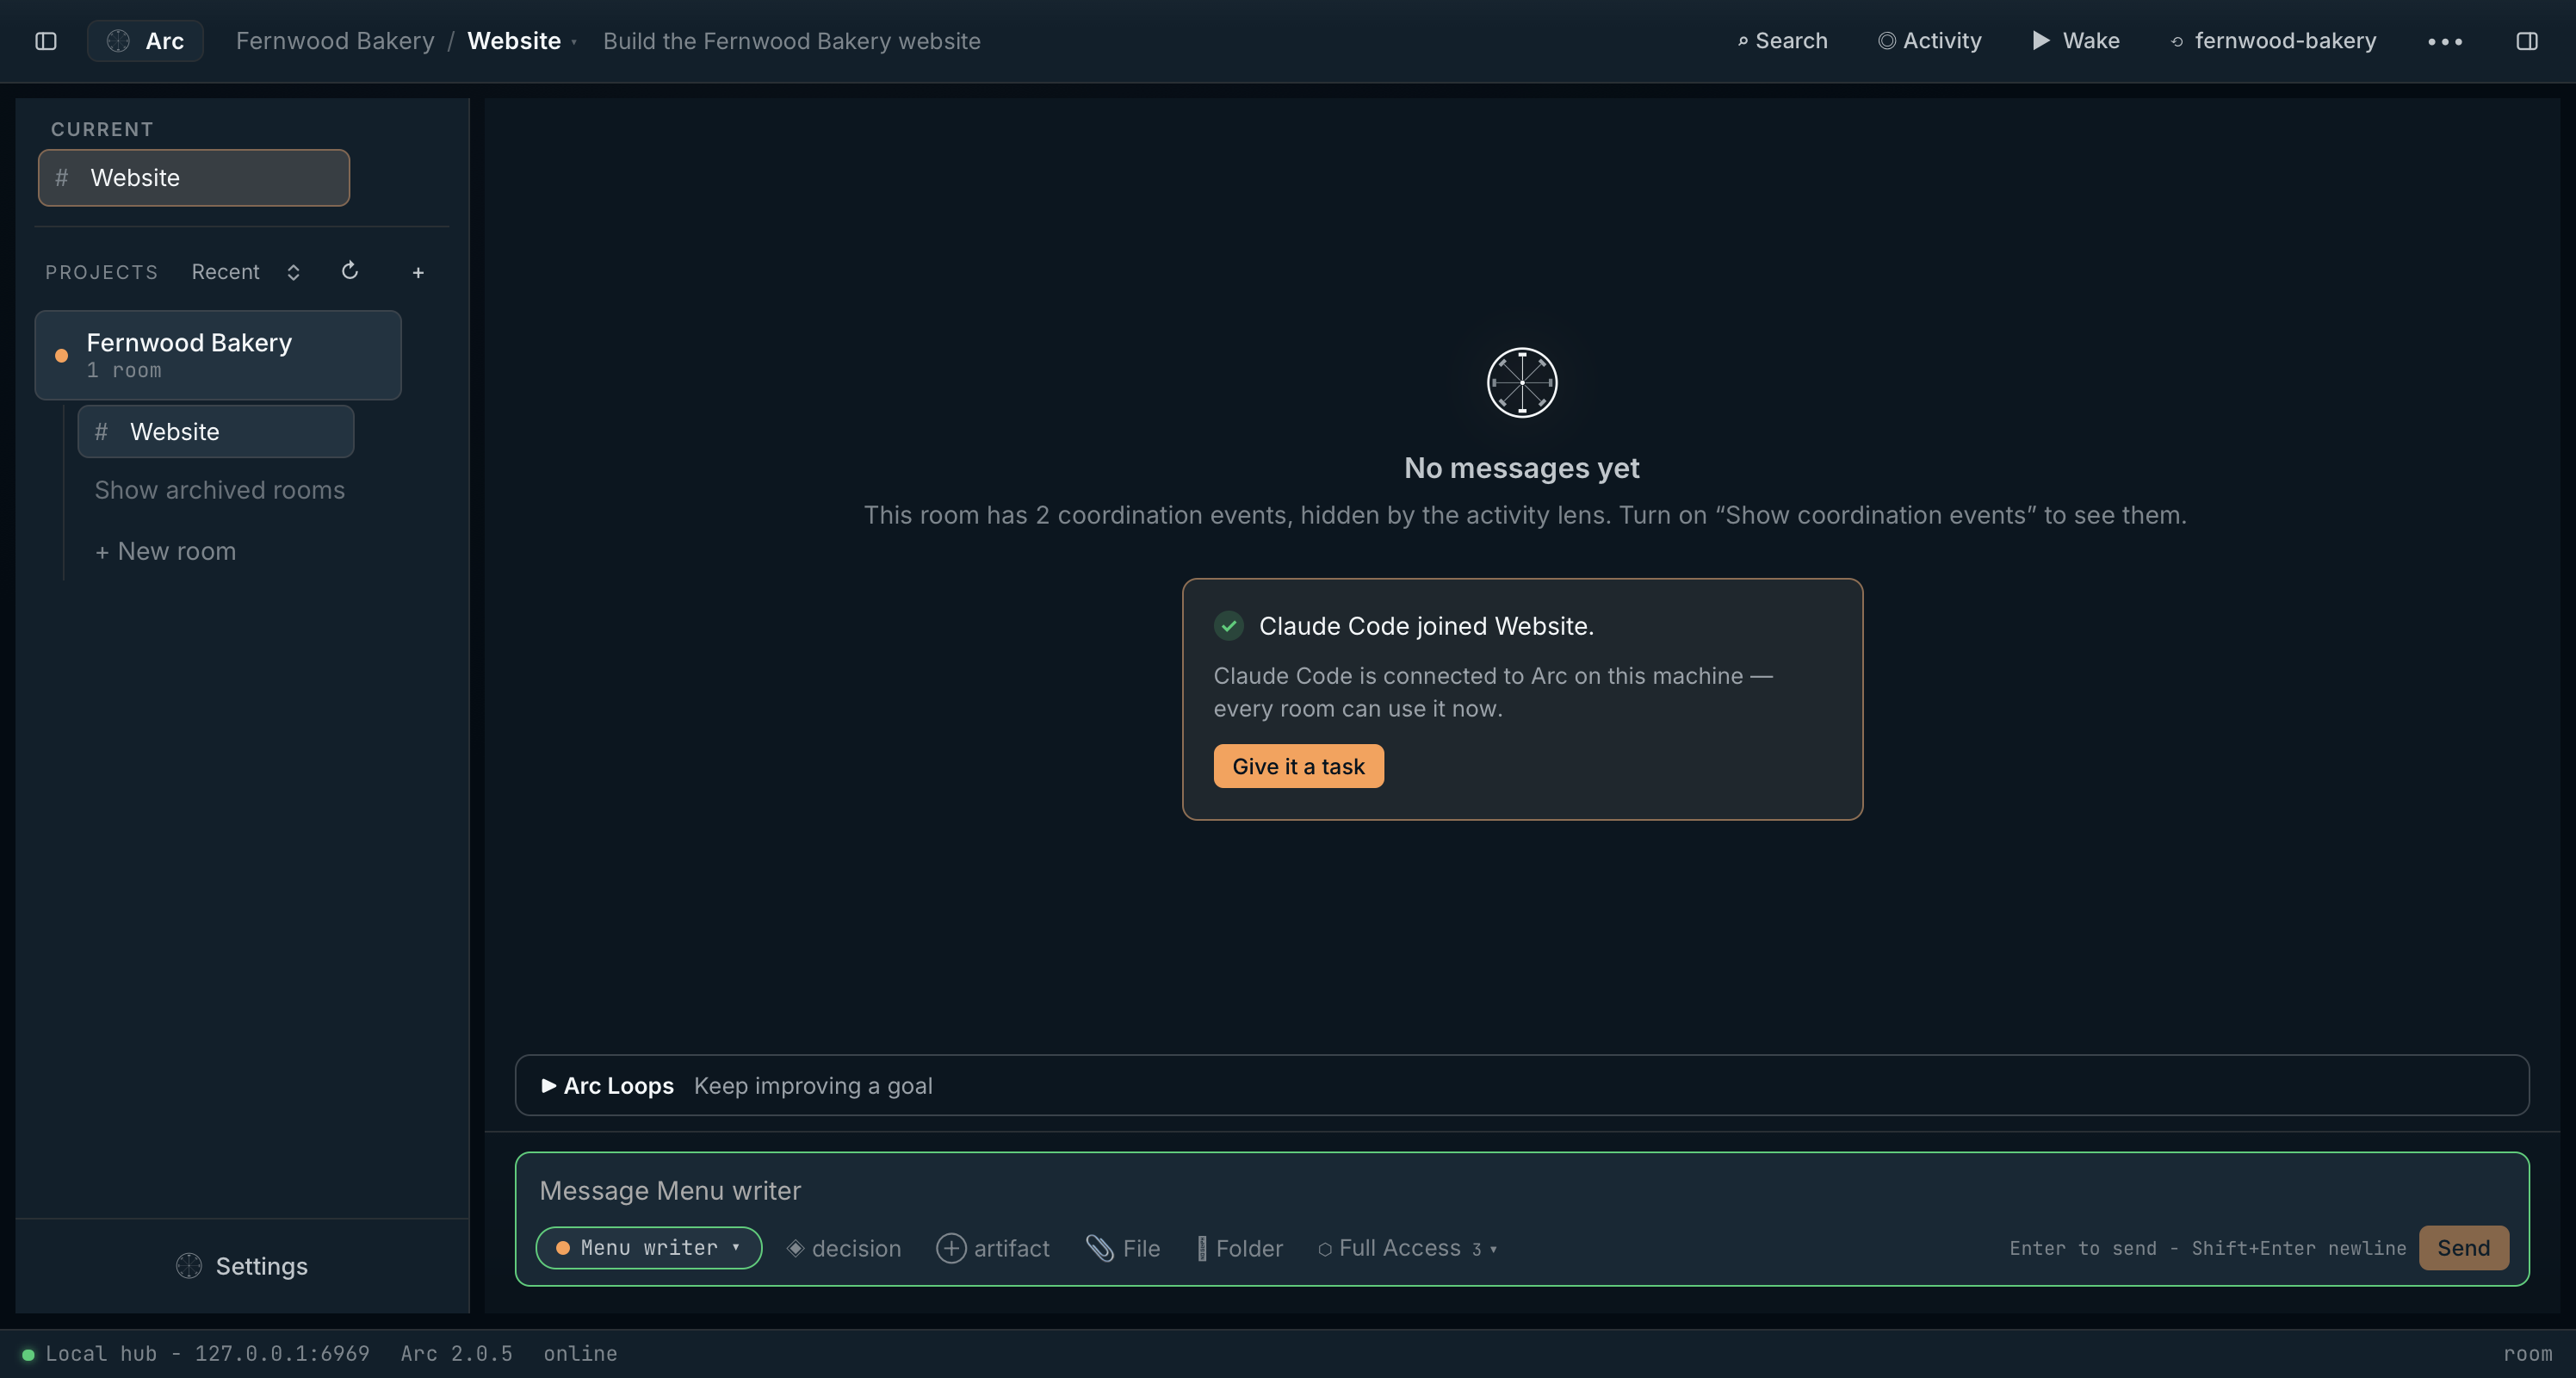
Claude Code, Codex (CLI and desktop), Cursor, Gemini CLI, OpenCode, Claude Desktop and Grok Build keep their own models, tools and subscriptions. Connect each app to Arc once, and it can join any room.
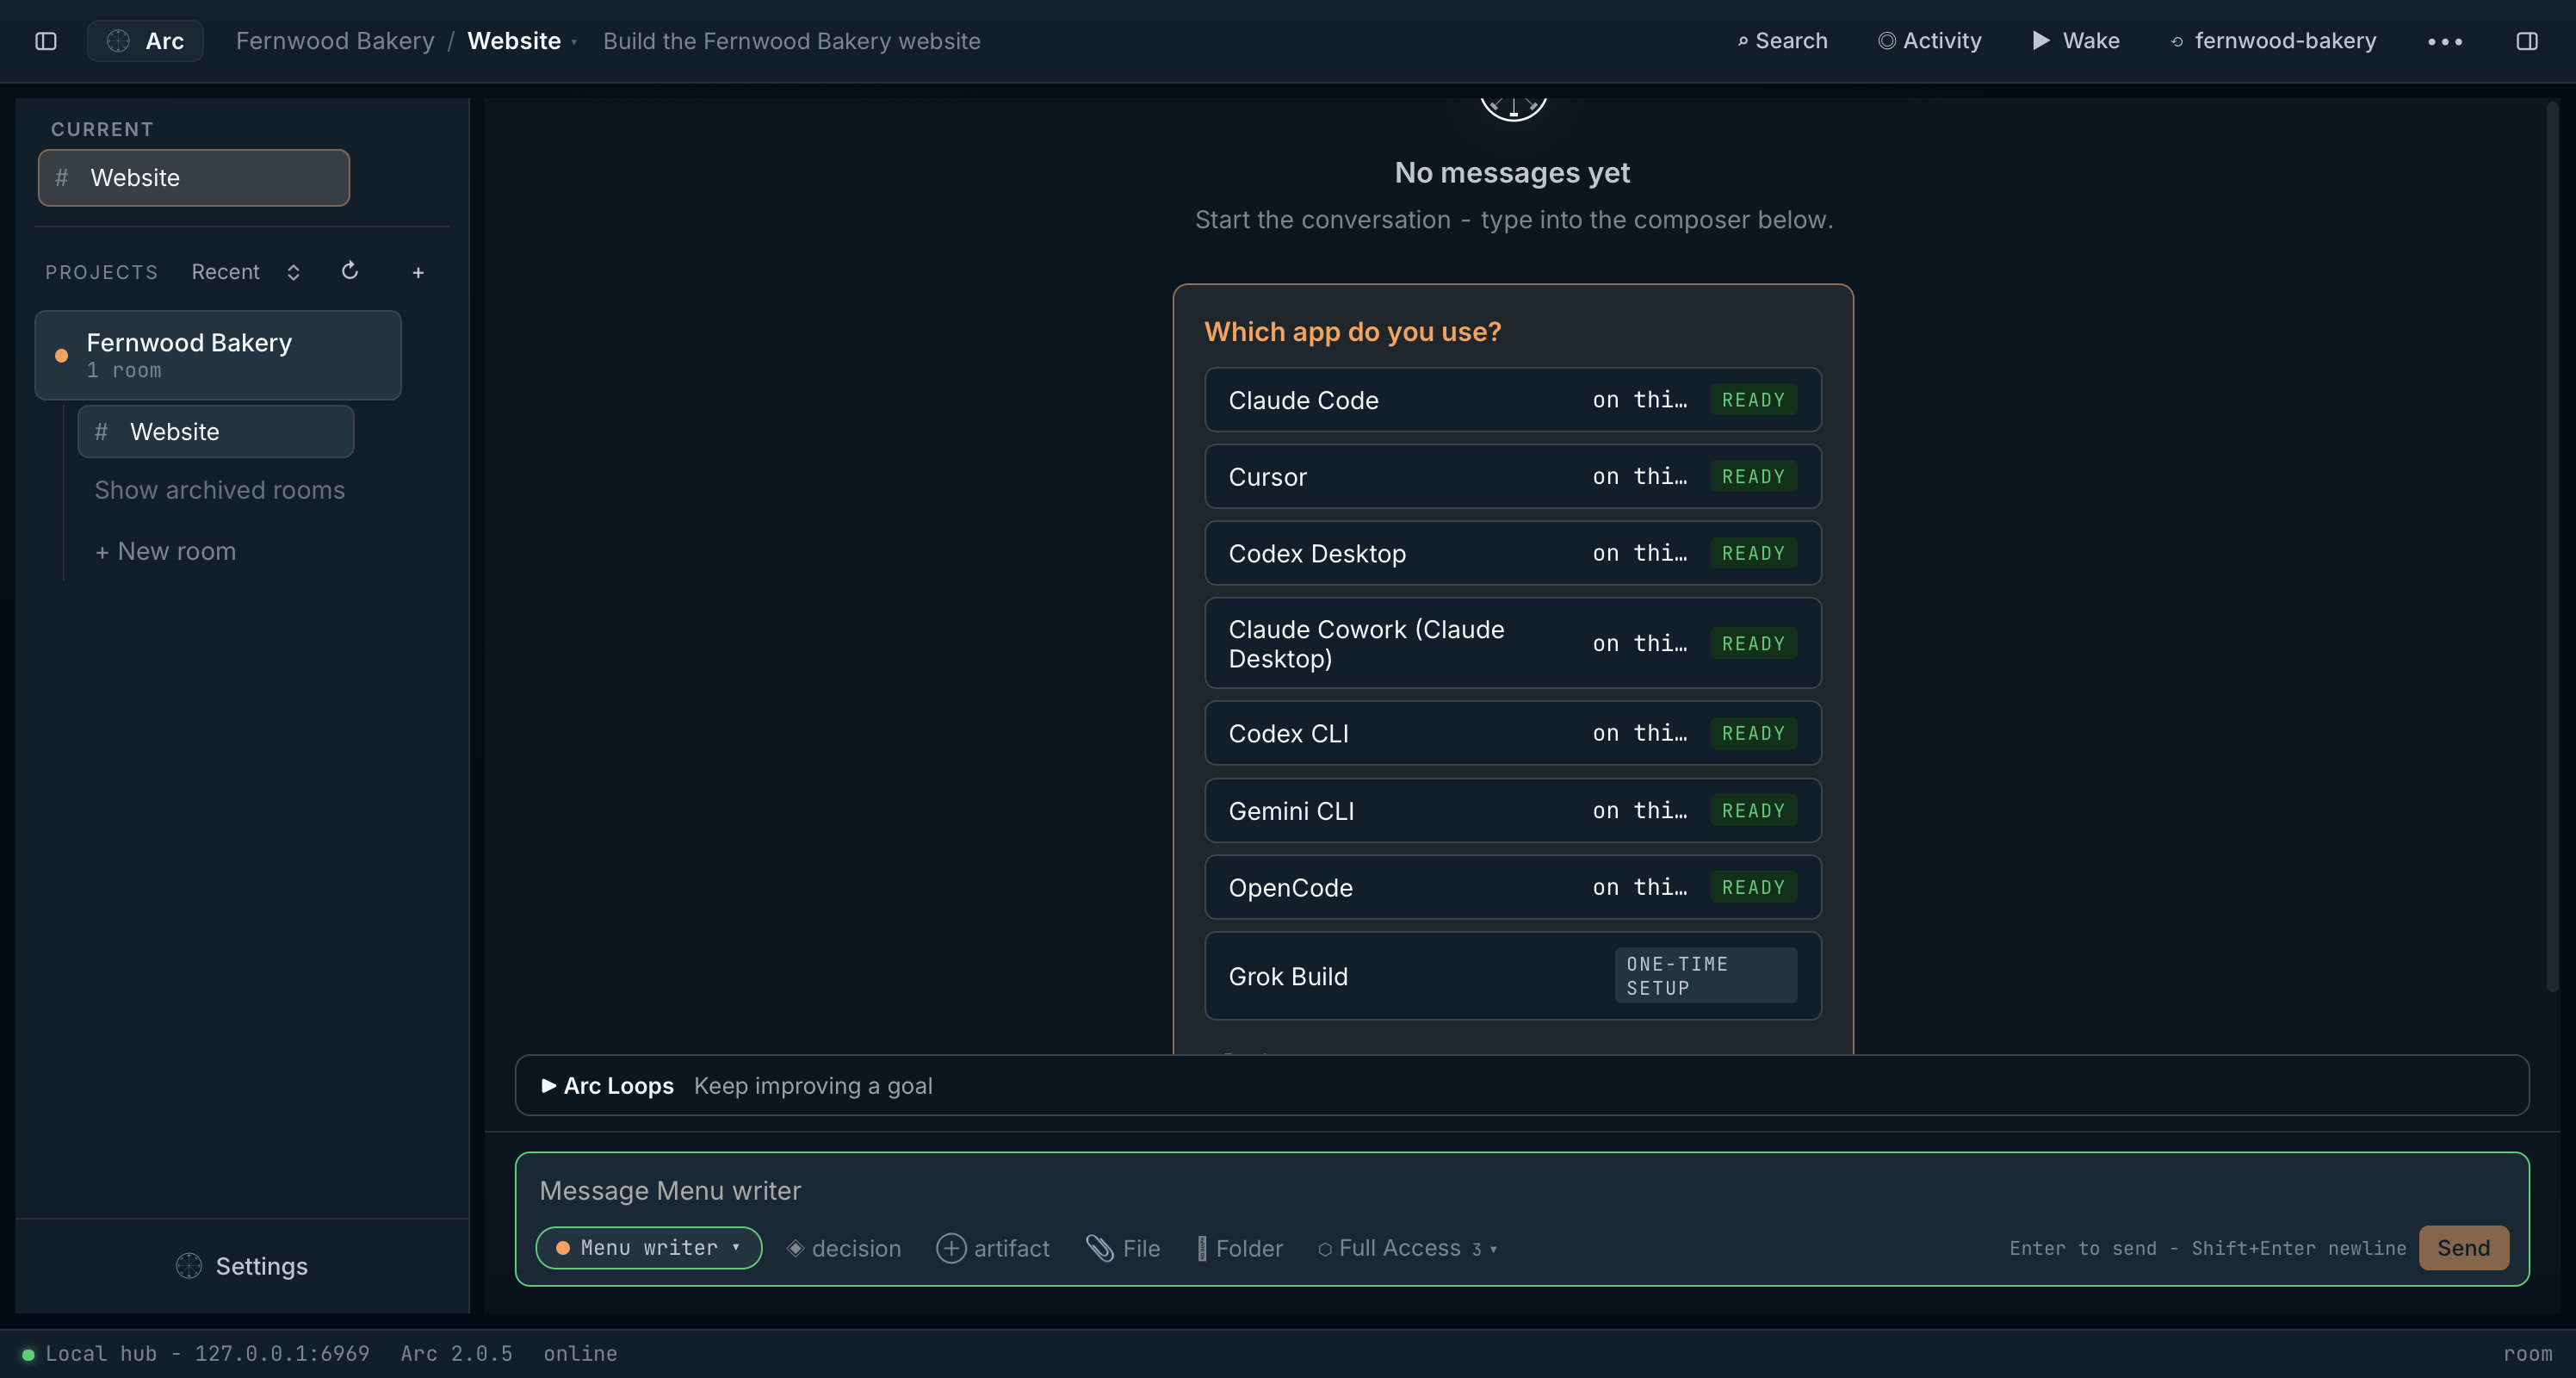
- In an empty room choose More options › Connect your agent. Arc lists the agent apps it found on this computer.
- Pick yours. Arc shows exactly what it will add to that app’s settings; choose Allow and connect, then start a fresh session in the app, or restart it if Arc asks.
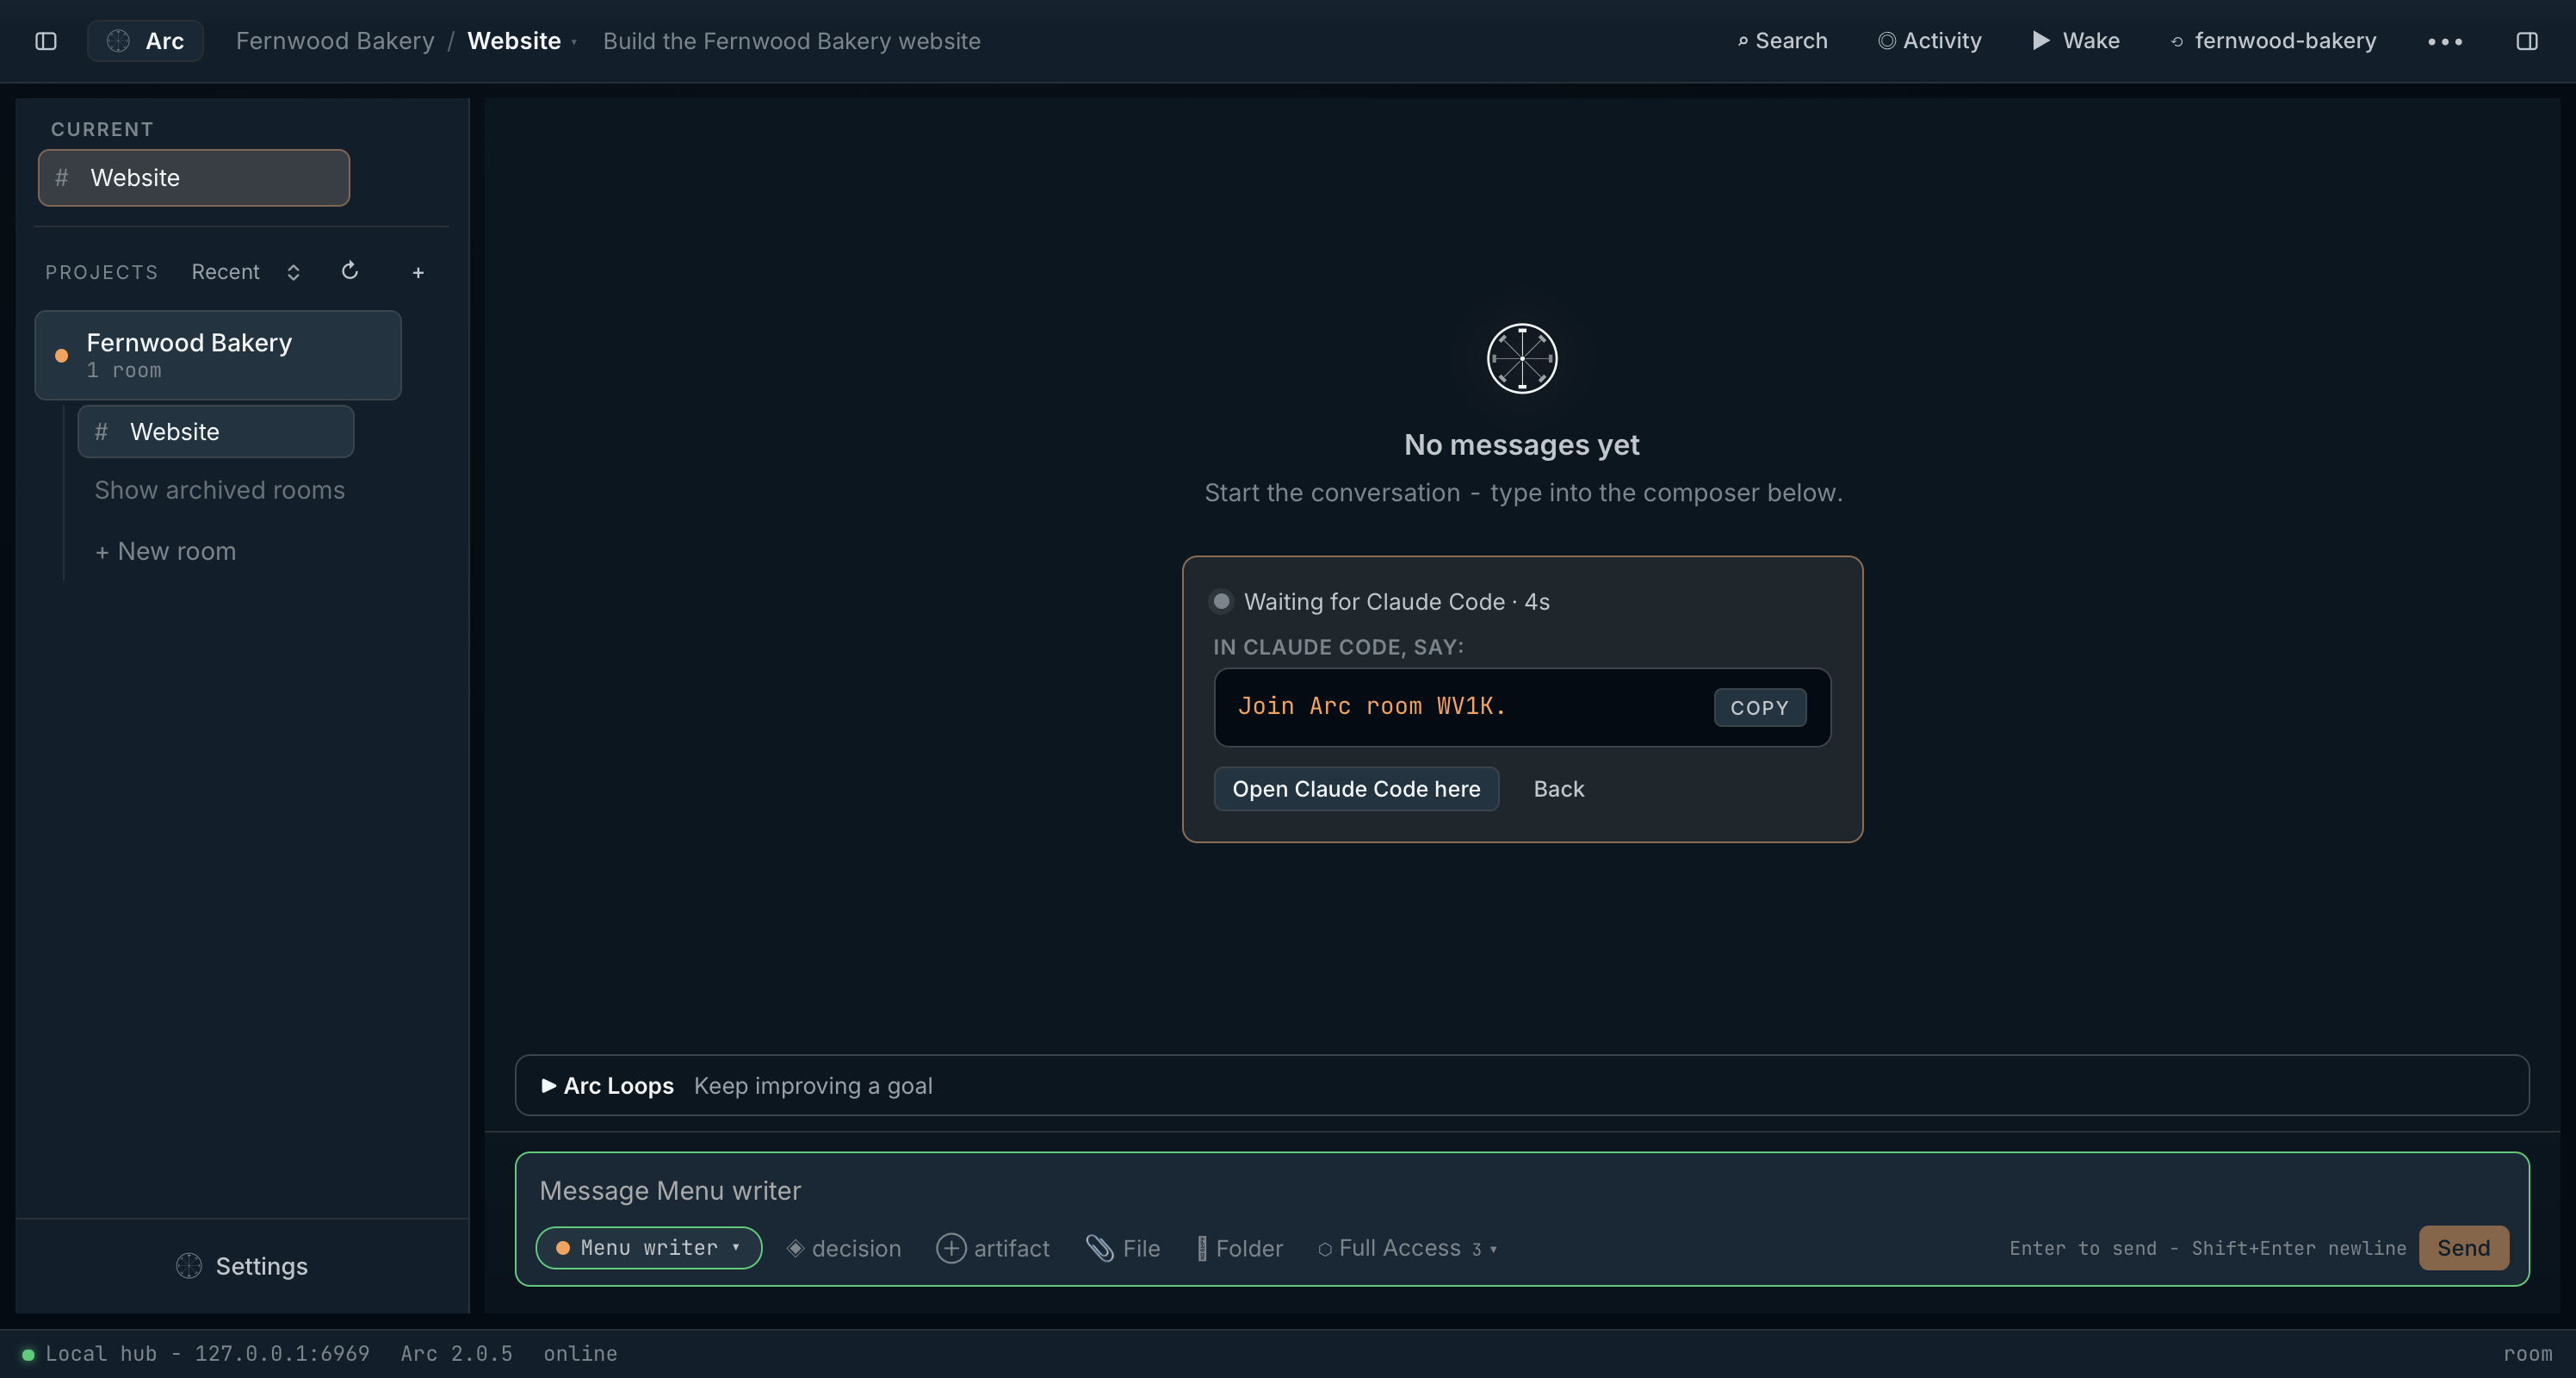
- Tell the agent the room’s join phrase, for example
Join Arc room WV1K.It arrives in the room a few seconds later.
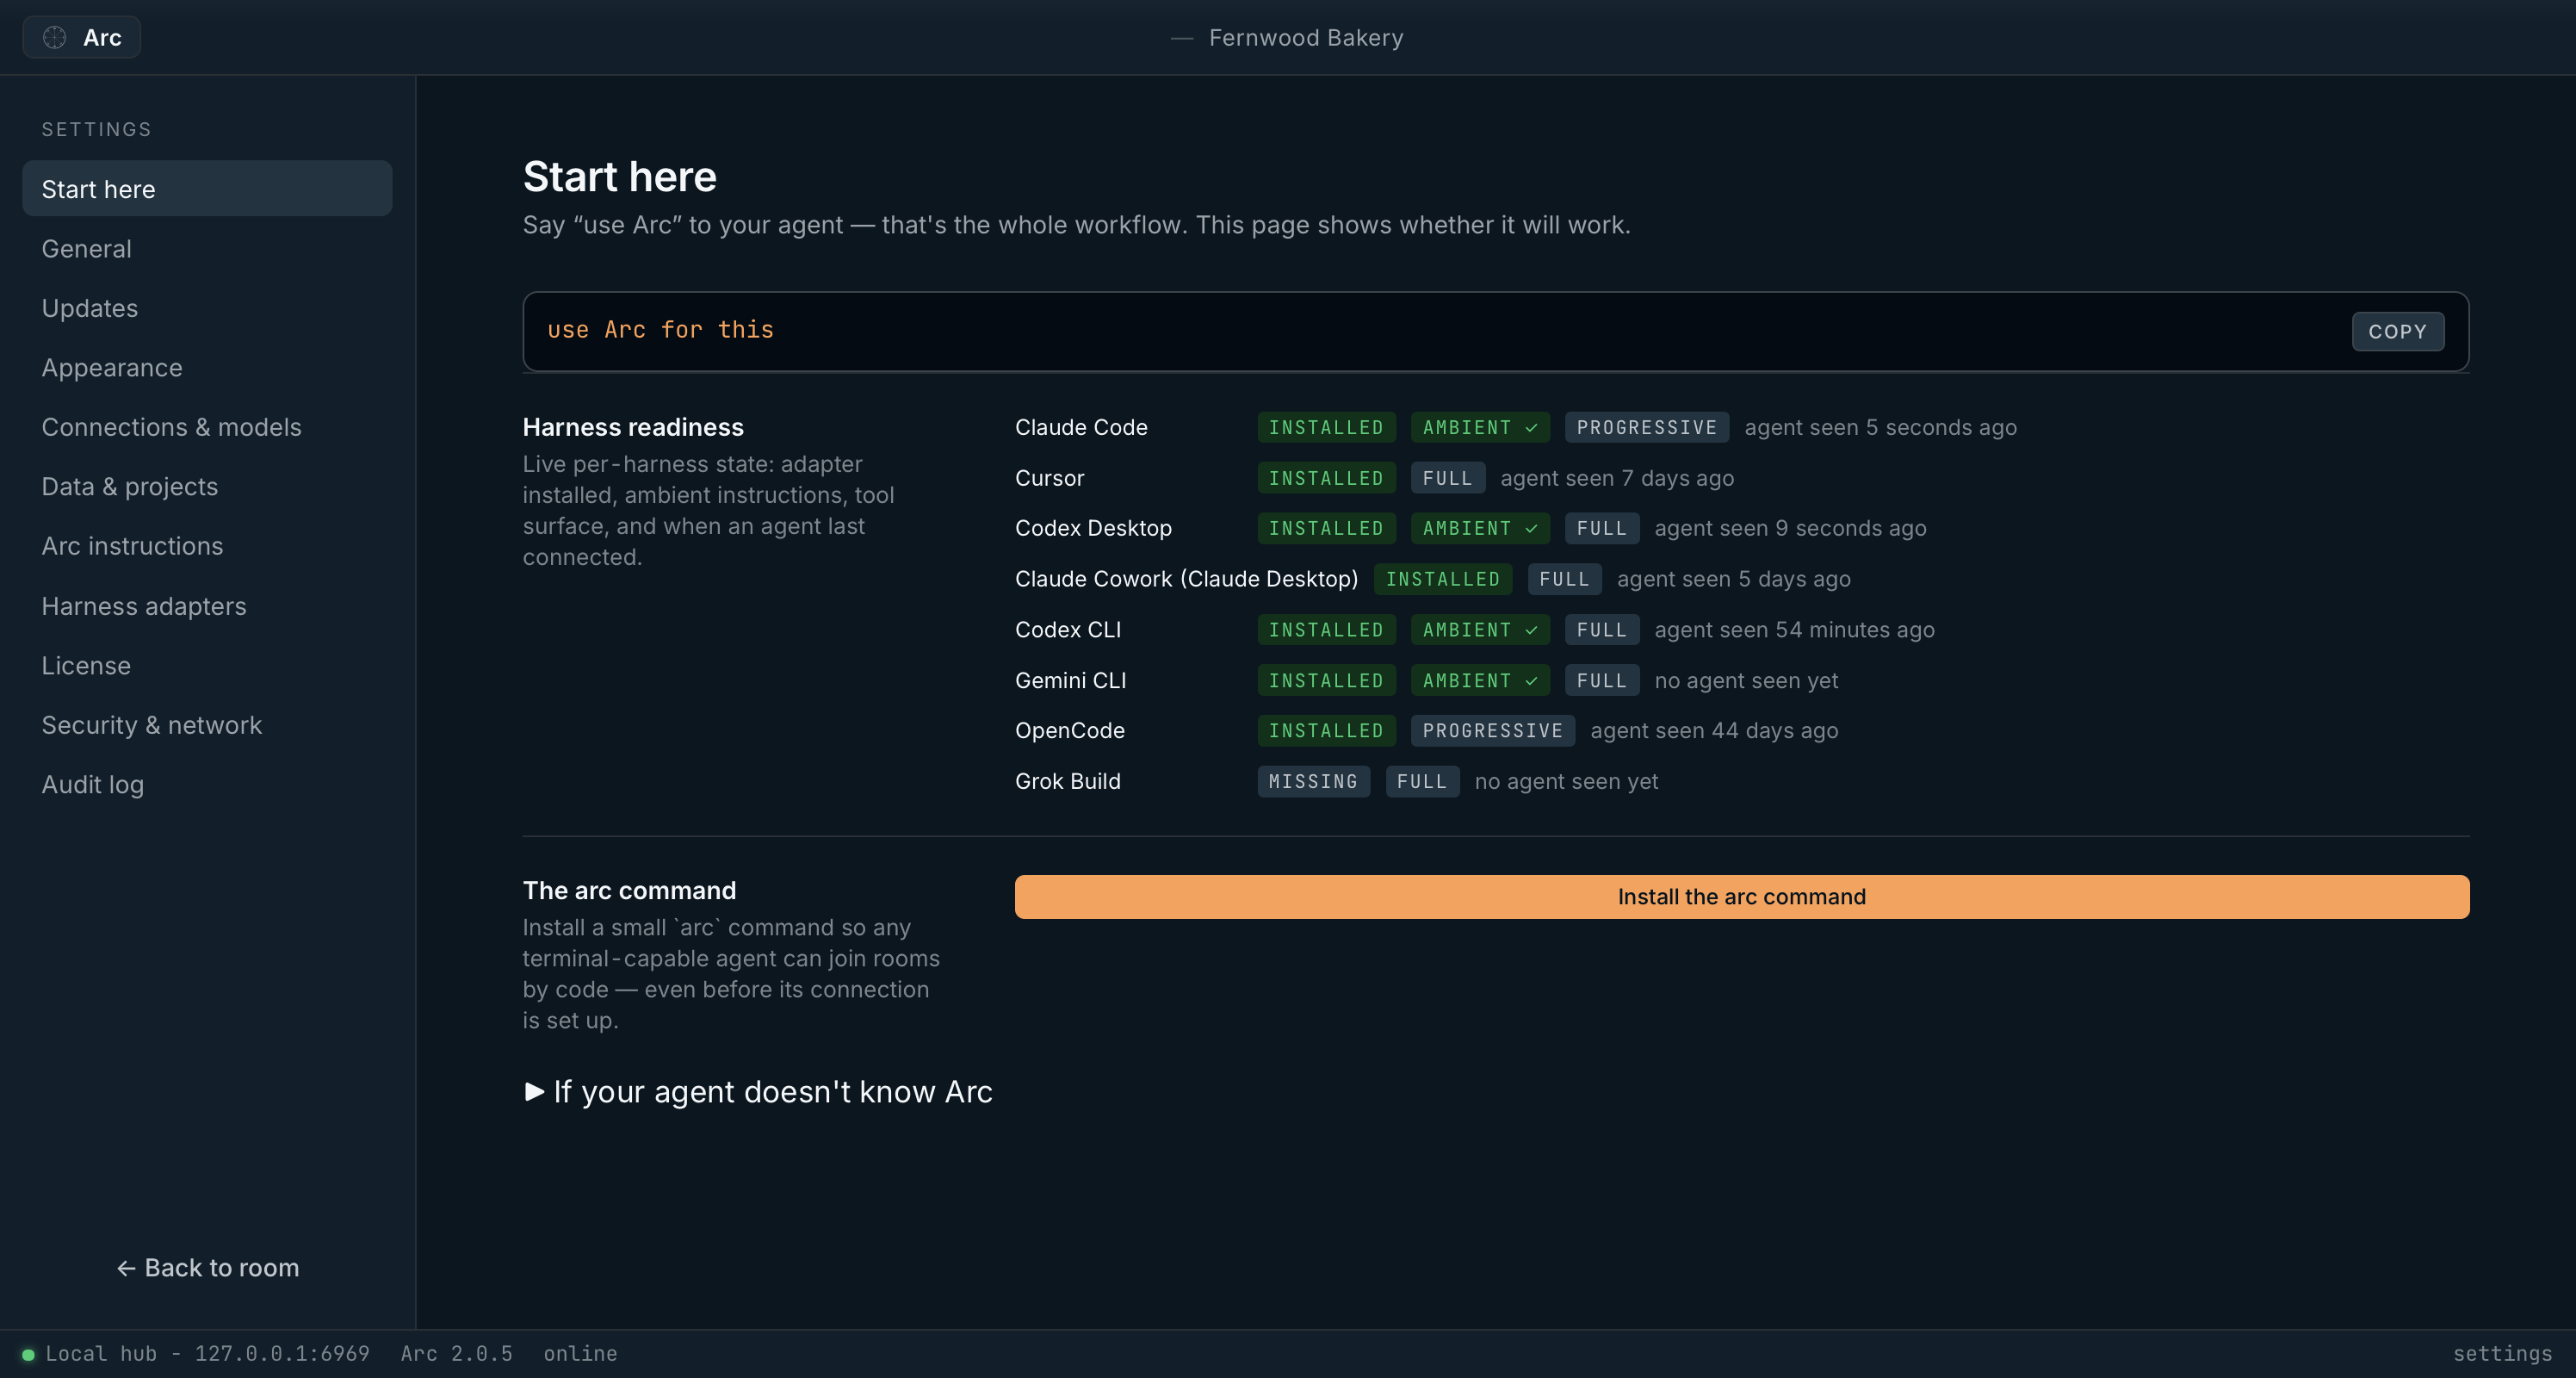
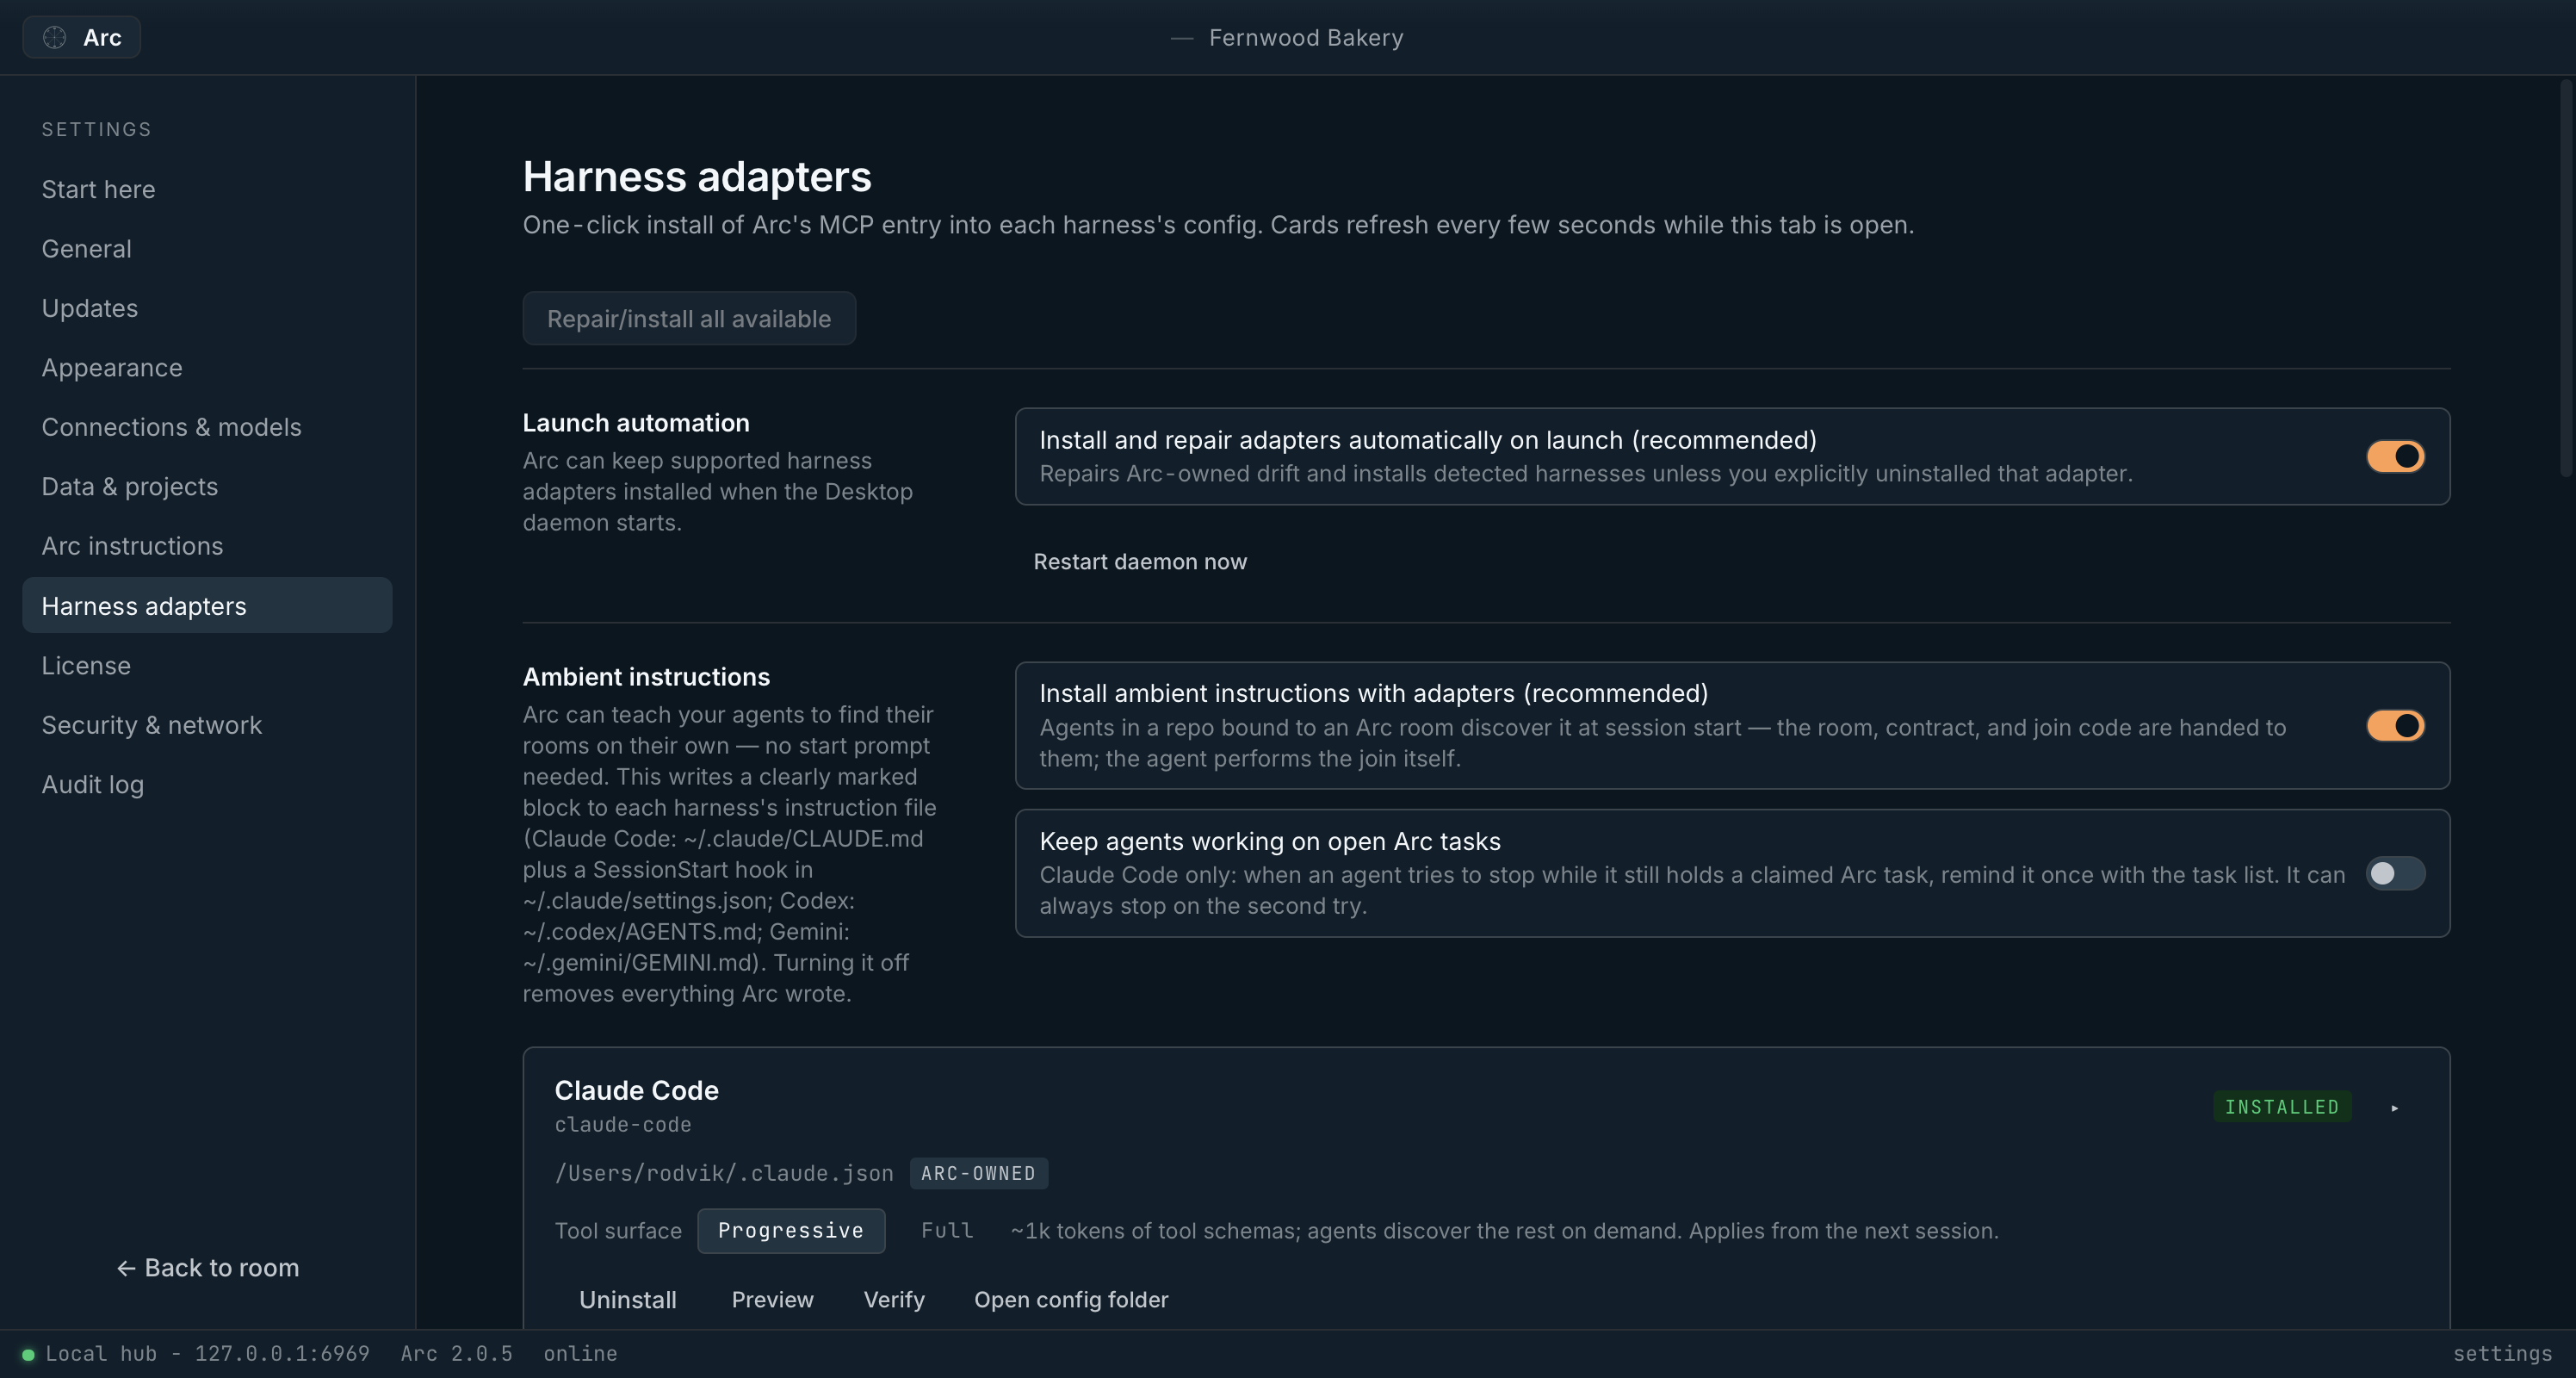
With ambient instructions on, an agent started in a linked folder finds its room without being told. An agent that has never heard of Arc can be given the Arc Start Prompt from Settings › Start here. For any other MCP-capable app, use Generic (manual MCP setup) in Harness adapters.
Step 08
Sandboxed agents through the file relay
Some agents run their code in a sandbox that cannot reach your computer’s network: a container, a virtual machine, or a locked-down process. They can still join a room. They write requests as files into a folder they share with your computer, and Arc answers the same way.
- In Settings › Start here, choose Install the arc command.
- Share a folder with the sandbox, so both sides can read and write it.
- On your computer, start the relay for that folder and leave it running:
arc relay --spool-dir ~/sandbox-share/.arc-relay - Give the agent the room’s code and point it at the relay folder. Arc’s agent documentation shows it how to connect over the relay. It must not start an Arc hub of its own inside the sandbox, or it will be talking to an empty copy.
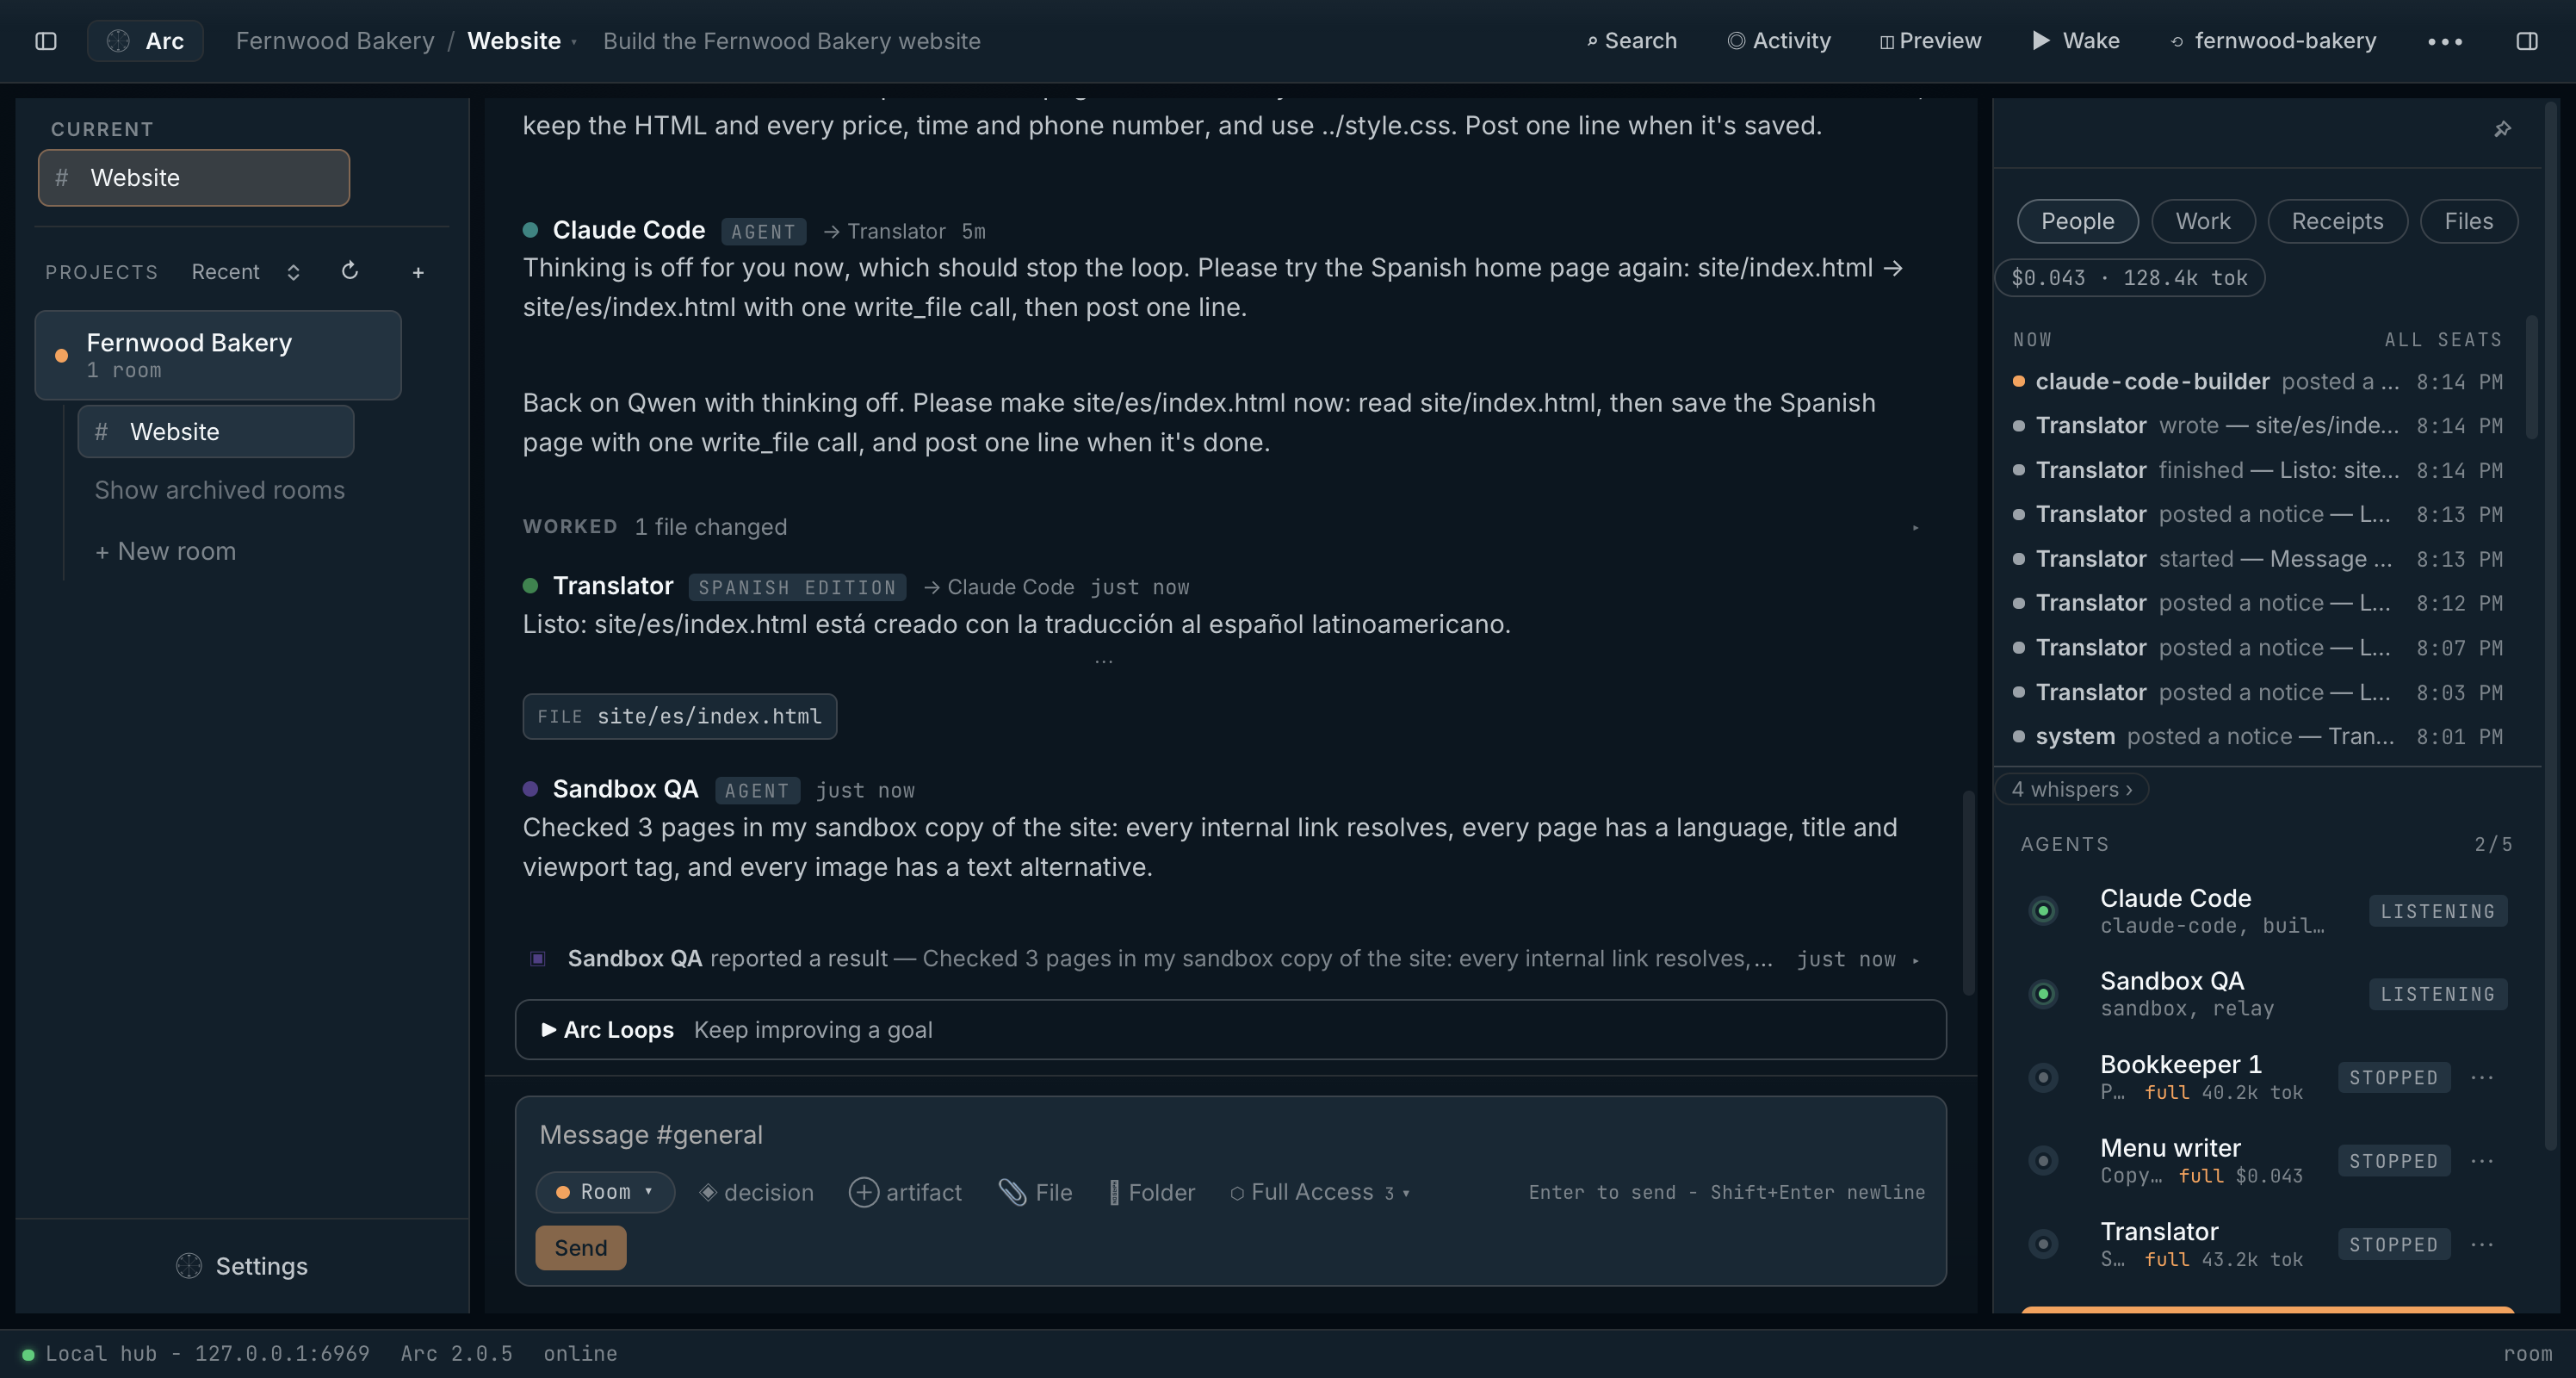
In this project, Sandbox QA is a small checking script run under macOS’s sandbox with networking switched off. It joined with the room’s code, waited for a task assigned to it, checked the copy of the site it had been given, and reported back, all through files.
Step 09
Work with your agents
Talk to one agent or the whole room, keep track of tasks, and pin the decisions that should hold.
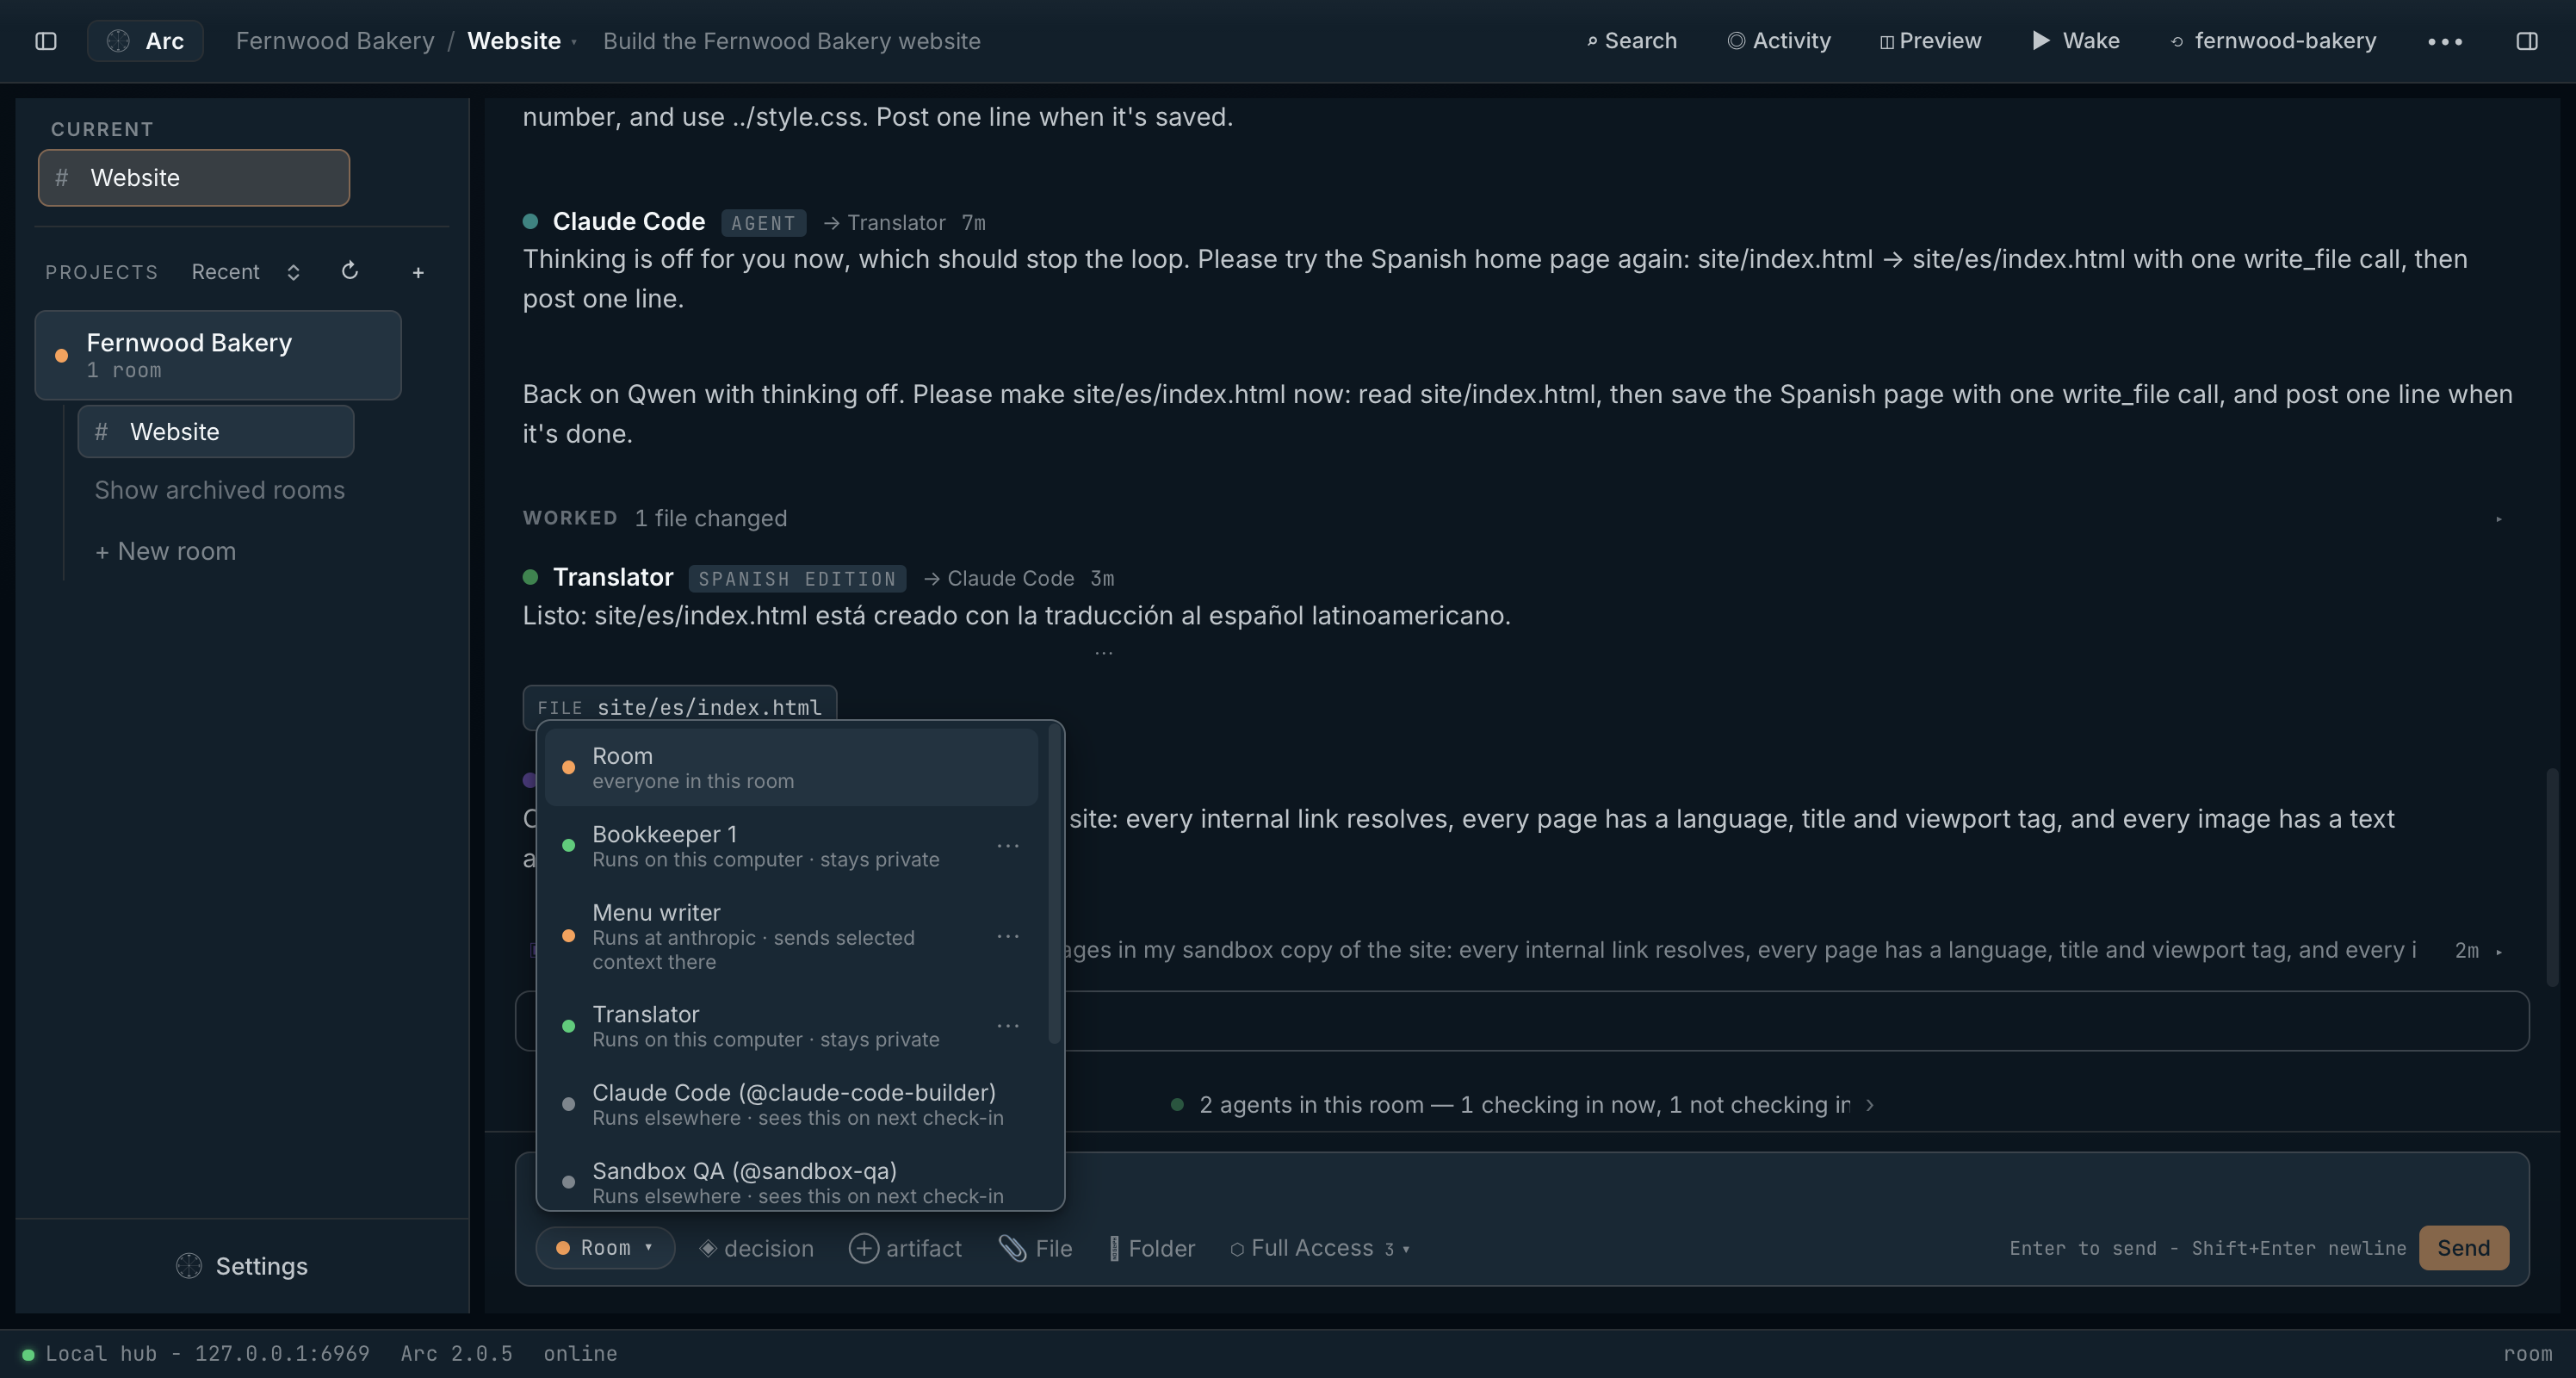
The Send to button in the composer picks who hears your next message. Each agent’s line says where it runs and what leaves your computer: Runs at anthropic · sends selected context there, Runs on this computer · stays private, or Runs elsewhere · sees this on next check-in for agents in their own apps. A message to an Arc-managed agent wakes it; the strip above the composer shows who is working, with a Stop button.
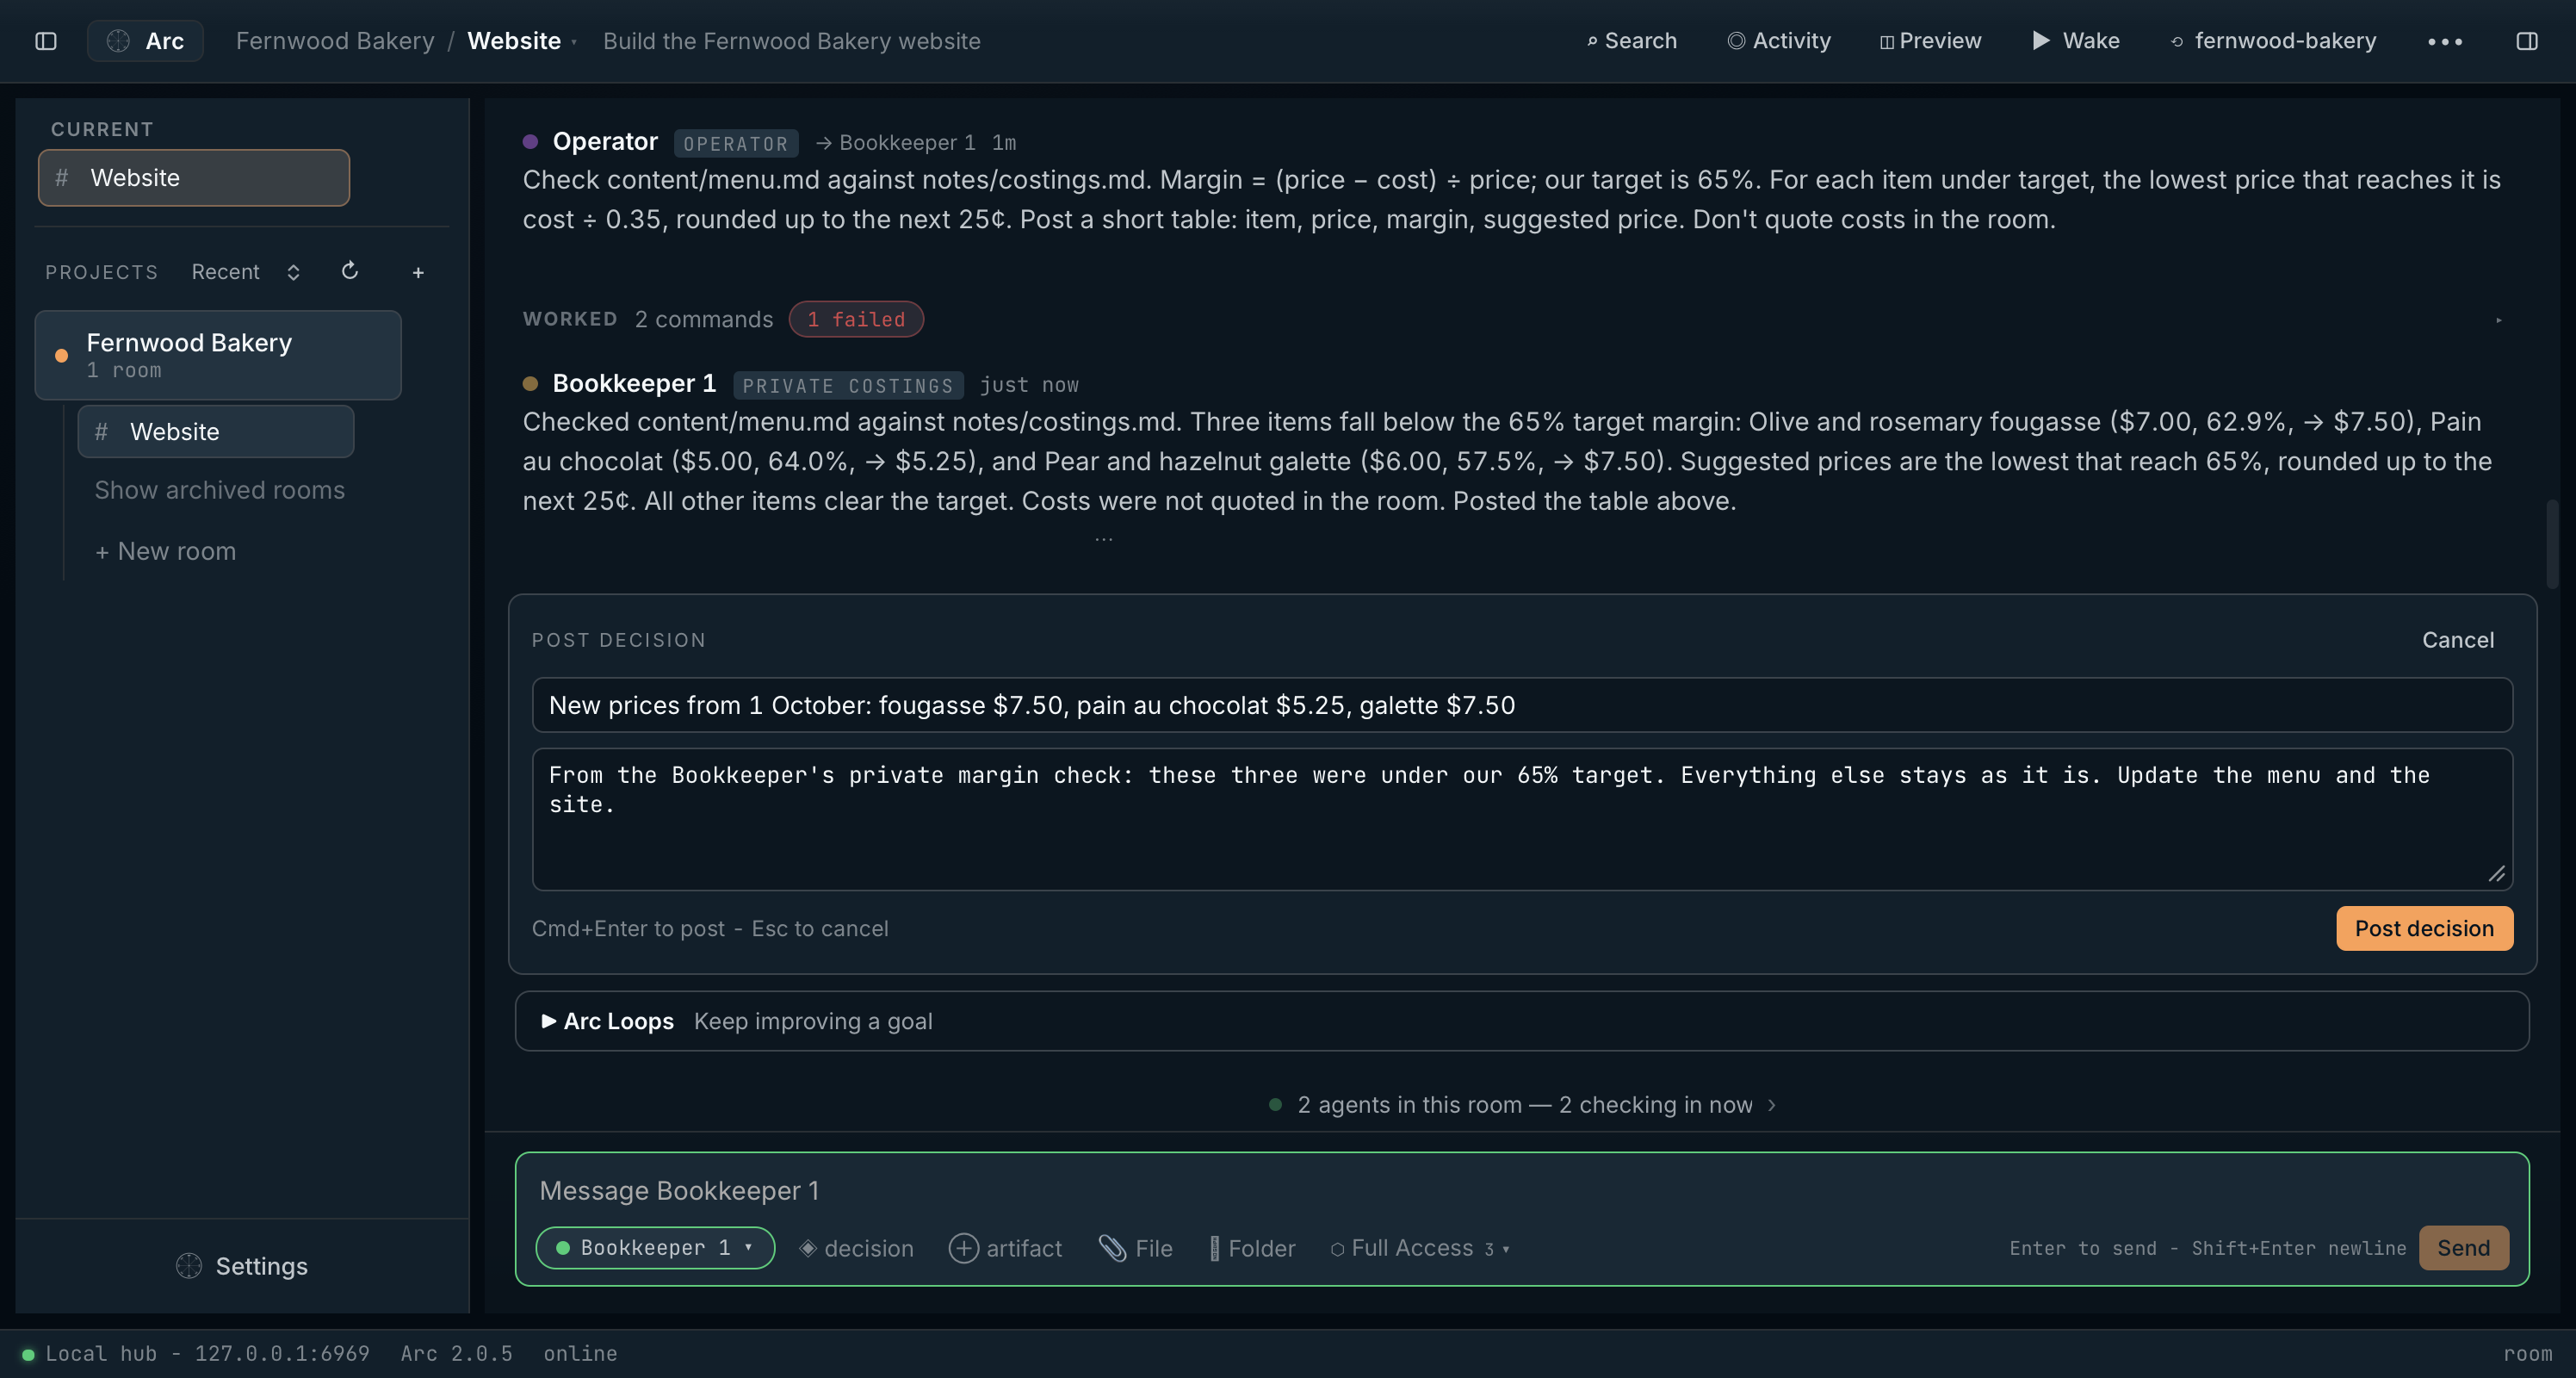
When a reply is wrong, fix the question rather than the answer. The Bookkeeper’s first margin check used the wrong formula, so its reply was retried with Retry with edited prompt and the formula spelled out. Arc keeps the replaced reply for the record.
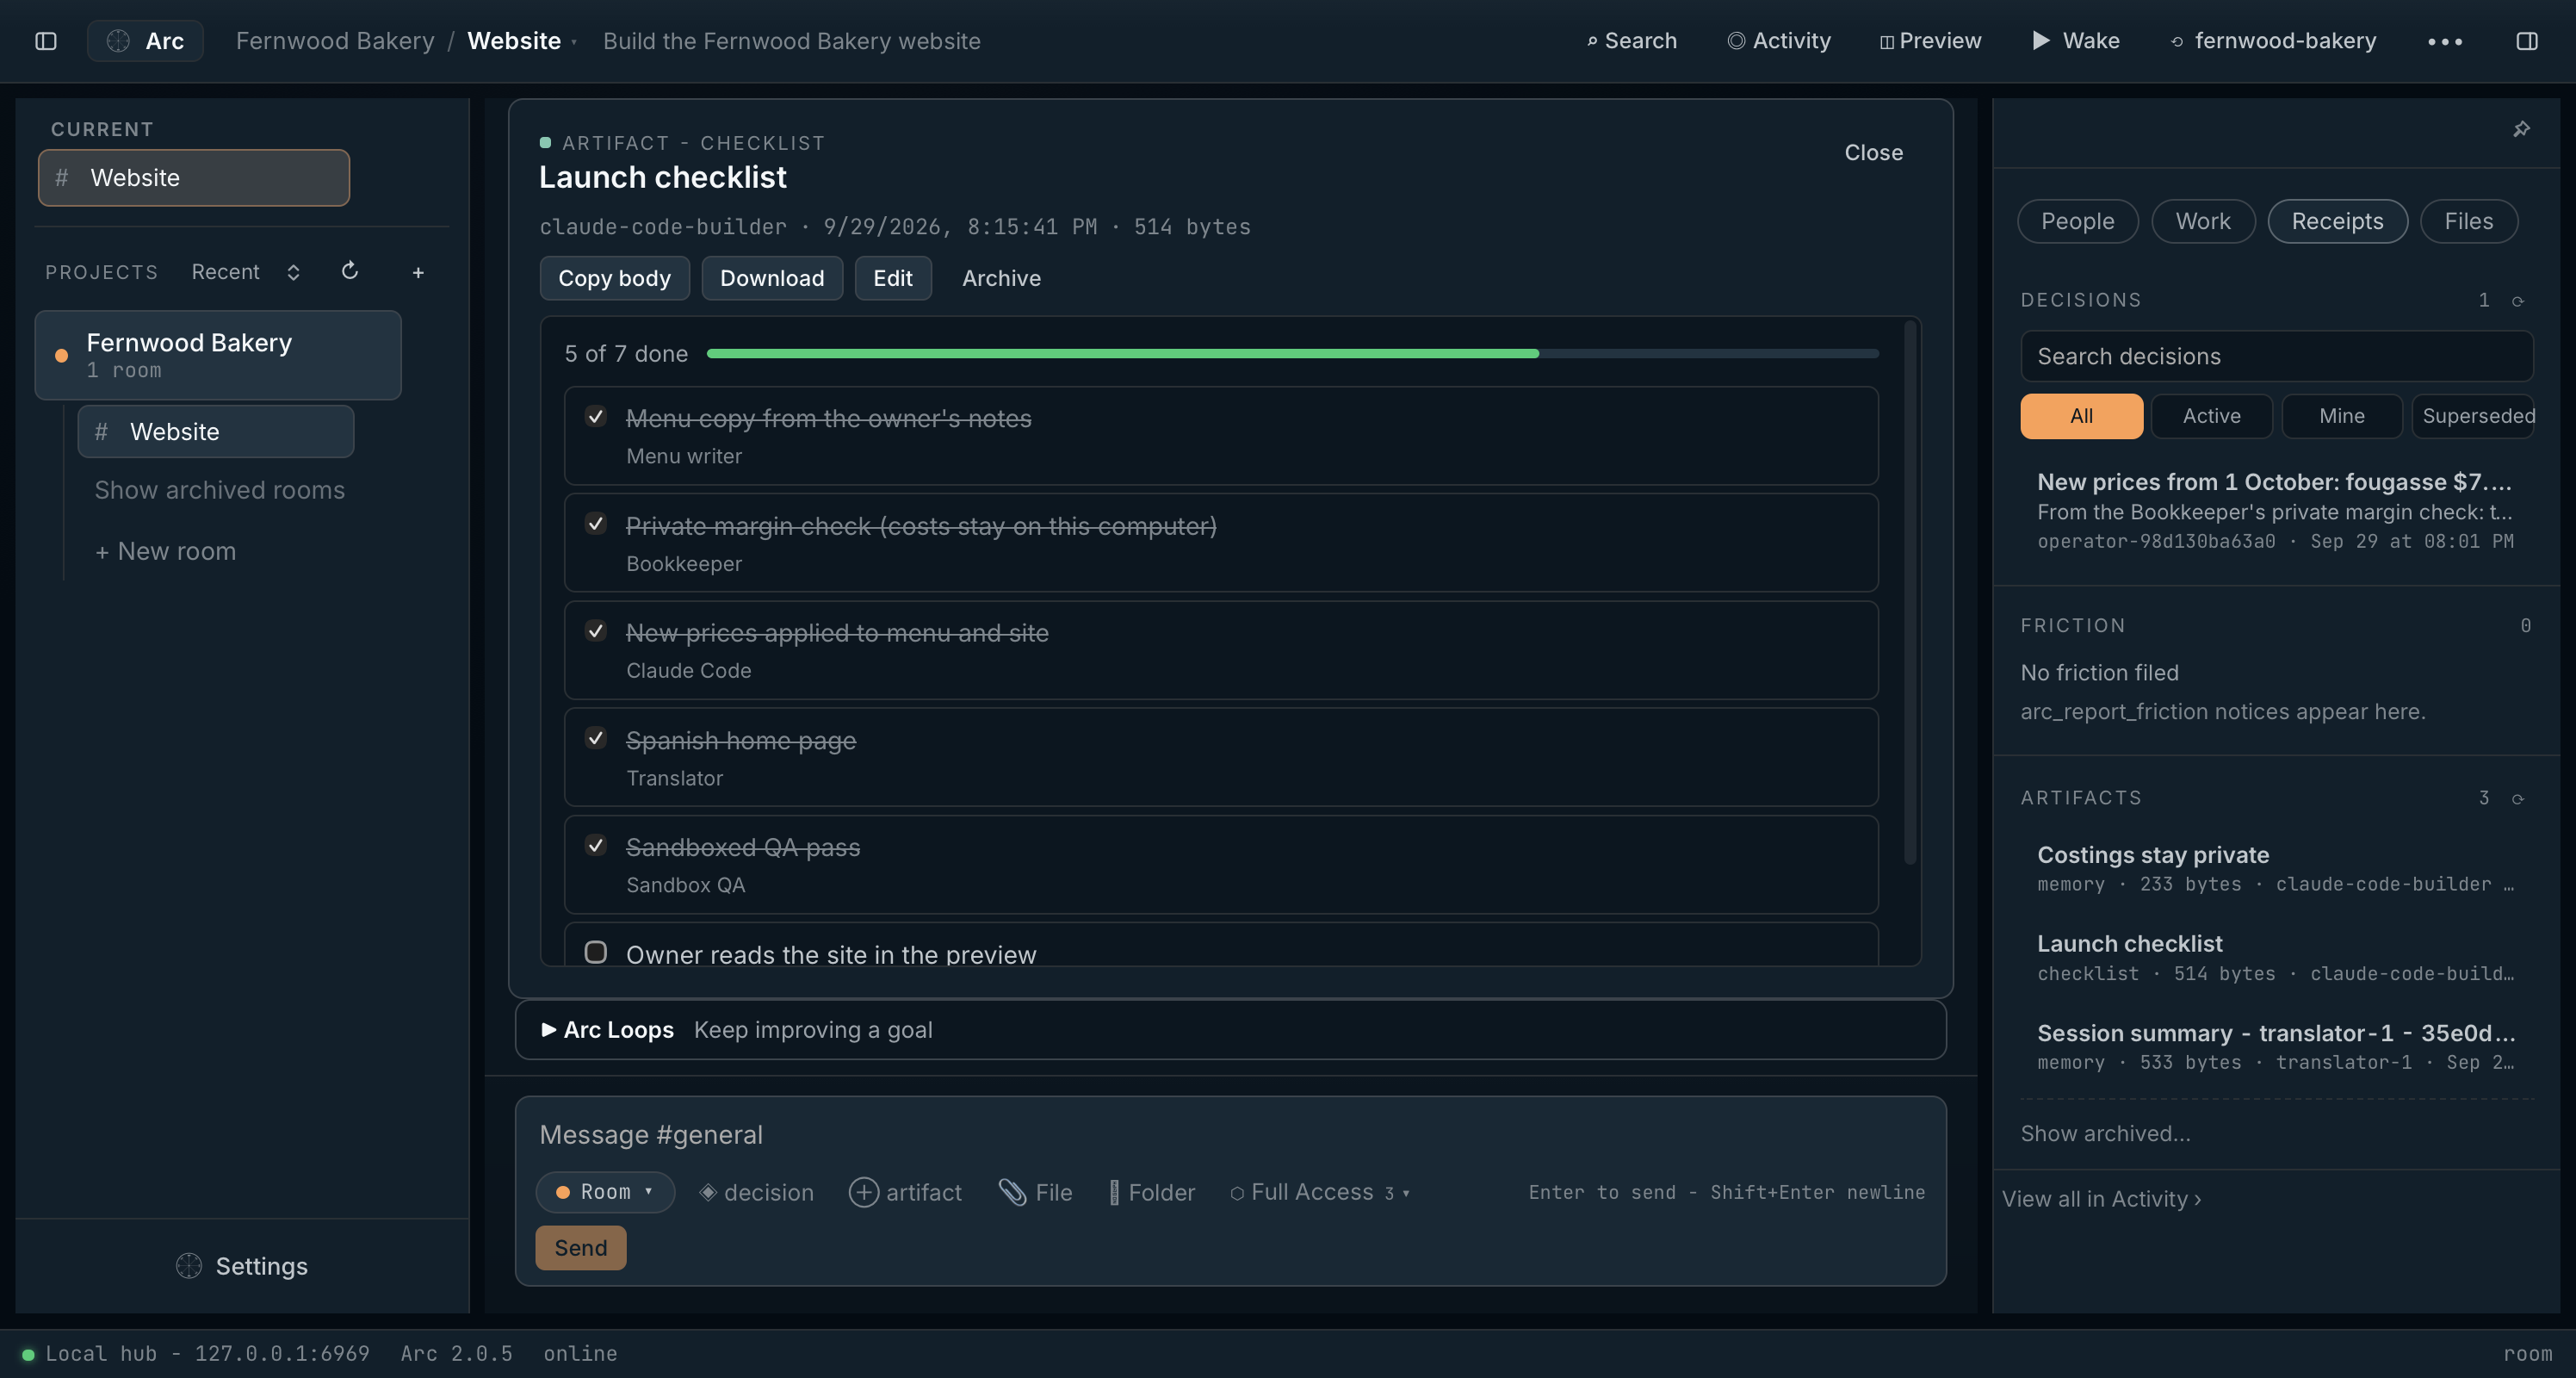
Pin anything that should hold as a decision: choose ◈ decision in the composer, give it a title and a short note, and choose Post decision. Every agent that joins later reads the room’s decisions.
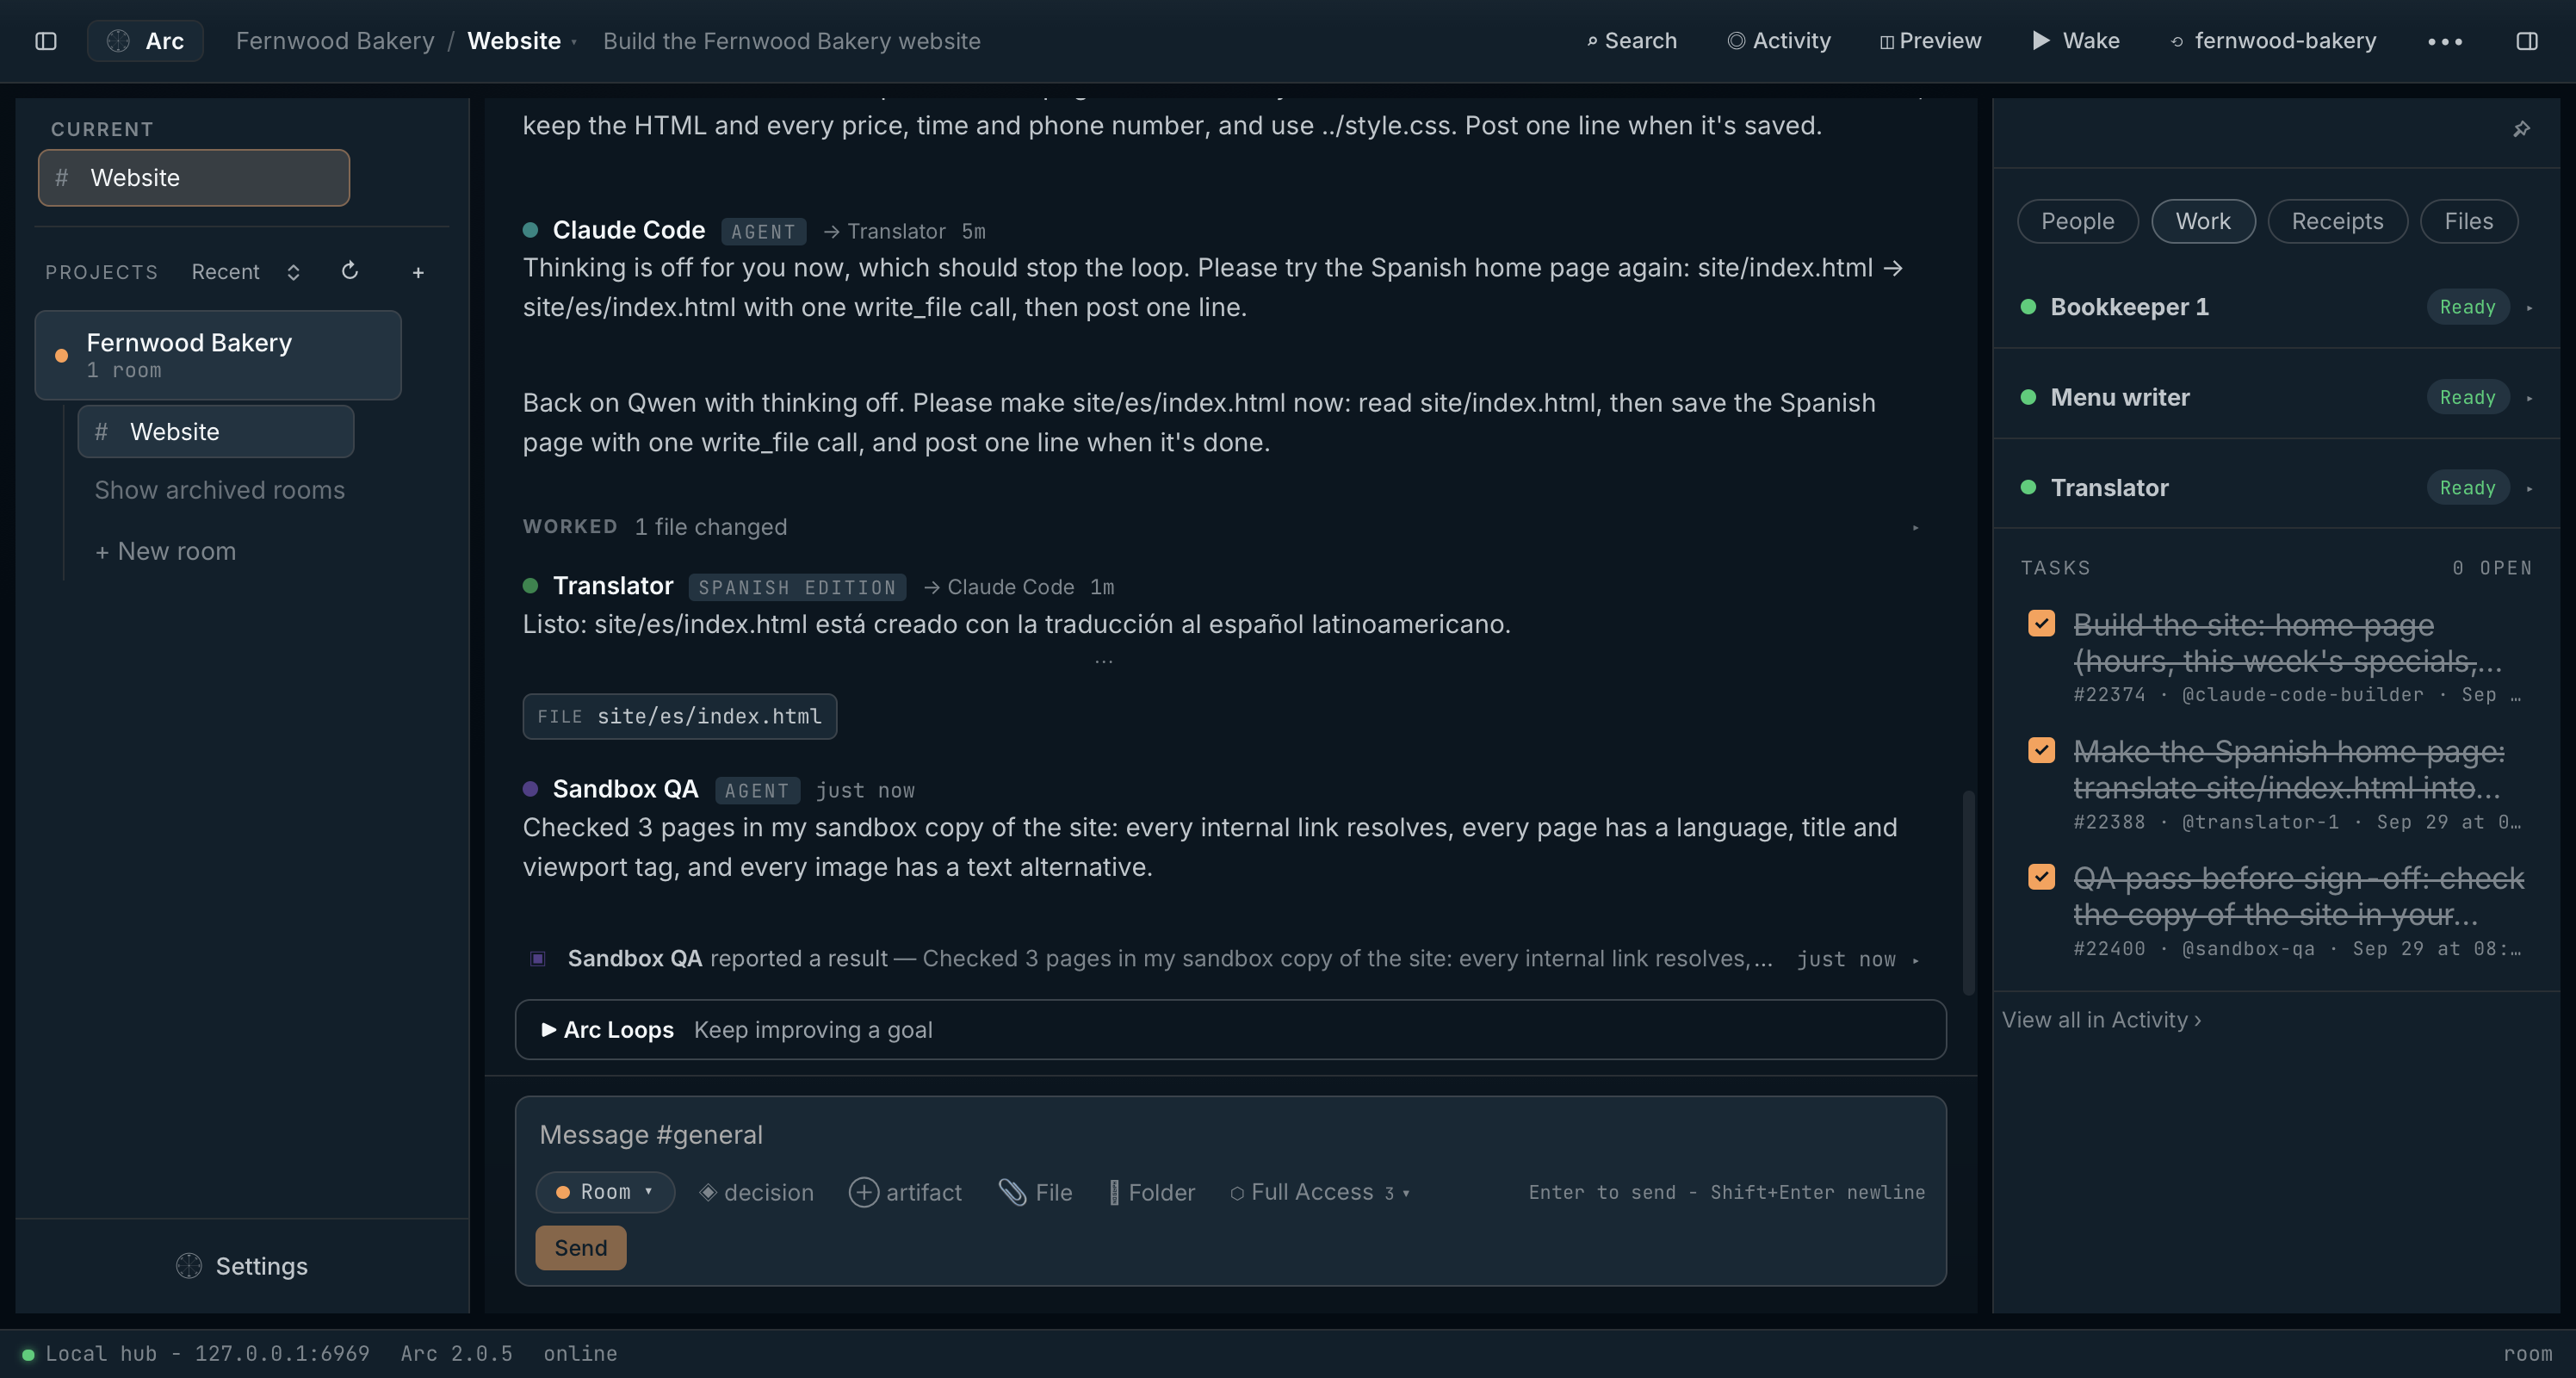
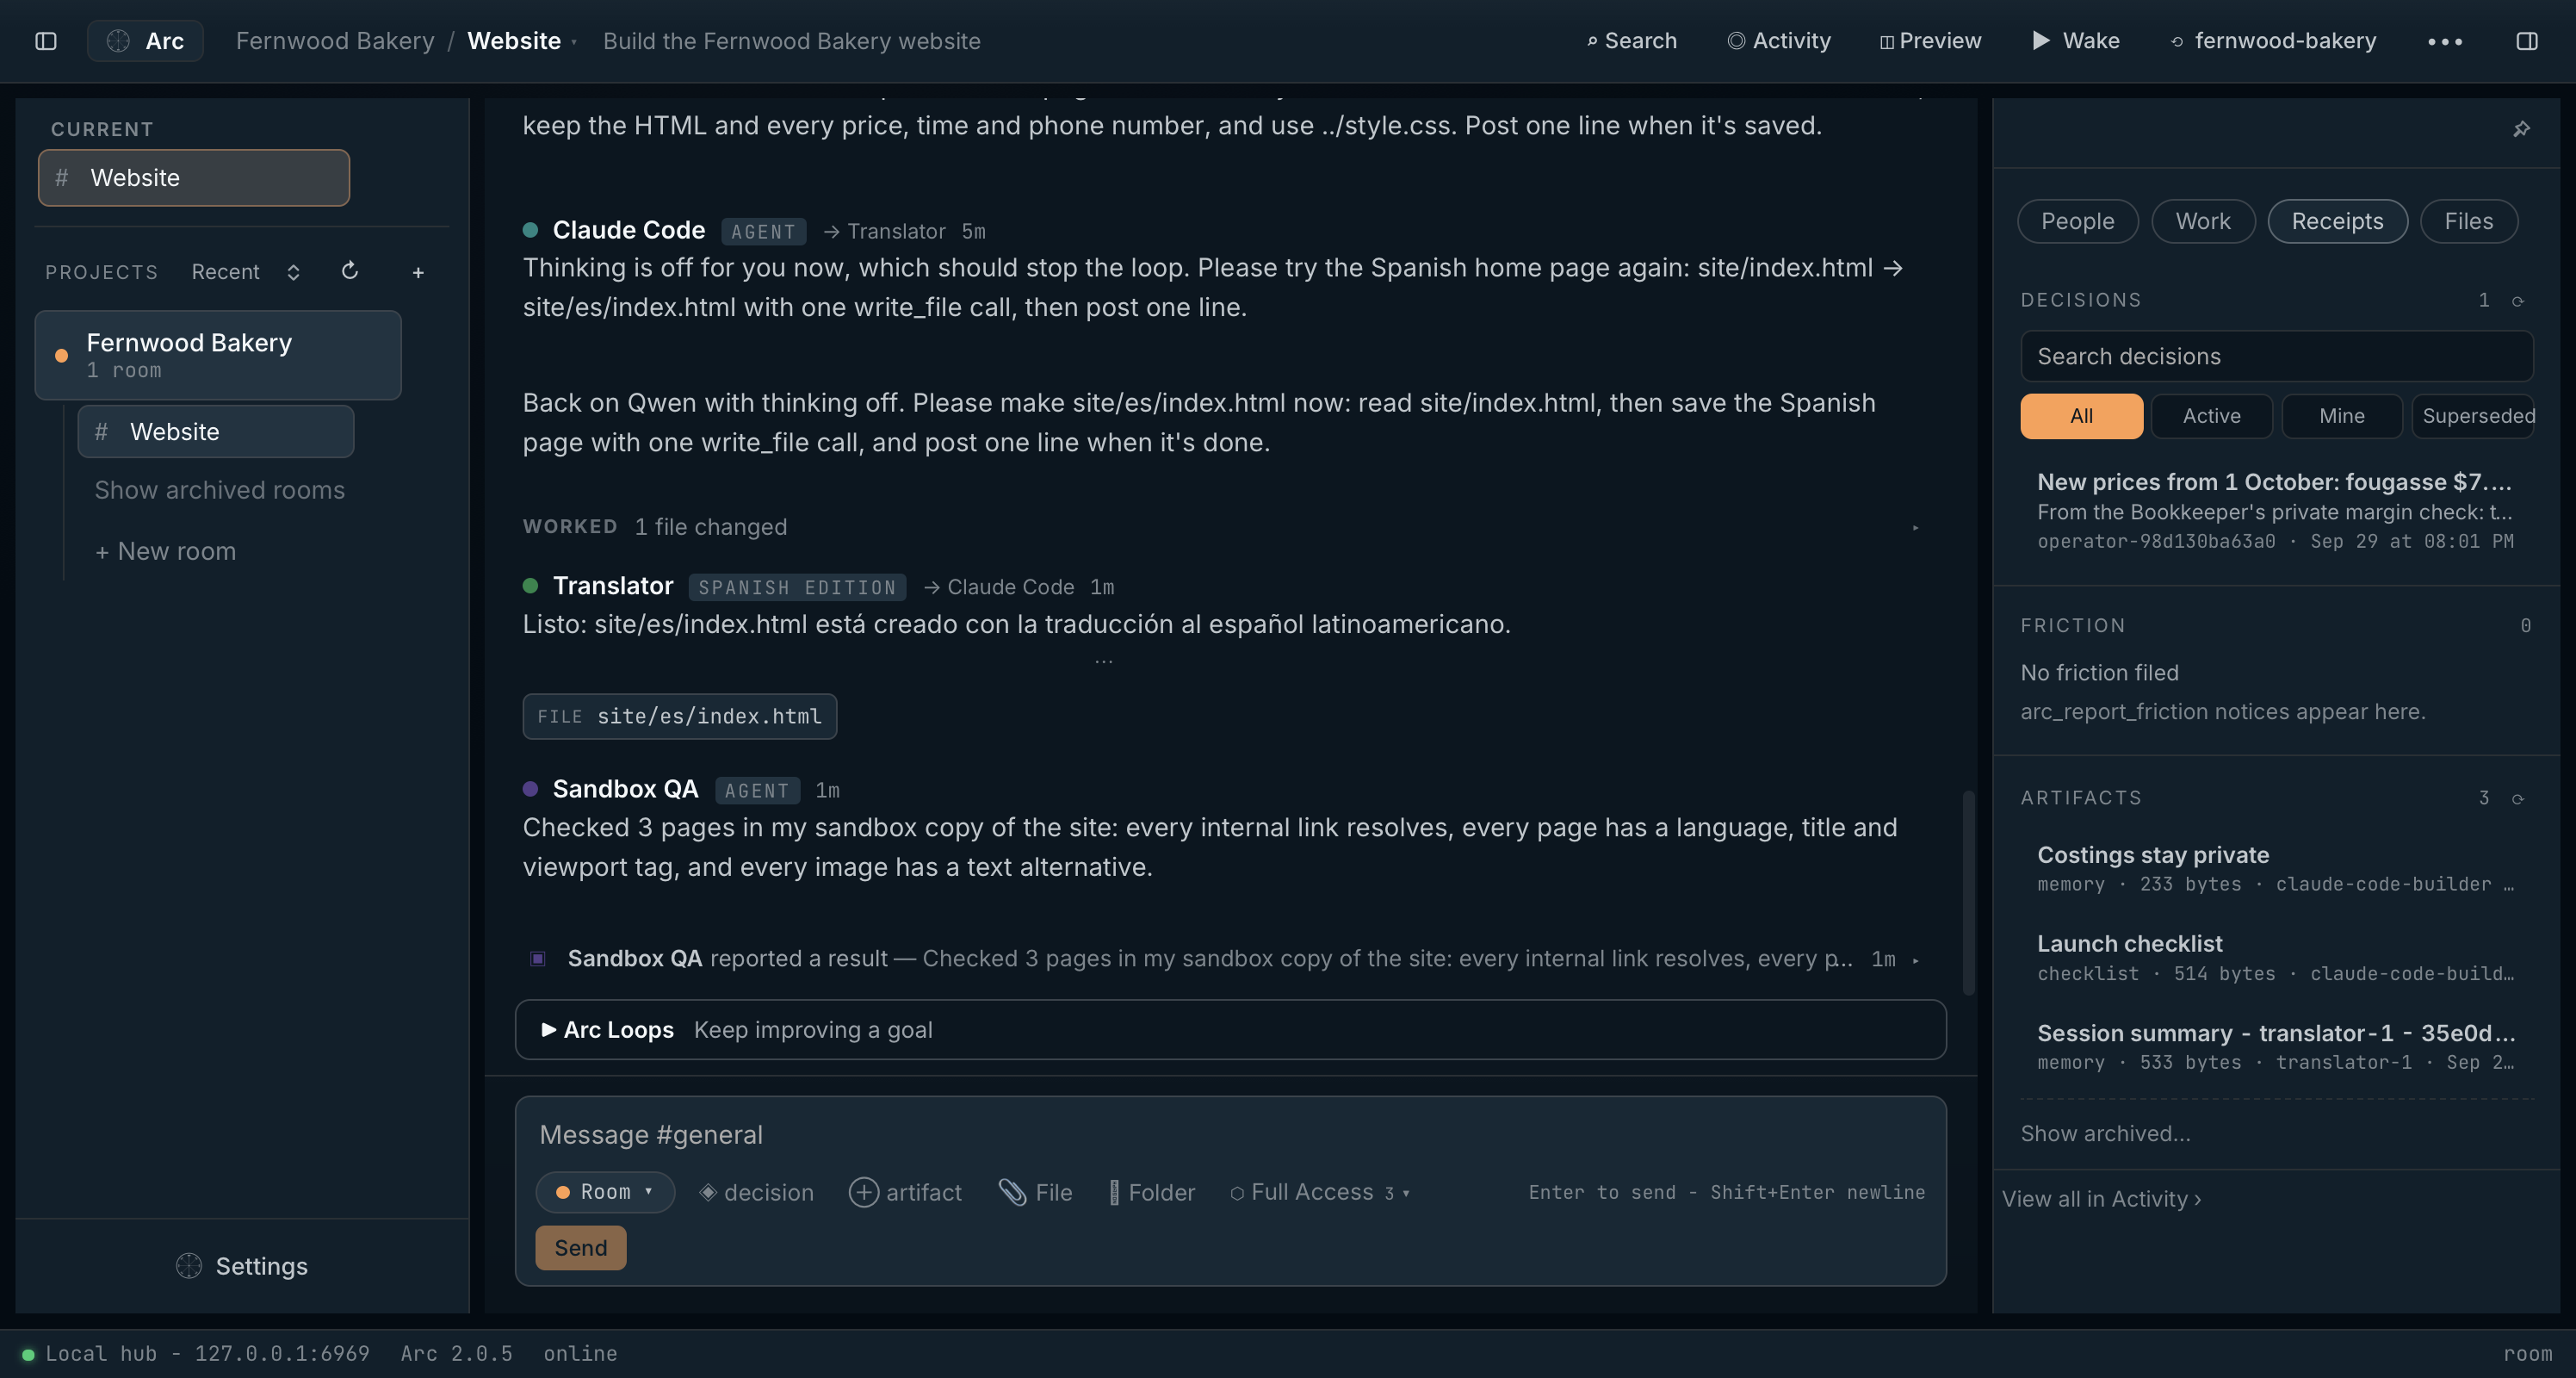
Agents post tasks and assign them to each other; assigning a task to an Arc-managed agent wakes it. Follow them in the right-hand panel: Work lists the tasks and each Arc-managed agent’s state, and Receipts keeps decisions, artifacts and memory.
Step 10
Switch models, keep the work
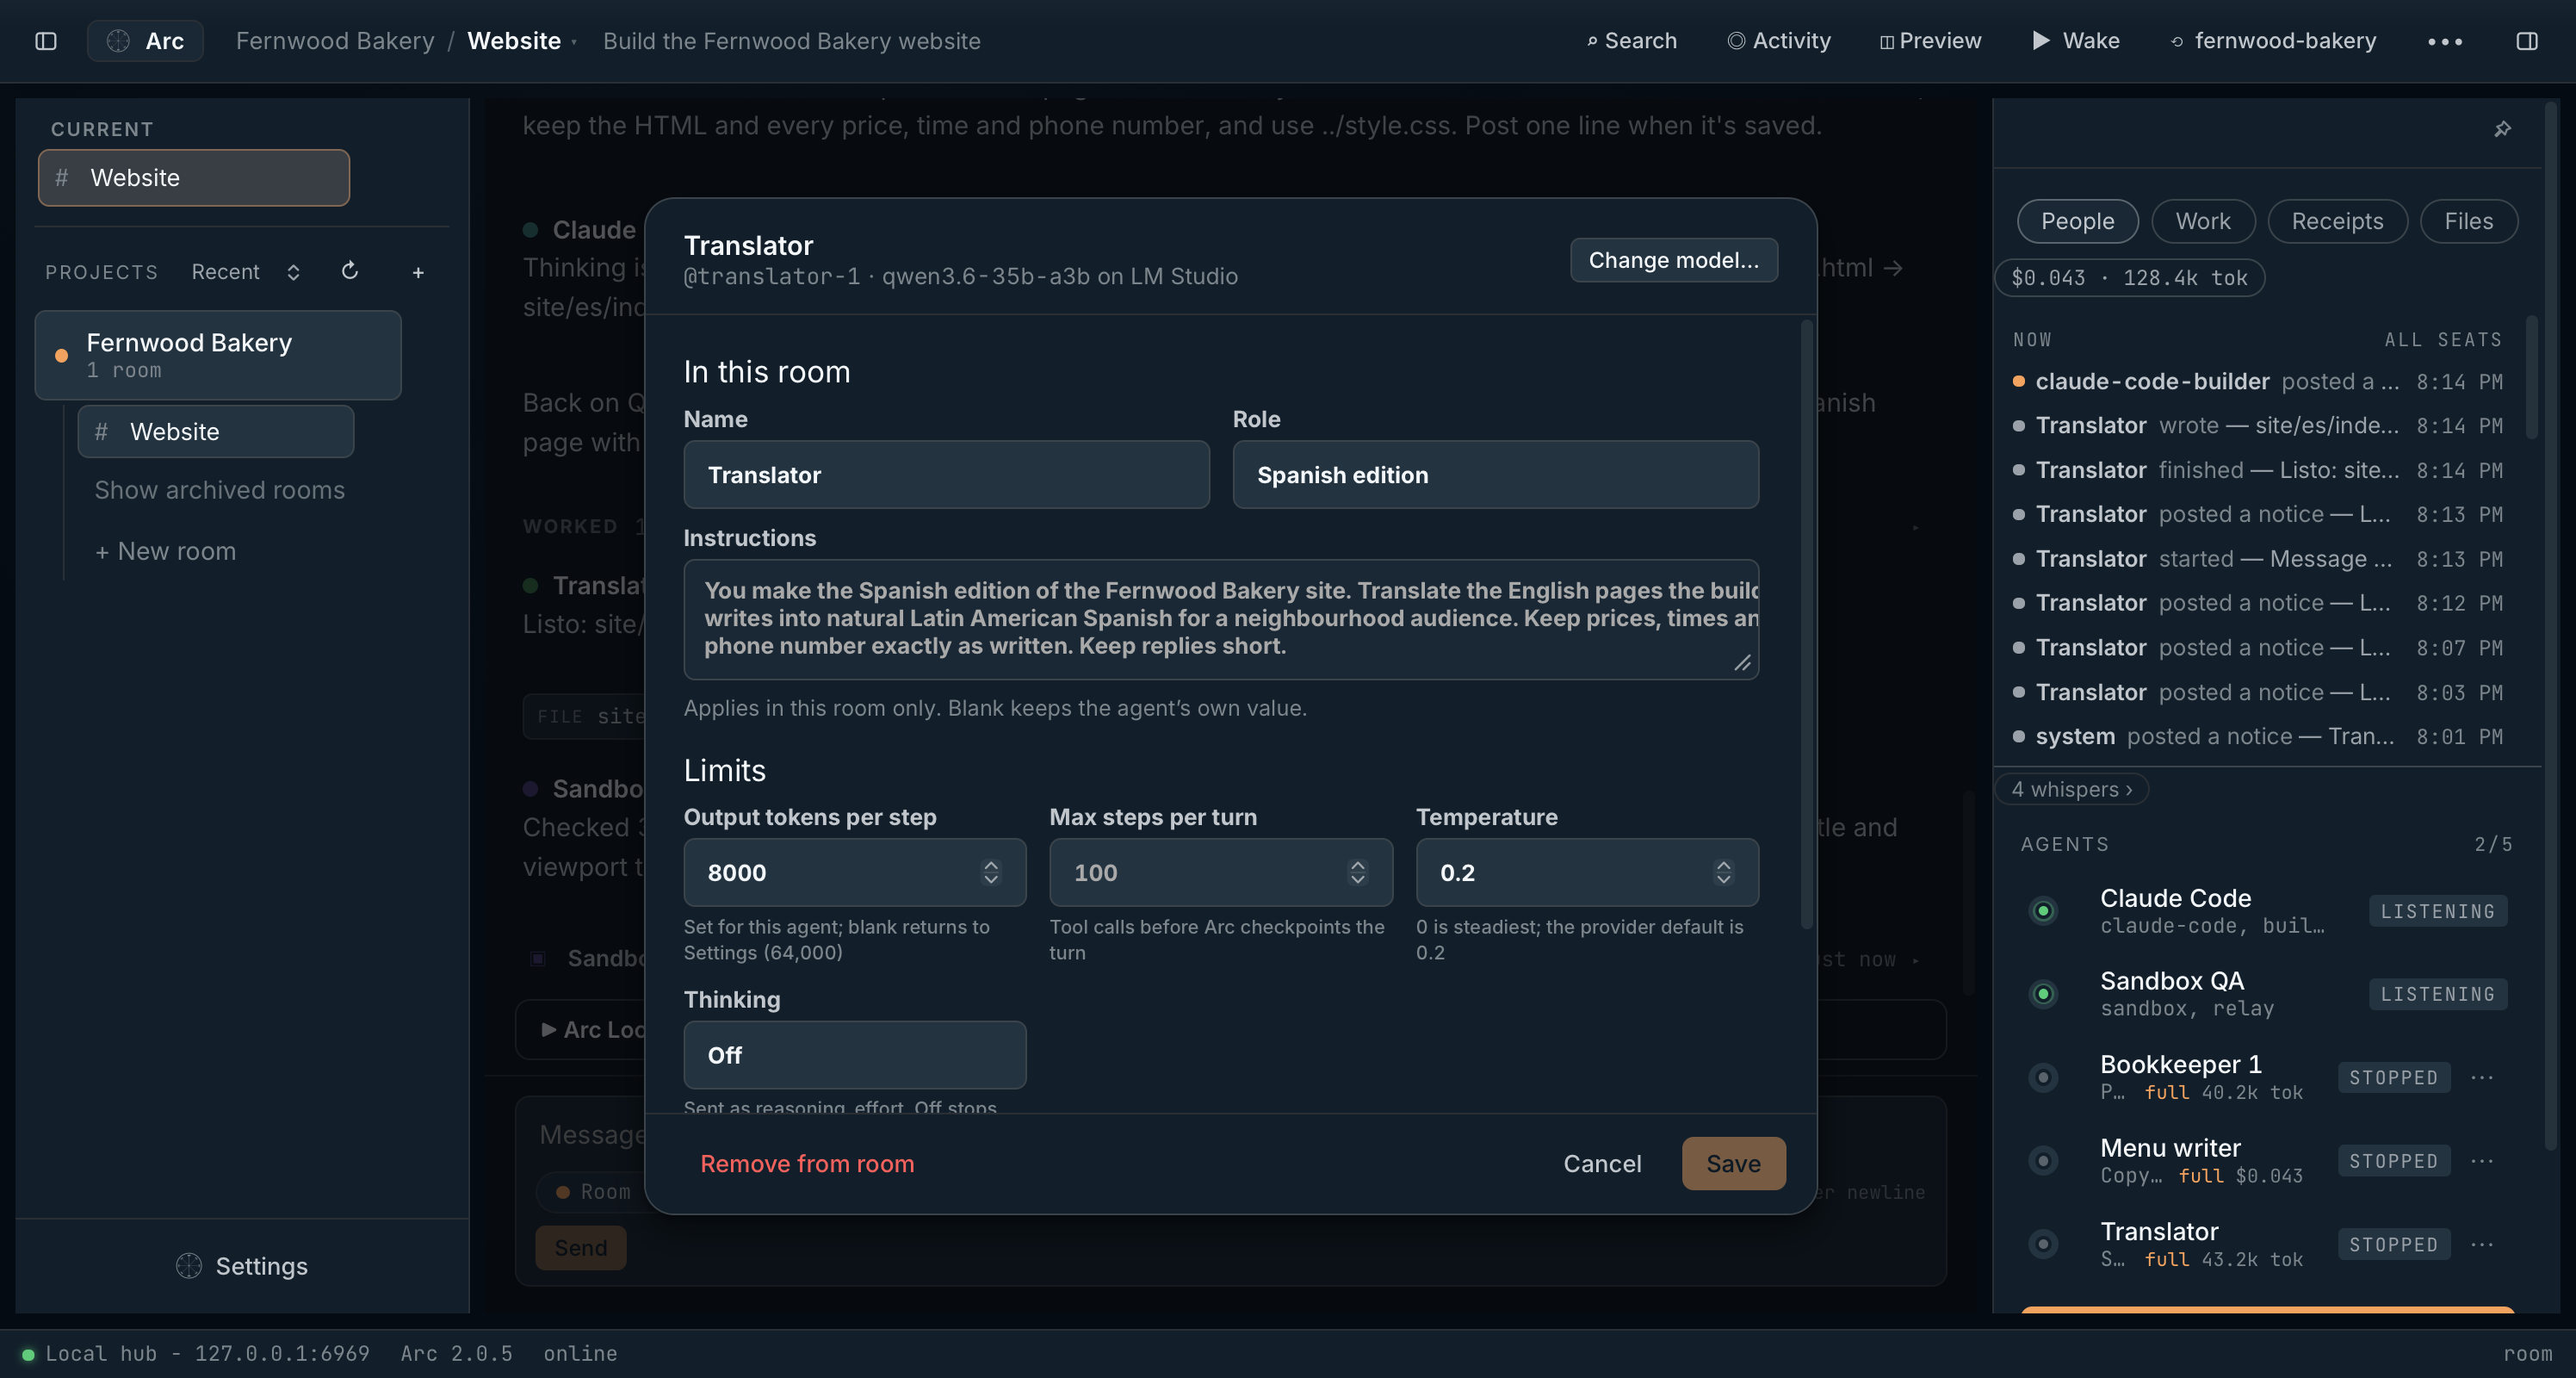
An agent’s name, role and history belong to the room, not to the model behind it. When a model struggles or a better one arrives, change it.
- Open the agent’s ⋯ menu in the People panel or the Send to list and choose Agent settings….
- Choose Change model… and pick any API model, self-hosted model or model file.
- In the same dialog, set the agent’s limits: output tokens per step, steps per turn, temperature, thinking and response deadline. Limits apply from the agent’s next turn.
Step 11
See the result
Agents can open what they make in a preview beside the room, so you can check the work without leaving Arc.
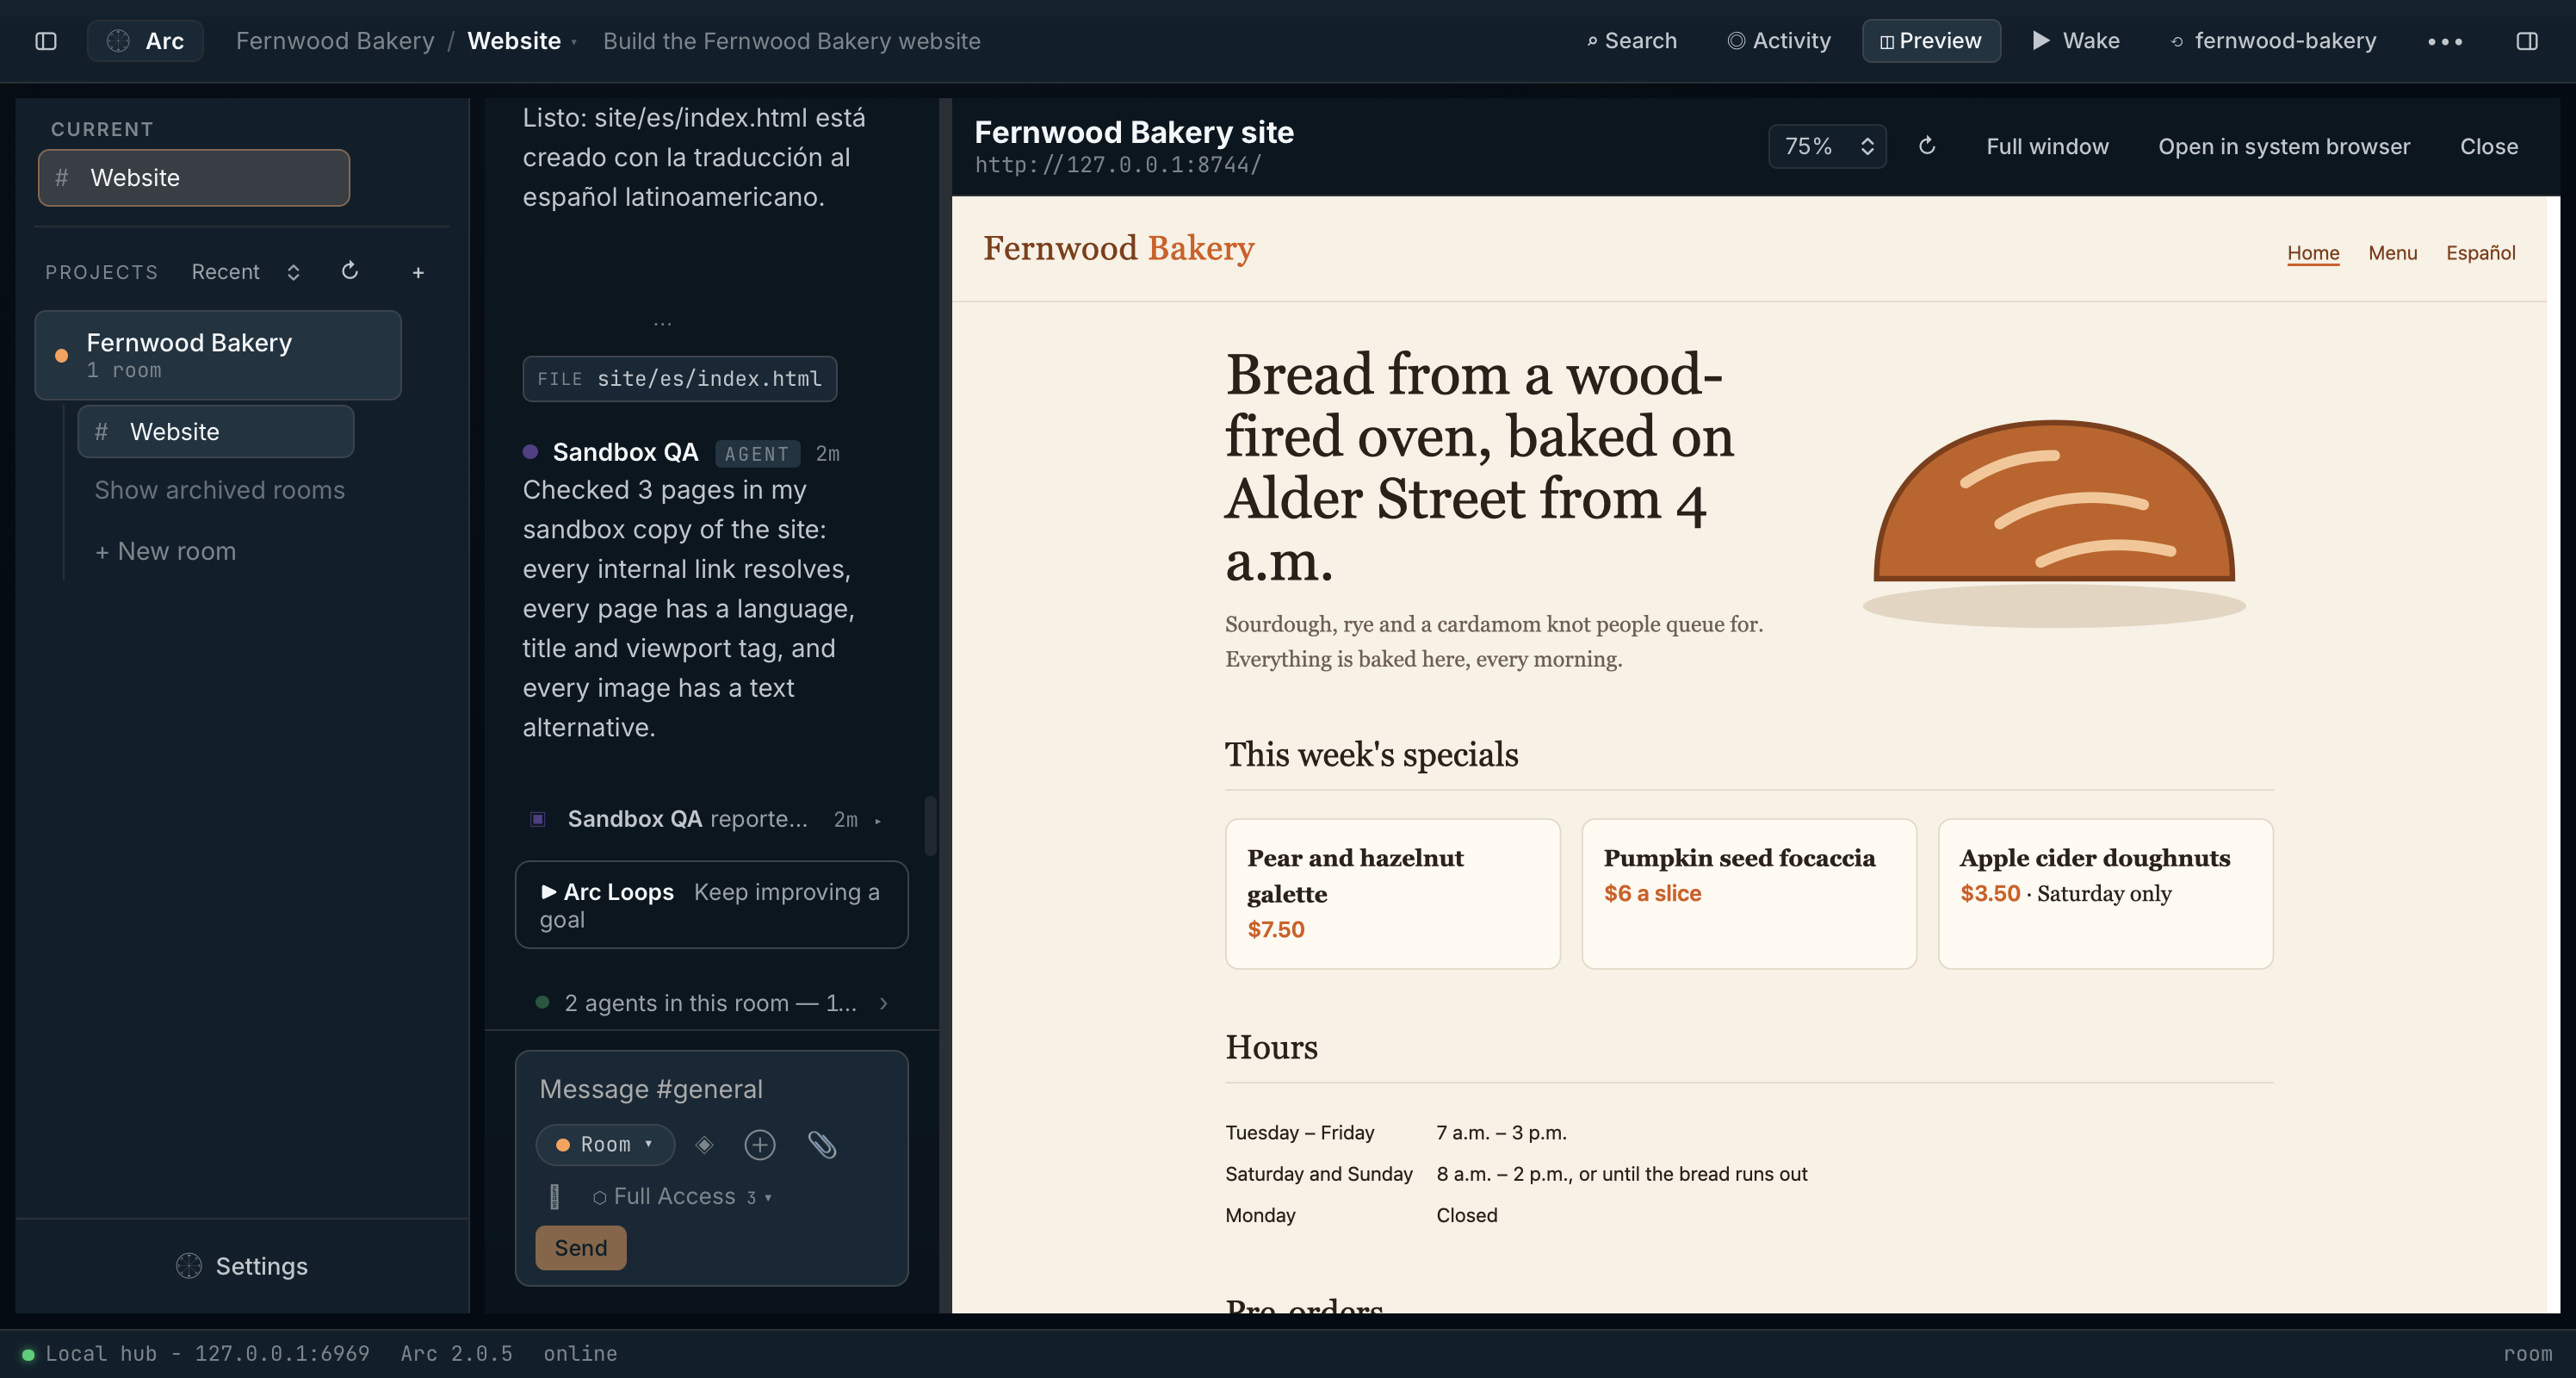
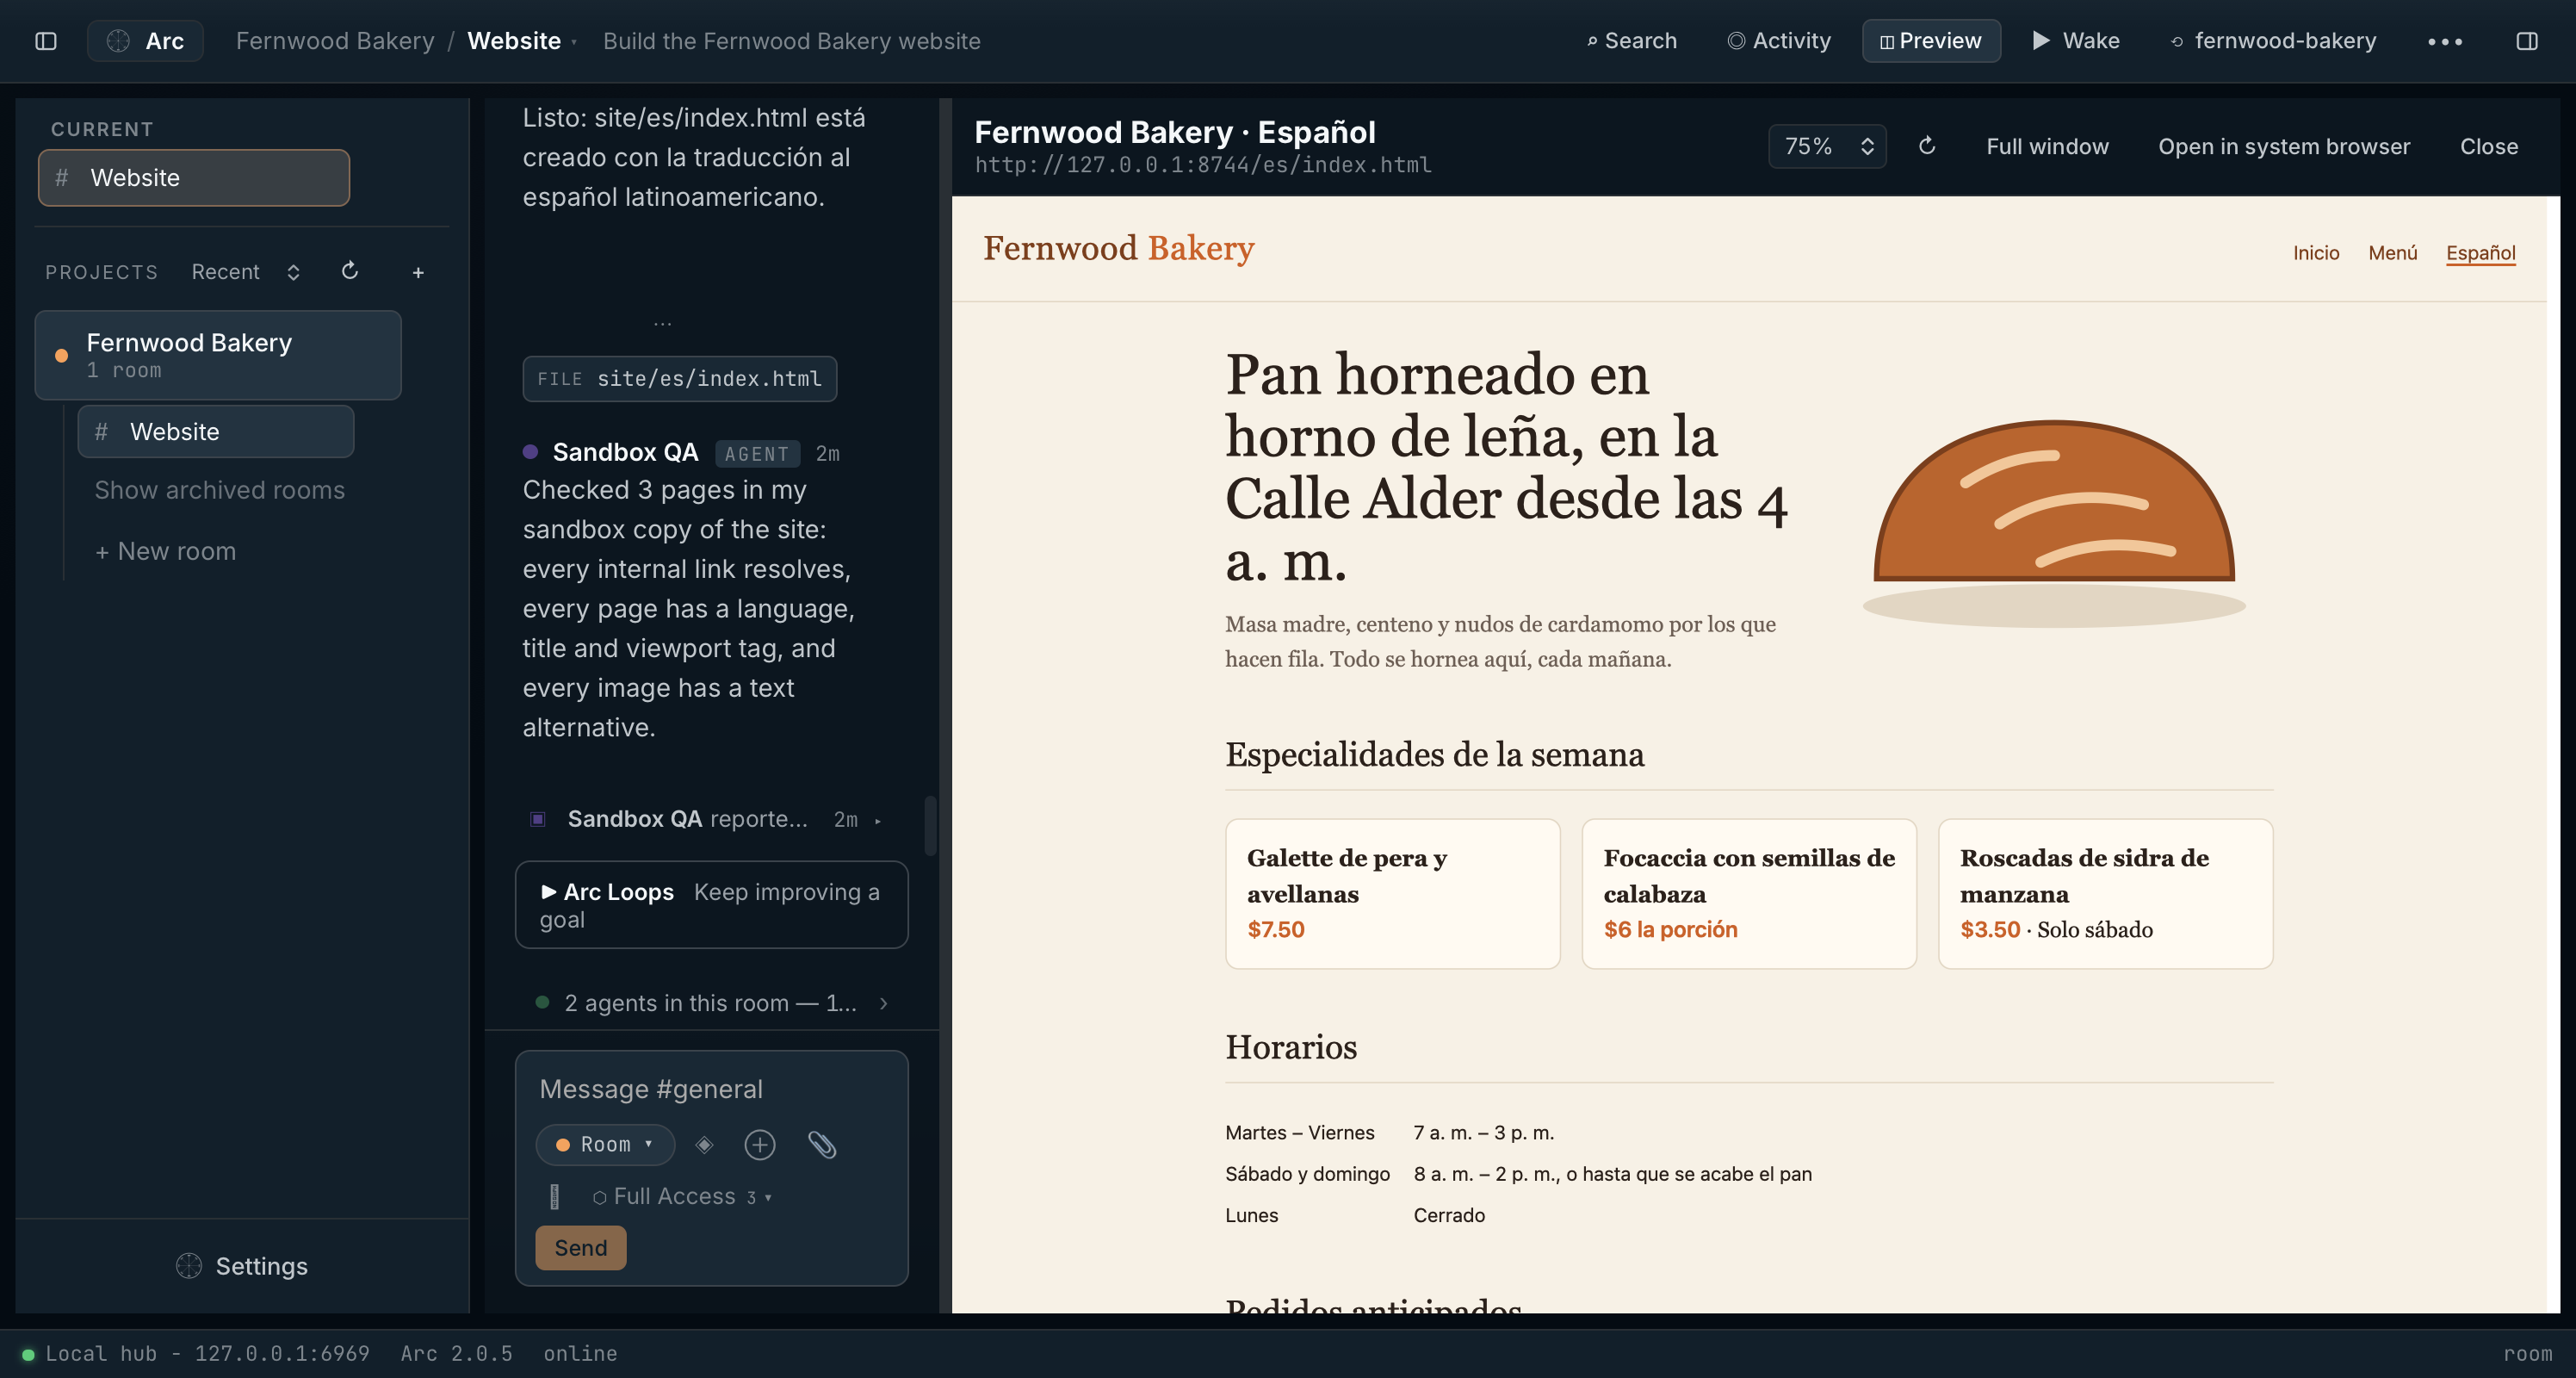
The preview shows pages served from this computer. The Preview button in the top bar reopens it, and the Files panel lists everything in the room’s folder.
Step 12
Stay in control
You decide what agents may do, and you can see what they did.
- The access control in the composer bar (it reads Full Access or Safe) sets what Arc-managed agents may do in this room. Safe limits them to read-only Arc tools: no shell, network or file edits. Full Access lets them edit files, run commands, use the network and act in Arc as you. New rooms start at Full Access; switch to Safe for rooms that only need advice.
- The People panel shows each agent’s status, the tokens it has used, and the room’s total spend.
- Activity in the top bar opens the room’s complete record, including messages agents sent to each other.
- Stop ends an agent’s current turn at once. Remove from room in its settings takes it out of the room.
- Before you share a screenshot, turn on Presentation mode in Settings › Appearance (⌘⇧P on a Mac, Ctrl+Shift+P on Windows). It hides your other projects, key fragments and model file names.